摘要:Spring官方不推荐使用JSP来开发WEB,而是推荐使用如下几种模板引擎来开发:
Thymeleaf(Spring官方推荐)FreeMarker
Velocity
Groovy
Mustache
这里以Thymeleaf为例,介绍如何和Spring Boot集成,开发web项目;由于我不是做前端的,所以这里只是介绍个入门,让你写个页面可以访问到,我这里以表单上传为例。
注意:页面如果炸了请访问:点击这里
1.pom.xml
先引入thymeleaf需要的依赖。
		<dependency>
			<groupId>org.springframework.boot</groupId>
			<artifactId>spring-boot-starter-thymeleaf</artifactId>
		</dependency>
2.写个页面
我们新建springBoot项目时,目录结构中,resource结构如下:
resource
--static:默认存放css等文件
--templates:默认存放我们写得页面
我们现在在template下创建一个文件上传页面:upload.html,里面写上简单的文件上传的代码:
<!DOCTYPE html>
<html lang="en">
<head>
    <meta charset="UTF-8"/>
    <title>文件上传</title>
</head>
    <body>
        <form method="POST" enctype="multipart/form-data" action="/upload/uploadBlog">
            <p>文件:<input type="file" name="file"/></p>
            <p><input type="submit" value="上传" /></p>
        </form>
    </body>
</html>
再创建一个欢迎页面:index.html
<!DOCTYPE html>
<html lang="en">
<head>
    <meta charset="UTF-8"/>
    <title>Title</title>
</head>
<body>
<h1>hello ,this is java4all club</h1>
</body>
</html>
3.controller
写一个接口,当访问这个接口时,页面跳转到这个文件上传页面:
package com.java4all.controller;

import org.springframework.stereotype.Controller;
import org.springframework.web.bind.annotation.RequestMapping;
import org.springframework.web.bind.annotation.RequestMethod;
import org.springframework.web.multipart.MultipartFile;

/**
 * Created by lightClouds917
 * Date 2018/2/7
 * Description:文件上传
 */
@Controller
@RequestMapping("upload")
public class UploadController {

    @RequestMapping(value = "toUploadBlog",method = RequestMethod.GET)
    public String toUploadBlog(){
        return "upload";
    }


    @RequestMapping(value = "uploadBlog")
    public String uploadBlog(MultipartFile file){
        String fileName = file.getOriginalFilename();
        String name = file.getName();
        return "index";
    }

}
4.访问
我们现在启动项目,访问:http://localhost:8080/upload/toUploadBlog
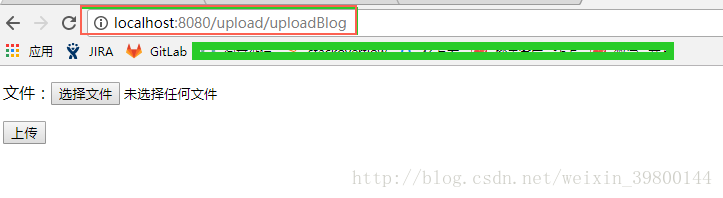
我们选择文件,点击上传,会进入我们action="/upload/uploadBlog"此接口,然后就可以对文件进行解析或者处理了。
5.重点
为什么,我们接口中,返回值是个字符串,为什么会跳转到一个页面呢?
注意:
1.我们这个类,头上不是@RestController,而是@Controller,所以,并不会返回json串。
2.当你返回index时,Thymeleaf的默认参数中,有以下两个:
spring.thymeleaf.prefix=classpath:/templates/
spring.thymeleaf.suffix=.html6.错误
初次尝试时,启动项目可能会有如下错误:
元素类型 "meta" 必须由匹配的结束标记 "</meta>" 终止。
是说页面的标签,meta标签没有结尾。给个结尾就可以了,如下:
<meta charset="UTF-8"><meta charset="UTF-8"/>7.常用配置参考
点击:Spring Boot---(17)Spring Boot常用配置项
最后
以上就是苹果纸鹤最近收集整理的关于Spring Boot---(16)Spring Boot使用Thymeleaf开发web页面的全部内容,更多相关Spring内容请搜索靠谱客的其他文章。


发表评论 取消回复