文章目录
- 一、实现WebMvcConfigurer扩展SpringMVC的功能
- 1.1 添加视图映射
- 1.2 添加拦截器
- 1.3 注册自定义区域信息解析器
- 1.4完整的扩展代码
- 二、添加国际化组件
- 2.1 编写国际化配置文件
- 2.2 自动管理
- 2.3 使用thymeleaf模板引擎在页面取值
- 3.3 点击链接切换语言
- 三、登陆功能与登录检查
- 3.1 登录功能
- 3.2 使用拦截器进行登录检查
- 四、Restful-CRUD开始
- 实验要求
- 4.1 点击按钮来到list页面
- 4.2 抽取公共页面
- 4.3 点击按钮高亮显示
- 4.4 点击添加来到添加页面
- 4.5 员工添加完成
- 4.5 点击修改来到修改页面(页面重用)
- 4.6 修改完成
- 4.7 删除完成
本文介绍使用SpringBoot进行一个Restful风格的CRUD,项目全部代码已经上传,可在文章附录中下载进行练习,下面对CRUD的主要功能做分析。

注意:提供的
静态页面(html)放在resources文件夹下不会得到模板引擎的解析,正确的做法是放在templates文件夹下;而静态资源(css,img,js)放入static文件夹即可。

项目的配置类application.properties
# 映射
server.servlet.context-path=/crud
#指定生日日期格式
spring.mvc.date-format=yyyy-MM-dd
# 禁用缓存
spring.thymeleaf.cache=false
# 设置区域信息解析器
spring.messages.basename=i18n.login
# 支持delete
spring.mvc.hiddenmethod.filter.enabled=true
一、实现WebMvcConfigurer扩展SpringMVC的功能
1.1 添加视图映射
重写addViewControllers方法。 将访问路径url中的/和/index.html都映射为login,将访问路径url中的/main.html映射为dashboard。
     //视图映射
    @Override
    public void addViewControllers(ViewControllerRegistry registry) {
        registry.addViewController("/").setViewName("login");//登录页面
        registry.addViewController("/index.html").setViewName("login");//主页
        registry.addViewController("/main.html").setViewName("dashboard");//主页
    }
类似的:配置文application.properties件中的server.servlet.context-path=/crud相当于将localhost:8080映射为了localhost:8080/crud。
1.2 添加拦截器
- addPathPatterns:设置需要拦截的请求。
- excludePathPatterns:设置排除拦截的请求。
    //添加拦截器
    @Override
    public void addInterceptors(InterceptorRegistry registry) {
        registry.addInterceptor(new LoginHandlerInterceptor()).addPathPatterns("/**")
                .excludePathPatterns("/index.html","/","/user/login","/static/**","/webjars/**");
    }
1.3 注册自定义区域信息解析器
为了让我们的自定义区域信息解析器生效,除了进行国际化组件的添加外,还需要将其添加到容器中。
	//注册解析器区域信息
   @Bean
    public LocaleResolver localeResolver(){
        return new MyLocaleResolver();
    }
1.4完整的扩展代码
@Configuration
class MyMVCConfig implements WebMvcConfigurer {
    /**
     * 添加拦截器
     */
    @Override
    public void addInterceptors(InterceptorRegistry registry) {
        registry.addInterceptor(new LoginHandlerInterceptor()).addPathPatterns("/**")
                .excludePathPatterns("/index.html","/","/user/login","/static/**",
                        "/webjars/**");
    }

    /**
     * 添加视图映射
     */
    @Override
    public void addViewControllers(ViewControllerRegistry registry) {
        registry.addViewController("/").setViewName("login");
        registry.addViewController("/index.html").setViewName("login");
        registry.addViewController("/main.html").setViewName("dashboard");
    }

    //注册自定义区域解析器
    @Bean
    public LocaleResolver localeResolver(){
        return new MyLocaleResolver();
    }
}
二、添加国际化组件
之前使用SpringMVC进行国际化的步骤是:
- ①编写国际化配置文件
- ②使用
ResourceBundleMessageSource管理国际化资源文件 - ③在页面使用fmt:message取出国际化内容
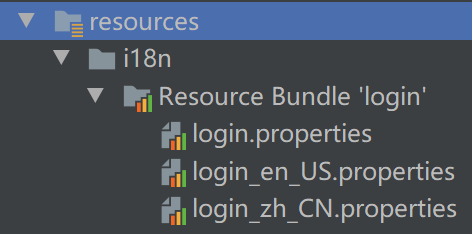
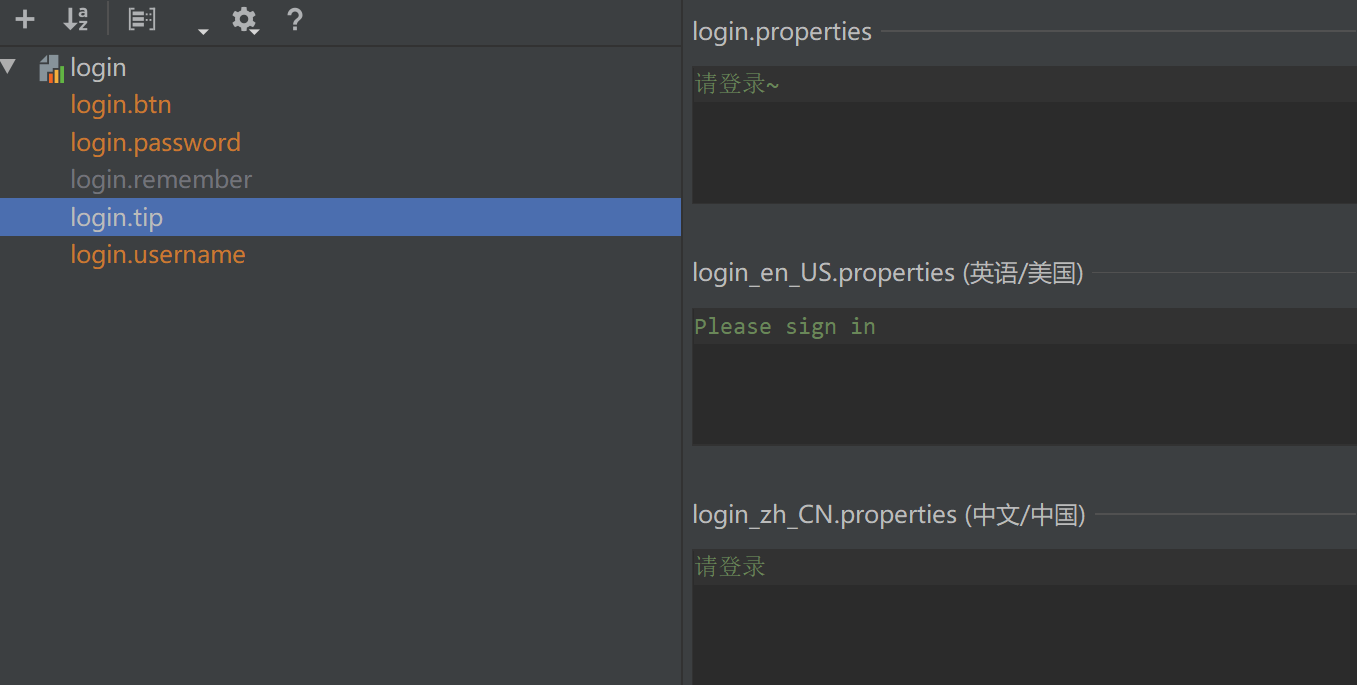
2.1 编写国际化配置文件
SpringBoot自动配置好了许多组件,只需要编写国际化配置文件,下面创建国际化文件夹
可以通过视图界面进行国际化配置。
2.2 自动管理
spring.messages.basename=i18n.login
SpringBoot已经自动配置好了管理国际化资源文件的ResourceBundleMessageSource组件,可以通过spring.messages.messages设置配置文件的基础名,本项目设置为spring.messages.basename=i18n.login。这样SpringBoot就将配置文件管理了起来。
源码:
public class MessageSourceAutoConfiguration {
	...
	@Bean
	@ConfigurationProperties(prefix = "spring.messages")//spring.messages.messages设置配置文件的基础名
	public MessageSourceProperties messageSourceProperties() {
		return new MessageSourceProperties();
	}
		//public class MessageSourceProperties {
		//	...
		//	private String basename = "messages";
		//	...
		//}
	@Bean
	public MessageSource messageSource(MessageSourceProperties properties) {
		ResourceBundleMessageSource messageSource = new ResourceBundleMessageSource();//这里已经配置好了!!!
		if (StringUtils.hasText(properties.getBasename())) {
			//设置国际化资源文件的基础名(去掉语言国家代码的,如本项目中为login)
			messageSource.setBasenames(StringUtils
					.commaDelimitedListToStringArray(StringUtils.trimAllWhitespace(properties.getBasename())));
		}
		if (properties.getEncoding() != null) {
			messageSource.setDefaultEncoding(properties.getEncoding().name());
		}
		messageSource.setFallbackToSystemLocale(properties.isFallbackToSystemLocale());
		Duration cacheDuration = properties.getCacheDuration();
		if (cacheDuration != null) {
			messageSource.setCacheMillis(cacheDuration.toMillis());
		}
		messageSource.setAlwaysUseMessageFormat(properties.isAlwaysUseMessageFormat());
		messageSource.setUseCodeAsDefaultMessage(properties.isUseCodeAsDefaultMessage());
		return messageSource;
	}
	...
}
2.3 使用thymeleaf模板引擎在页面取值
模板引擎thymeleaf的国际化使用
- 标签体中:
#{th:text="${msg}} - 行内表达式:
[[#{msg}]]
<h1 class="h3 mb-3 font-weight-normal" th:text="#{login.tip}">Please sign in</h1>
<!DOCTYPE html>
<html lang="en" xmlns:th="http://www.thymeleaf.org">
	<head>
		<meta http-equiv="Content-Type" content="text/html; charset=UTF-8">
		<meta name="viewport" content="width=device-width, initial-scale=1, shrink-to-fit=no">
		<meta name="description" content="">
		<meta name="author" content="">
		<title>Restful-CRUD</title>
		<!-- Bootstrap core CSS -->
		<link href="asserts/css/bootstrap.min.css" th:href="@{/webjars/bootstrap/4.4.1-1/css/bootstrap.css}"  rel="stylesheet">
		<!-- Custom styles for this template -->
		<link href="asserts/css/signin.css" th:href="@{/asserts/css/signin.css}"  rel="stylesheet">
	</head>

	<body class="text-center">
		<form class="form-signin" action="dashboard.html" th:action="@{/user/login}" method="post">
			<img class="mb-4" th:src="@{/asserts/img/bootstrap-solid.svg}" src="asserts/img/bootstrap-solid.svg"  alt="" width="72" height="72">
			<h1 class="h3 mb-3 font-weight-normal" th:text="#{login.tip}">Please sign in</h1>
			<!--判断条件成立,p标签生效-->
			<p style="color: red" th:text="${msg}" th:if="${not #strings.isEmpty(msg)}"> </p>
			<label class="sr-only" th:text="#{login.username}">Username</label>
			<input type="text" name="username" class="form-control" placeholder="Username" th:placeholder="#{login.username}" required="" autofocus="">
			<label class="sr-only" th:text="#{login.password}">Password</label>
			<input type="password" name="password" class="form-control" placeholder="Password" th:placeholder="#{login.password}" required="">
			<div class="checkbox mb-3">
				<label>
          <input type="checkbox" value="remember-me"/>[[#{login.remember}]]
        </label>
			</div>
			<button class="btn btn-lg btn-primary btn-block" type="submit" th:text="#{login.btn}">Sign in</button>
			<p class="mt-5 mb-3 text-muted">© 2020-2021</p>
			<a class="btn btn-sm" th:href="@{/index.html(l='zh_CN')}">中文</a>
			<a class="btn btn-sm" th:href="@{/index.html(l='en_US')}">English</a>
		</form>
	</body>
</html>
3.3 点击链接切换语言
SpringBoot默认配置了区域信息解析器,该解析器是根据请求头带来的区域信息获取Locale进行国际化。
AcceptHeaderLocaleResolver:根据请求头带来的区域信息获取Locale进行国际化。
源码:
public class WebMvcAutoConfiguration {
		...
		@Bean
		@ConditionalOnMissingBean
		@ConditionalOnProperty(prefix = "spring.mvc", name = "locale")
		public LocaleResolver localeResolver() {
			//如果没有固定区域信息解析器的,就使用AcceptHeaderLocaleResolver
			if (this.mvcProperties.getLocaleResolver() == WebMvcProperties.LocaleResolver.FIXED) {
				return new FixedLocaleResolver(this.mvcProperties.getLocale());
			}
			AcceptHeaderLocaleResolver localeResolver = new AcceptHeaderLocaleResolver();
			localeResolver.setDefaultLocale(this.mvcProperties.getLocale());
			return localeResolver;
		}
		...
}
实现点击链接切换语言,需要在链接上携带区域信息:
		<a class="btn btn-sm" th:href="@{/index.html(l='zh_CN')}">中文</a>
		<a class="btn btn-sm" th:href="@{/index.html(l='en_US')}">English</a>
我们可以自己写一个区域信息解析器,实现点击链接切换国际化。
- 这里获取的参数
l是链接上携带的区域信息。 - 可以用Spring Framework的
StringUtils工具检查带来的数据是否为空。
public class MyLocaleResolver implements LocaleResolver {
    /**
     * 解析区域信息
     */
    @Override
    public Locale resolveLocale(HttpServletRequest request) {
        String l = request.getParameter("l");
        Locale locale = Locale.getDefault();
        if (!StringUtils.isEmpty(l)) {//如果不为空,就截串
            String[] split = l.split("_");
            locale = new Locale(split[0], split[1]);
        }
        return locale;
    }

    /**
     * 设置区域信息
     */
    @Override
    public void setLocale(HttpServletRequest request, HttpServletResponse response, Locale locale) {

    }

}
接下来将我们的区域信息解析器添加到容器就可以使用了。
三、登陆功能与登录检查
3.1 登录功能
将longin页面的提交地址改为/user/login,并且是post方式的请求。
<form class="form-signin" action="dashboard.html" th:action="@{/user/login}" method="post">
接收请求的处理器:
- 这里只做简单的登录功能,当用户名不为空且密码为123456即可登录成功。
- 登录成功返回主页,登录失败返回登录页面。
- 为了防止表单重复提交,使用
redirect重定向到主页。 - 如果登录成功,就将用户的信息存入
session中。
<!--设置p标签:如果msg不为空,p标签生效,给出错误提示-->
			<p style="color: red" th:text="${msg}" th:if="${not #strings.isEmpty(msg)}"> </p>
@Controller
public class LoginController {
    @PostMapping(value = "/user/login")
    public String login(@RequestParam("username") String username,
                        @RequestParam("password") String password,
                        Map<String,Object> map,
                        HttpSession session) {
        if (!StringUtils.isEmpty(username) && "123456".equals(password)) {
            session.setAttribute("loginUser",username);
            //登录成功,防止表单重复提交,重定向到主页
            return "redirect:/main.html";
        } else {
            map.put("msg","登录失败,请重新登录~");
            return "login";
        }
    }
}
此时,输入正确的账号和密码就可跳转到主页了,但是存在一个安全问题,即访问http://localhost:8080/crud/main.html直接就进入了登录页面,为此,需要添加拦截器进行登录检查。
3.2 使用拦截器进行登录检查
- 没有登录的用户不能访问后台主页和对员工进行增删改查。
- request的作用域为当前请求,所以用forward.
/**
 * 拦截器:登录检查
 */
public class LoginHandlerInterceptor implements HandlerInterceptor {
    /**
     * 预检查
     */
    @Override
    public boolean preHandle(HttpServletRequest request, HttpServletResponse response, Object handler) throws Exception {
   		//获得session中的登录用户信息
        Object user = request.getSession().getAttribute("loginUser");
        if(user == null){
            //未登录:给出提示信息、转发到登录页面
            request.setAttribute("msg","没有权限,请先登陆");
            request.getRequestDispatcher("/index.html").forward(request,response);
            return false;
        }else{
            //已登录,放行请求
            return true;
        }
    }

    @Override
    public void postHandle(HttpServletRequest request, HttpServletResponse response, Object handler, ModelAndView modelAndView) throws Exception {

    }

    @Override
    public void afterCompletion(HttpServletRequest request, HttpServletResponse response, Object handler, Exception ex) throws Exception {

    }
}
创建好了拦截器,还需要在扩展配置页面WebMvcConfigurer,对拦截器进行添加。
四、Restful-CRUD开始
实验要求
| Restful风格的CRUD | 普通CRUD | Restful-CRUD |
|---|---|---|
| 查询 | getEmp | emp----(GET方式) |
| 添加 | addEmp?xxx | emp----(POST方式) |
| 修改 | updateEmp?id=xxx&xxx | emp/{id}----(PUT方式) |
| 删除 | deleteEmp?id=1 | emp/{id}----(DELETE方式) |
| 本实验的请求架构 | 请求URI | 请求方式 |
|---|---|---|
1.查询所有员工 | emps | GET |
| 查询单个员工(即来到修改页面的操作) | emp/{id} | GET |
2.来到添加页面 | emp | GET |
3.添加员工 | emp | POST |
4.来到修改页面(查出员工信息并回显) | emp/{id} | GET |
5.修改员工 | emp | PUT |
6.删除员工 | emp/{id} | DELETE |
4.1 点击按钮来到list页面
①查询所有员工点击员工管理按钮,发送GET方式的/emps请求。
<a th:href="@{/emps}">员工管理</a>
Controller处理器接收请求后,查询所有员工并返回到列表页面。
    @GetMapping("/emps")
    public String list(Model model) {
        Collection<Employee> employees = employeeDao.getAll();
        //放在请求域中进行共享
        model.addAttribute("emps",employees);
        return "emp/list";
    }
遍历查询所有员工的操作:
- 使用
#dates.format(emp.birth, 'yyyy-MM-dd')格式化日期。
list.html
	<tbody>
		<tr th:each="emp:${emps}">
			<td th:text="${emp.id}"></td>
			<td>[[${emp.lastName}]]</td>
			<td th:text="${emp.email}"></td>
			<td th:text="${emp.gender}==0?'女':'男'"></td>
			<td th:text="${emp.department.departmentName}"></td>
			<td th:text="${#dates.format(emp.birth, 'yyyy-MM-dd')}"></td>
			<td>
				<a class="btn btn-sm btn-primary" th:href="@{/emp/}+${emp.id}">编辑</a>
				<button th:attr="del_uri=@{/emp/}+${emp.id}"  class="btn btn-sm btn-danger deleteBtn">删除</button>
			</td>
		</tr>
	</tbody>
4.2 抽取公共页面
由于员工列表页面、主页面的上边栏和侧边栏(左)都是一样的,因此可以使用thymeleaf将它们公共抽取出来。创建commons文件夹将公共代码抽取至bar.html页面。
抽取公共页面
th:fragment:抽取名为topbar和sidebar的两个片段
commons/bar.html
<!--上边栏topbar-->
<div th:fragment="topbar">
	... //这里是上边栏的代码
</div>
<!--侧边栏(左)sidebar-->
<div th:fragment="sidebar">
	... //这里是侧边栏(左)的代码
</div>
引用公共片段
方式1:th:insert:将公共片段整个插入到声明引入的元素中
方式2:th:replace:将声明引入的元素替换为公共片段
方式3:th:include:将被引入的片段的内容包含进这个标签中
commons/bar::topbar:模板名::选择器commons/bar::#sidebar(activeUri='main.html'):模板名::片段名
dashboard.html
<!--引入上边栏topbar-->
	<div th:replace="commons/bar::topbar"></div>
<!--引入侧边栏(左)sidebar-->
	<div th:replace="commons/bar::#sidebar(activeUri='main.html')"></div>
list.html
<!--引入上边栏topbar-->
		<div th:replace="commons/bar::topbar"></div>
<!--引入侧边栏(左)sidebar-->
		<div th:replace="commons/bar::#sidebar(activeUri='emps')"></div>
4.3 点击按钮高亮显示
点击Dashboard或者员工管理按钮分别发送/main.html、/emps请求。使用th:class改变获取class的值,取出uri命名为 activeUri,如果activeUri==对应的请求就生成加了active(高亮)的标签,否则不加active。
dashboard.html
 <a class="nav-link active" th:class="${activeUri=='main.html'?'nav-link active':'nav-link'}"
 	href="#" th:href="@{/main.html}">Dashboard</a>
 <a class="nav-link" th:class="${activeUri=='emps'?'nav-link active':'nav-link'}"
 	href="#" th:href="@{/emps}">员工管理</a>
4.4 点击添加来到添加页面
超链接本身就是GET方式的请求。
list.html
	<a class="btn btn-sm btn-success" href="emp" th:href="@{/emp}">员工添加</a>
Controller中对get形式的/emp请求进行处理。
- 返回到添加页面前,查出所有的部门存入
depts,方便在页面显示部门。
   /**
     * 2.来到添加页面	/emp---GET
     */
    @GetMapping("/emp")
    public String toAddPage(Model model){
        //来到添加页面前,查出所有的部门,在页面显示
        Collection<Department> departments = departmentDao.getDepartments();
        model.addAttribute("depts",departments);
        return "emp/add";
    }
th:each:遍历th:text:显示的内容th:value:提交的value值(提交的是部门的id)th:selected:默认选择的部门名(这里设置仅修改页面有效)。
add.html
	<select class="form-control" name="department.id">
			<option th:selected="${emp!=null}?${dept.id==emp.department.id}" th:value="${dept.id}"
			th:each="dept:${depts}" th:text="${dept.departmentName}"></option>
	</select>
4.5 员工添加完成
修改员工添加form表单的action地址为POST形式的/emp。
add.html
		<form th:action="@{/emp}" method="post">
Controller中对post形式的/emp请求进行处理。
- 由于thymeleaf会对返回值进行解析,进而拼串;所以要返回到list页面,需要使用
重定向或转发。 - SpringMVC自动将请求参数和入参对象的属性进行一一绑定,需要
请求参数名和JavaBean入参的属性名相同。
在add.html中将Employee属性都加上name标签,值为Employee属性的值。 - 调用employeeDao的save方法将员工数据保存。
   /**
     * 3.添加员工   /emp---POST
     *
     */
    @PostMapping("/emp")
    public String addEmp(Employee employee){
        //来到员工列表页面
        System.out.println("保存的员工信息:"+employee);
        //保存员工
        employeeDao.save(employee);
        //redirect:重定向到一个地址,"/"代表当前项目路径
        //forward:转发到一个地址
        return "redirect:/emps";
    }
4.5 点击修改来到修改页面(页面重用)
点击编辑,来到修改页面。
list.html
		<td>
			<a class="btn btn-sm btn-primary" th:href="@{/emp/}+${emp.id}">编辑</a>
			<button th:attr="del_uri=@{/emp/}+${emp.id}"  class="btn btn-sm btn-danger deleteBtn">删除</button>
		</td>
Controller中对get形式的/emp{id}请求进行处理。
- 返回到add页面,重用add页面。
- 查出部门信息并保存到
depts中,方便在页面显示部门。 - 查出员工id信息放在
emp中,在表单上使用th:value="${emp.属性名}"回显。
    /**
     * 4.来到修改页面     /emp/{id}---GET
     * 查出当前员工,在页面回显
     */
    @GetMapping("/emp/{id}")
    public String toEditPage(@PathVariable("id") Integer id, Model model){
        Employee employee = employeeDao.get(id);
        model.addAttribute("emp",employee);
        //查出部门,页面显示所有部门列表
        Collection<Department> departments = departmentDao.getDepartments();
        model.addAttribute("depts",departments);
        //回到修改页面(复用add页面)
        return "/emp/add";
    }
4.6 修改完成
提交时需要区分是添加还行修改页面。因为在修改时在model中保存了emp对象,而添加时只有部门信息没有员工对象。所以取值时可以据此做判断。
${emp!=null}?${emp.属性名}:仅修改页面才回显属性信息。- 表单需要区分是添加请求POST还是修改请求
PUT。 - 默认是添加页面使用post请求,如果带来emp有值则改为put形式的修改页面。
- SpringBoot已经配置好了SpringMVC的
HiddenHttpMethodFilter,只需在form表单中将input选项项的name标签设置为_method,并制定value值即可更改请求方式。 - 如果是修改页面,需要判断是否传入
emp.id的值。
add.html
	<form th:action="@{/emp}" method="post">
	<input type="hidden" name="_method" value="put" th:if="${emp!=null}"/>
	<input th:type="hidden" name="id" th:if="${emp!=null}" th:value="${emp.id}">
	以lastName属性为例:
	<input name="lastName" type="text" class="form-control" placeholder="zhangsan" th:value="${emp!=null}?${emp.lastName}">
	<button type="submit" class="btn btn-primary" th:text="${emp!=null}?'修改':'添加'"/>
Controller对put形式的/emp请求做处理。
- 调用employeeDao的save方法,进行修改。
   /**
     * 5.修改员工   /emp---PUT
     * 需要提交员工id
     */
    @PutMapping("emp")
    public String updateEmployee(Employee employee){
        System.out.println("修改员工的数据"+employee);
        employeeDao.save(employee);
        return "redirect:/emps";
    }
4.7 删除完成
使用js的形式提交表单。
th:attr="del_uri=@{/emp/}+${emp.id}":自定义使用del_uri代表删除请求。$(this).attr("del_uri")):当前按钮的del_uri属性。$("#deleteEmpForm").attr("action",$(this).attr("del_uri")).submit();:为表单添加提交地址action。
list.html
	<button th:attr="del_uri=@{/emp/}+${emp.id}"  class="btn btn-sm btn-danger deleteBtn">删除</button>
	...
	<form id="deleteEmpForm" method="post" style="display:inline">
		<input type="hidden" name="_method" value="delete"/>
	</form>
	...
	<script>
		$(".deleteBtn").click(function(){
			//删除当前员工
			$("#deleteEmpForm").attr("action",$(this).attr("del_uri")).submit();
			return false;
		});
	</script>
Controller中对delete形式的/emp/{id}请求做处理。
- 防止thymeleaf对返回值拼串,仍使用重定向。
    /**
     * 6.员工删除   /emp/{id}---DELETE
     */
    @DeleteMapping("/emp/{id}")
    public String deleteEmployee(@PathVariable("id") Integer id){
        employeeDao.delete(id);
        return "redirect:/emps";
    }
最后
以上就是光亮信封最近收集整理的关于Spring Boot |使用SpringBoot进行Restful-CRUD一、实现WebMvcConfigurer扩展SpringMVC的功能二、添加国际化组件三、登陆功能与登录检查四、Restful-CRUD开始的全部内容,更多相关Spring内容请搜索靠谱客的其他文章。


发表评论 取消回复