Powered by Node.js 厥功至伟的Node.js
node.js就是前端的工业革命
前端工程化
- 脚手架工具开发
- 自动化构建系统
- 模块化打包
- 项目代码规范化
- 自动化部署
脚手架工具概要
脚手架的本质作用:创建项目基础结构、提供项目规范和约定
常用的脚手架工具
React项目------create-react-app
Vue.js项目------vue-cli
Angular项目 -------- angular-cli
通用型项目脚手架工具 Yeoman
Plop创建特定的文件例如创建一个组件/模块所需要的文件
Yeoman的基本使用
Yeoman要配合不同框架的generator使用比如react、vue、node等
1、全局安装yeoman
yarn global add yo
2、安装全局特定的generator ex. node模块
yarn global add generator-node
3、通过yo运行generator
yo node
4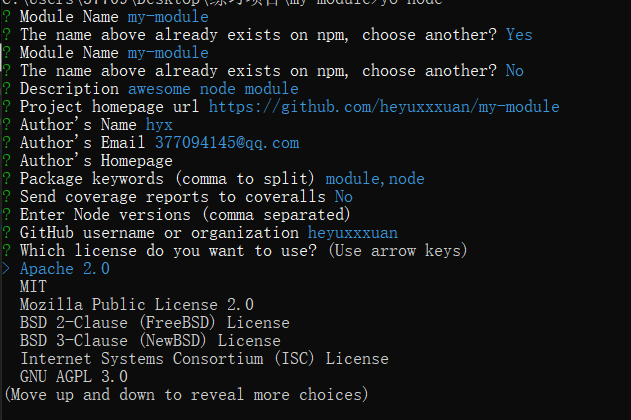
第一项时这个项目的名字,然后时他的描述,项目主页地址,作者姓名邮箱和主页,下面是这个项目的关键词 ,是否集成发送覆盖率 github的主页以及项目的license
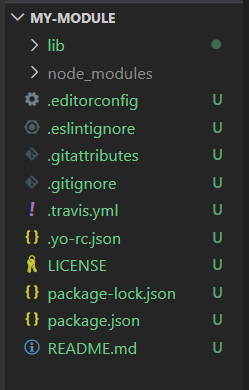
完成脚手架创建
接下来若想加入配置文件手打容易出错,这时用yeoman中的sub generator(generator的子级生成器)去生成这些配置文件他的用法是
yo node:cli
yo命令后面在他的generator名称后面加上冒号再加上sub generator的名称(node的sub generator的名称叫做cli)
Yeoman的使用步骤
- 明确你的需求
- 找到合适的Generator
- 全局范围安装找到的Generator
- 通过Yo运行对应的Generator;
- 通过命令行交互填写选项;
- 生成你所需要的项目结构
自定义Generator 基于Yeoman搭建自己的脚手架
Generator本质上就是一个NPM模块
Generator的基本结构

若想要实现sub Generator需要在app目录同级下创建一个新的目录,就会出现一个component的子生成器
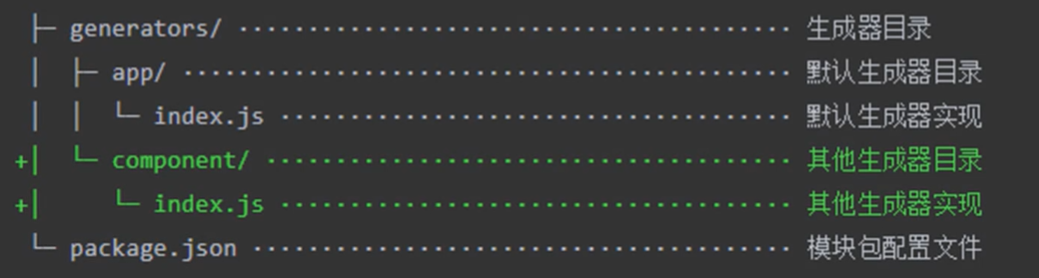
yeoman的genrtator模块的名称必须是 generator-name的形式
创建文件generator-sample
1、创建一个package.json文件
yarn init //创建一个package.json文件
2、安装一个yeoman的基类,提供了一些工具函数让我们在创建生成器时更加便捷
yarn add yeoman-generator
3、用vscode打开在根目录下根据结构创建generators/app/index.js文件
index.js文件的作用:
//此文件作为Generator的入口
// 需要导出一个继承自 Yeoman Generator的类型
// Yeoman Generator 在工作时会自动调用我们在此类型中定义的一些生命周期方法
// 我们在这些方法中可以通过调用父类提供的一些工具方法实现一些功能,例如文件写入
在index.js文件中写入如下内容
const Generator = require('yeoman-generator')

module.exports = class extends Generator {
    writing () {
        // Yeoman 自动在生成文件阶段调用此方法
        // 我们这里尝试往项目目录中写入文件
        this.fs.write(   //需要两个参数一个是写入文件的绝对路径 一个是写入文件的内容
            this.destinationPath('temp.text'), //根据父类中的destinationPath方法去自动获取生成项目目录下对应的文件路径
            Math.random.toString() //文件内容用生成随机数代替
        )
    }
}
在完成后通过命令将这个模块链接到全局范围让他成为一个全局模块的包
yarn link
最后在新建文件中通过yo-sample 安装刚才的包成功写入文件文件内容为随机数
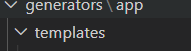
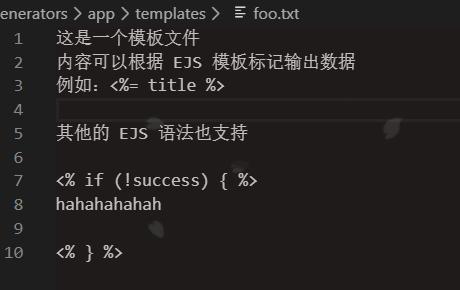
根据模板创建文件
首先在app目录下创建templates文件夹里面存放模板文件
在文件中编写模板内容
在index.js中运用模板标记的方式写入文件
const Generator = require('yeoman-generator')

module.exports = class extends Generator {
    writing () {
        // Yeoman 自动在生成文件阶段调用此方法
        // 我们这里尝试往项目目录中写入文件
        // this.fs.write(   //需要两个参数一个是写入文件的绝对路径 一个是写入文件的内容
        //     this.destinationPath('temp.text'), //根据父类中的destinationPath方法去自动获取生成项目目录下对应的文件路径
        //     Math.random().toString() //文件内容用生成随机数代替
        // )


        // 通过模板方式写入文件到目录 他需要三个 模板文件路径 输出目标路径 模板数据上下文
        // 模板文件路径
        const temp = this.templatePath('foo.txt') //通过templatePath方法找到templates目录下的模板文件

        //输出目标路径
        const output = this.destinationPath('foo.txt')

        //模板数据上下文
        const context = { title:'Hello hyx', success: false } //一个对象 里面是模板标记的数据

        this.fs.copyTpl(temp, output, context) //这个方法会将模板文件映射到输出文件上
    }
}
接受用户输入
在命令行之中通过用户输入交互确定项目的标题等
module.exports = class extends Generator {
    prompting () {
        // yeoman 在询问用户环节会自动调用此方法
        // 在此方法中可以调用父类的prompt()方法对用户进行命令行询问
        // 这个方法是个promise方法可以有更好的流程控制
        //
        return this.prompt([    // 传入一个数组 数组里面是对象
            {
                type:'input', //类型
                name: 'name', // 键名
                message: 'Your project name', // 提示就是命令行里面的问题
                default: this.appname // appname为项目生成目录名称

            }
        ]).then(answers => {
            //answers是以一个对象的形式 {name:'user input value'} 里面的键为上面的键名 值为用户输入的值
            this.answers = answers
        })
    }
    writing () {
        // Yeoman 自动在生成文件阶段调用此方法
        // 我们这里尝试往项目目录中写入文件
        // this.fs.write(   //需要两个参数一个是写入文件的绝对路径 一个是写入文件的内容
        //     this.destinationPath('temp.text'), //根据父类中的destinationPath方法去自动获取生成项目目录下对应的文件路径
        //     Math.random().toString() //文件内容用生成随机数代替
        // )


        // 通过模板方式写入文件到目录 他需要三个 模板文件路径 输出目标路径 模板数据上下文
        // 模板文件路径
        const temp = this.templatePath('bar.html') //通过templatePath方法找到templates目录下的模板文件

        //输出目标路径
        const output = this.destinationPath('bar.html')

        //模板数据上下文
        const context = this.answers //一个对象

        this.fs.copyTpl(temp, output, context) //这个方法会将模板文件映射到输出文件上
    }
}
Vue-Generator案例
1、首先创建一个generator文件夹
mkdir generator-my-vue
2、init一个package.json
yarn init
3、安装yeoman-generator工具函数依赖
yarn add yeoman-generator
4、创建一个主入口文件
generators/app/index
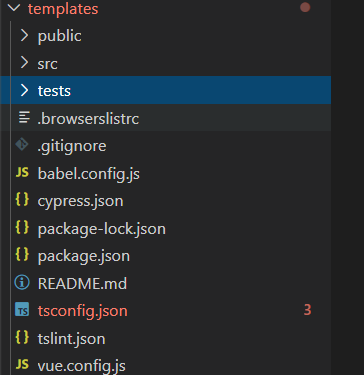
模板文件夹 generators/app/templates
5、编写脚手架搭建信息将想要的文件目录结构复制到模板文件夹templates中
const Generator = require('yeoman-generator')
module.exports = class extends Generator {
// 命令行询问环节调用此方法
prompting () {
return this.prompt([
{
type: 'input',
name: 'name',
message: 'Your project name',
default: this.appname
}
])
.then( answers => {
this.answers = answers //将此回答结果挂在到this
})
}
writing () {
//把每一个文件都通过模板转换到目标路径
// 这个数组是每一个模板的相对路径
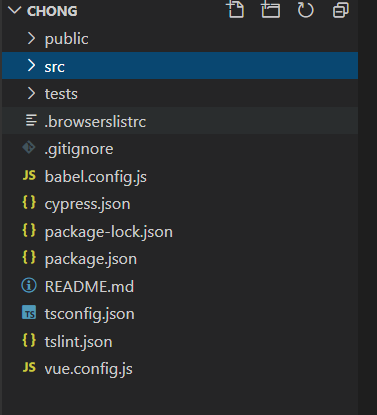
const templates = [
'.browserslistrc',
'.gitignore',
'babel.config.js',
'cypress.json',
'package-lock.json',
'package.json',
'README.md',
'tsconfig.json',
'tslint.json',
'vue.config.js',
'public/favicon.ico',
'public/index.html',
'src/App.vue',
'src/main.ts',
'src/shims-tsx.d.ts',
'src/shims-vue.d.ts',
'tests/e2e/plugins/index.js',
'tests/e2e/specs/test.js',
'tests/e2e/support/commands.js',
'tests/e2e/support/index.js',
'tests/unit/example.spec.ts'
]
templates.forEach(item => {
//item => 每一个文件的路径
this.fs.copyTpl(
this.templatePath(item),
this.destinationPath(item),
this.answers
)
})
}
}
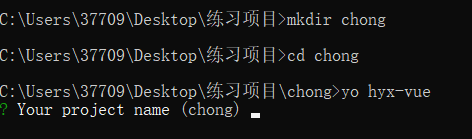
6、将编写好的模块通过yarn link 链接到全局模块
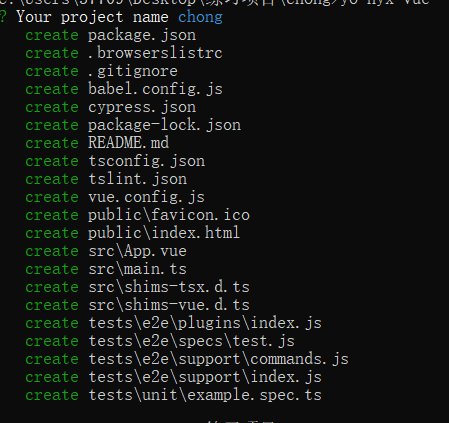
7、可以在新的文件夹中安装我们的脚手架了!!!!
最后
以上就是感性时光最近收集整理的关于前端工程化---脚手架构建 (搭建一个自己的脚手架)的全部内容,更多相关前端工程化---脚手架构建内容请搜索靠谱客的其他文章。


发表评论 取消回复