1。在vue项目中的components添加目录SvgIcon:

2. 在目录下添加Index.vue,如上图; Index.vue的内容为:
<template>
  <div v-if="isExternal" :style="styleExternalIcon" class="svg-external-icon svg-icon" v-on="$attrs" />
  <svg v-else :class="svgClass" aria-hidden="true">
    <use :xlink:href="iconName" />
  </svg>
</template>

<script>
import { isExternal } from '@/utils/validate'

export default {
  name: 'SvgIcon',
  props: {
    iconClass: {
      type: String,
      required: true
    },
    className: {
      type: String,
      default: ''
    }
  },
  computed: {
    isExternal() {
      return isExternal(this.iconClass)
    },
    iconName() {
      return `#icon-${this.iconClass}`
    },
    svgClass() {
      if (this.className) {
        return 'svg-icon ' + this.className
      } else {
        return 'svg-icon'
      }
    },
    styleExternalIcon() {
      return {
        mask: `url(${this.iconClass}) no-repeat 50% 50%`,
        '-webkit-mask': `url(${this.iconClass}) no-repeat 50% 50%`
      }
    }
  }
}
</script>

<style scoped>
.svg-icon {
  width: 1em;
  height: 1em;
  vertical-align: -0.15em;
  fill: currentColor;
  overflow: hidden;
}

.svg-external-icon {
  background-color: currentColor;
  mask-size: cover!important;
  display: inline-block;
}
</style>
其中第三行的写法: v-on="$attrs" 为vue3.0写法
3.在 src/assets新建立目录:icons, 在其下建立子目录 svg, 在svg下拷贝user.svg图标文件:
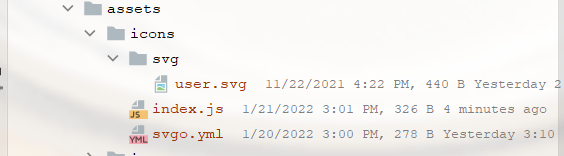
同时在 icons 还要建立两个文件index.js 和 svgo.yml文件,其内容分别:
index.js内容:
import { createApp } from 'vue';
import SvgIcon from '@/components/SvgIcon/Index'  // svg component

// register globally
createApp({}).component('svg-icon', SvgIcon) //vue3.0的写法

const req = require.context('./svg', false, /.svg$/)
const requireAll = requireContext => requireContext.keys().map(requireContext)
requireAll(req)
svgo.yml的内容为:
# replace default config

# multipass: true
# full: true

plugins:

  # - name
  #
  # or:
  # - name: false
  # - name: true
  #
  # or:
  # - name:
  #     param1: 1
  #     param2: 2

  - removeAttrs:
      attrs:
        - 'fill'
        - 'fill-rule'
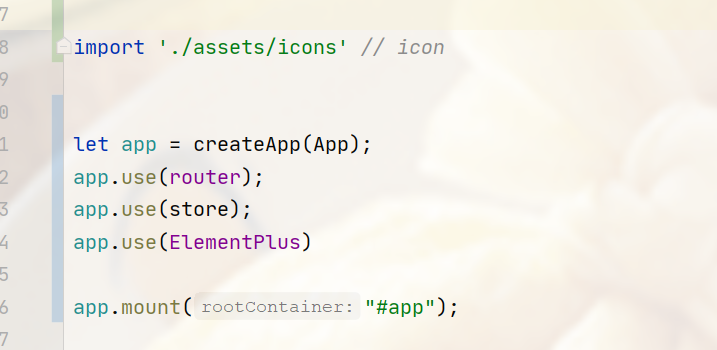
4. 最后在main.js中引入组件:
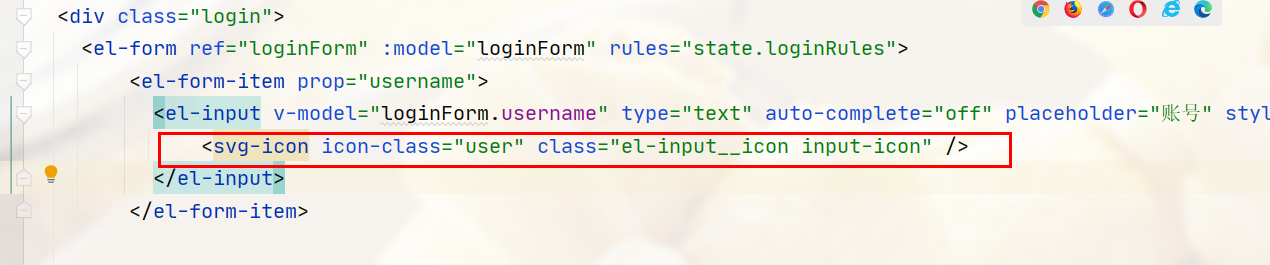
5. 最后是使用组件:
最后
以上就是独特铃铛最近收集整理的关于vue3.0 引入svg-icon组件的全部内容,更多相关vue3.0内容请搜索靠谱客的其他文章。
本图文内容来源于网友提供,作为学习参考使用,或来自网络收集整理,版权属于原作者所有。


发表评论 取消回复