文章目录
- 1.MobileNetV1轻量化网络结构
- 2.MobileNetV2轻量化网络结构
- 3.前置准备
- (1)MobileNetSSD_300x300.prototxt描述文件下载
- (2)MobileNet_SSD.caffemodel下载
- 3.正文
- (1)初始化操作
- (2)预测类别
- (3)读取相关文件
- (4)对图像进行预处理和设置网络的输入
- (5)对图像进一步处理
- (6)遍历预测的结果
- (7)对单张图片进行预测
- (8)实时检测
- (9)完整代码
1.MobileNetV1轻量化网络结构
https://mydreamambitious.blog.csdn.net/article/details/124560414
2.MobileNetV2轻量化网络结构
https://mydreamambitious.blog.csdn.net/article/details/124617584
3.前置准备
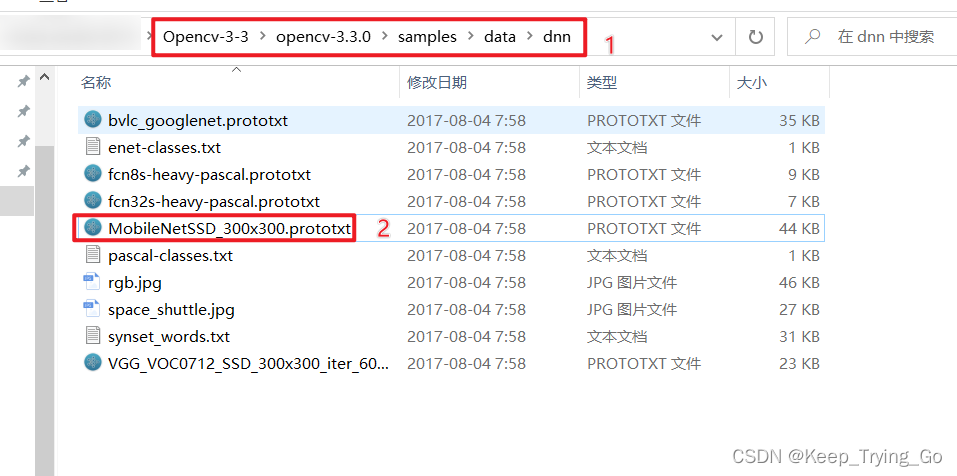
(1)MobileNetSSD_300x300.prototxt描述文件下载
注:虽然我们这里使用的python中的opencv来实现GoogleNet图像分类,可是我们需要GoogleNet模型的描述文件和分类文件,所以我们这里需要下载Opencv-3-3-0,从里面获取描述文件和分类文件:
https://www.raoyunsoft.com/opencv/opencv-3.3.0/
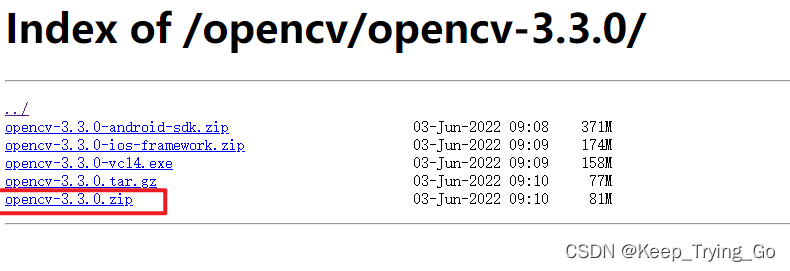
下载好Opencv-3-3-0压缩包之后,解压,打开以下路径即可找到MobileNetSSD_300x300.prototxt
(2)MobileNet_SSD.caffemodel下载
git clone https://github.com/chuanqi305/MobileNet-SSD.git
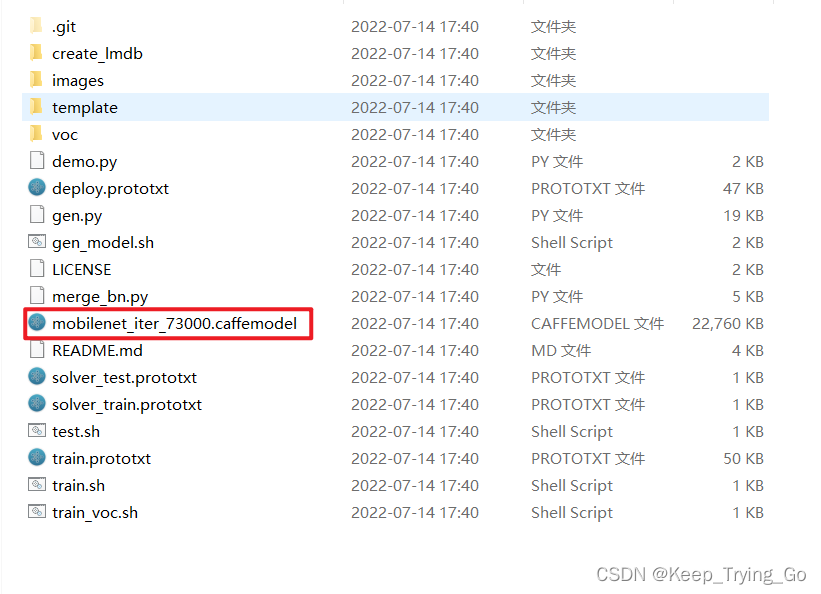
或者从百度网盘下载亦可以:
链接:https://pan.baidu.com/s/1S9GrYB-G_iS1wodrYjsdbw
提取码:gqpu
3.正文
(1)初始化操作
import os
import cv2
import cvzone
import numpy as np

#设置图片的宽度和高度
img_width,img_heigth=300,300
#得到图像的高宽比
WHRatio=img_width/float(img_heigth)
#设置图片的缩放因子
ScaleFactor=0.007843
#设置平均数
meanVal=127.5
#设置置信度阈值
threshod=0.2
(2)预测类别
#mobileNetSSD可以检测类别数21=20+1(背景)
classNames = ['background',
              'aeroplane', 'bicycle', 'bird', 'boat',
              'bottle', 'bus', 'car', 'cat', 'chair',
              'cow', 'diningtable', 'dog', 'horse',
              'motorbike', 'person', 'pottedplant',
              'sheep', 'sofa', 'train', 'tvmonitor']
(3)读取相关文件
#加载文件
net=cv2.dnn.readNetFromCaffe(prototxt='modelCaffe//MobileNetSSD_300x300.prototxt',
                             caffeModel='modelCaffe//mobilenet_iter_73000.caffemodel')
(4)对图像进行预处理和设置网络的输入
# 对图片进行预处理
    blob = cv2.dnn.blobFromImage(image=imgSize, scalefactor=ScaleFactor,
                                 size=(img_width, img_heigth), mean=meanVal)
    # 设置网络的输入并进行前向传播
    net.setInput(blob)
    detections = net.forward()
(5)对图像进一步处理
# 对图像进行按比例裁剪
    height,width,channel=np.shape(imgSize)
    if width/float(height)>WHRatio:

        cropSize=(int(height*WHRatio),height)
    else:

        cropSize = (width,int(width / WHRatio))
    y1=int((height-cropSize[1])/2)
    y2=int(y1+cropSize[1])
    x1=int((width-cropSize[0])/2)
    x2=int(x1+cropSize[0])
    imgSize=imgSize[y1:y2,x1:x2]
    height,width,channel=np.shape(imgSize)
(6)遍历预测的结果
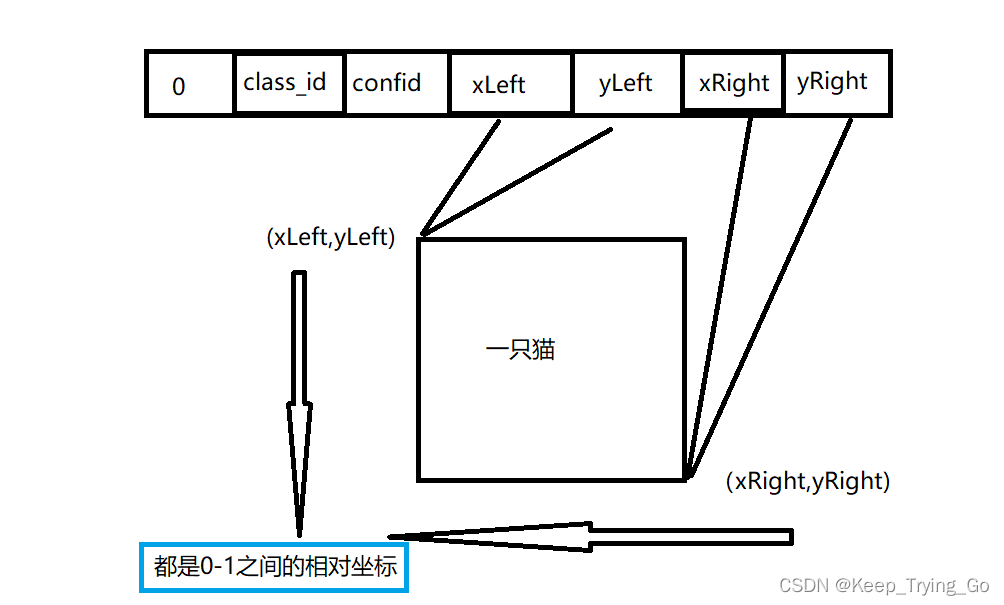
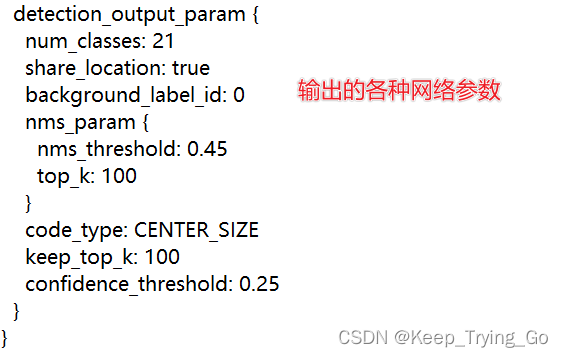
打开文件:MobileNetSSD_300x300.prototxt末尾。上面的第一个参数之所以为0,表示背景。
#遍历检测的目标
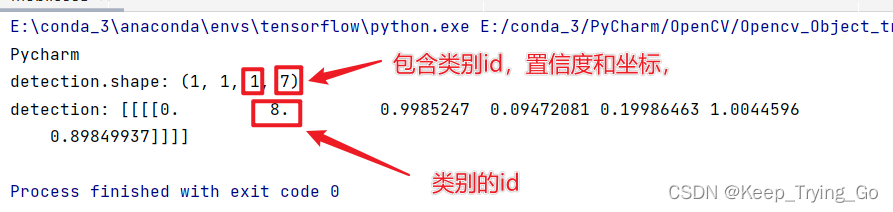
print('detection.shape: {}'.format(detections.shape))
print('detection: {}'.format(detections))
for i in range(detections.shape[2]):
#预测的置信度保留两位小数
confidence=round(detections[0,0,i,2]*100,2)
if confidence>threshod:
#预测类别的id
class_id=int(detections[0,0,i,1])
xLeftBottom=int(detections[0,0,i,3]*width)
yLeftBottom=int(detections[0,0,i,4]*height)
xRightTop=int(detections[0,0,i,5]*width)
yRightTop=int(detections[0,0,i,6]*height)
cv2.rectangle(img=imgSize,pt1=(xLeftBottom,yLeftBottom),
pt2=(xRightTop,yRightTop),color=(0,255,0),thickness=2)
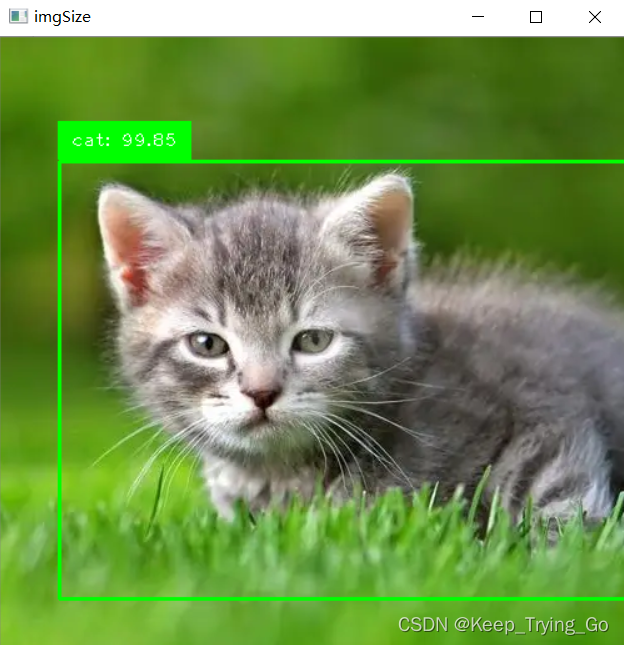
label=classNames[class_id]+": "+str(confidence)
labelSize, baseLine = cv2.getTextSize(label, cv2.FONT_HERSHEY_SIMPLEX, 0.5, 1)
cvzone.putTextRect(img=imgSize,text=label,pos=(xLeftBottom+9,yLeftBottom-12),
scale=1,thickness=1,colorR=(0,255,0))
return imgSize
(7)对单张图片进行预测
#对单张图片进行检测
def SignalDetect(img_path='images//6.png'):
    imgSize=cv2.imread(img_path)
    imgSize=processImage(imgSize)
    cv2.imshow('imgSize', imgSize)
    cv2.waitKey(0)
    cv2.destroyAllWindows()
(8)实时检测
#实时检测
def detectTime():
    cap=cv2.VideoCapture(0)
    while cap.isOpened():
        ret,frame=cap.read()
        frame=cv2.resize(src=frame,dsize=(520,520))
        frame=cv2.flip(src=frame,flipCode=2)
        frame=processImage(frame)
        cv2.imshow('frame',frame)
        key=cv2.waitKey(1)
        if key==27:
            break
    cap.release()
    cv2.destroyAllWindows()
(9)完整代码
import os
import cv2
import cvzone
import numpy as np

#设置图片的宽度和高度
img_width,img_heigth=300,300
#得到图像的高宽比
WHRatio=img_width/float(img_heigth)
#设置图片的缩放因子
ScaleFactor=0.007843
#设置平均数
meanVal=127.5
#设置置信度阈值
threshod=0.2

#mobileNetSSD可以检测类别数21=20+1(背景)
classNames = ['background',
              'aeroplane', 'bicycle', 'bird', 'boat',
              'bottle', 'bus', 'car', 'cat', 'chair',
              'cow', 'diningtable', 'dog', 'horse',
              'motorbike', 'person', 'pottedplant',
              'sheep', 'sofa', 'train', 'tvmonitor']

#加载文件
net=cv2.dnn.readNetFromCaffe(prototxt='modelCaffe//MobileNetSSD_300x300.prototxt',
                             caffeModel='modelCaffe//mobilenet_iter_73000.caffemodel')

#对图片进行处理和设置网络的输入同时进行前向传播
def processImage(imgSize):
    # 对图片进行预处理
    blob = cv2.dnn.blobFromImage(image=imgSize, scalefactor=ScaleFactor,
                                 size=(img_width, img_heigth), mean=meanVal)
    # 设置网络的输入并进行前向传播
    net.setInput(blob)
    detections = net.forward()
    # 对图像进行按比例裁剪
    height,width,channel=np.shape(imgSize)
    if width/float(height)>WHRatio:
        #裁剪多余的宽度
        cropSize=(int(height*WHRatio),height)
    else:
        # 裁剪多余的高度
        cropSize = (width,int(width / WHRatio))
    y1=int((height-cropSize[1])/2)
    y2=int(y1+cropSize[1])
    x1=int((width-cropSize[0])/2)
    x2=int(x1+cropSize[0])
    imgSize=imgSize[y1:y2,x1:x2]
    height,width,channel=np.shape(imgSize)

    #遍历检测的目标
    # print('detection.shape: {}'.format(detections.shape))
    # print('detection: {}'.format(detections))
    for i in range(detections.shape[2]):
        #保留两位小数
        confidence=round(detections[0,0,i,2]*100,2)
        if confidence>threshod:
            class_id=int(detections[0,0,i,1])

            xLeftBottom=int(detections[0,0,i,3]*width)
            yLeftBottom=int(detections[0,0,i,4]*height)
            xRightTop=int(detections[0,0,i,5]*width)
            yRightTop=int(detections[0,0,i,6]*height)

            cv2.rectangle(img=imgSize,pt1=(xLeftBottom,yLeftBottom),
                          pt2=(xRightTop,yRightTop),color=(0,255,0),thickness=2)
            label=classNames[class_id]+": "+str(confidence)
            labelSize, baseLine = cv2.getTextSize(label, cv2.FONT_HERSHEY_SIMPLEX, 0.5, 1)

            cvzone.putTextRect(img=imgSize,text=label,pos=(xLeftBottom+9,yLeftBottom-12),
                                scale=1,thickness=1,colorR=(0,255,0))
            # cv2.rectangle(imgSize, (xLeftBottom, yLeftBottom - labelSize[1]),
            #               (xLeftBottom + labelSize[0], yLeftBottom + baseLine),
            #               (255, 255, 255), cv2.FILLED)
            # cv2.putText(imgSize, label, (xLeftBottom, yLeftBottom),
            #             cv2.FONT_HERSHEY_SIMPLEX, 0.5, (0, 0, 0))
    return imgSize

#对单张图片进行检测
def SignalDetect(img_path='images//8.png'):
    imgSize=cv2.imread(img_path)
    imgSize=processImage(imgSize)
    cv2.imshow('imgSize', imgSize)
    cv2.waitKey(0)
    cv2.destroyAllWindows()

#实时检测
def detectTime():
    cap=cv2.VideoCapture(0)
    while cap.isOpened():
        ret,frame=cap.read()
        frame=cv2.resize(src=frame,dsize=(520,520))
        frame=cv2.flip(src=frame,flipCode=2)
        frame=processImage(frame)
        cv2.imshow('frame',frame)
        key=cv2.waitKey(1)
        if key==27:
            break
    cap.release()
    cv2.destroyAllWindows()


if __name__ == '__main__':
    print('Pycharm')
    # SignalDetect()
    detectTime()
最后
以上就是激情火龙果最近收集整理的关于使用MobileNet_SSD进行目标检测的全部内容,更多相关使用MobileNet_SSD进行目标检测内容请搜索靠谱客的其他文章。
本图文内容来源于网友提供,作为学习参考使用,或来自网络收集整理,版权属于原作者所有。


发表评论 取消回复