我是靠谱客的博主 斯文身影,这篇文章主要介绍Nginx安装与配置(包括解决403错误,站点配置,_STORAGE_WRITE_ERROR_,No input file),现在分享给大家,希望可以做个参考。
1.yum 安装nginx
nginx -v   #安装前检查
yum install nginx -y #yum安装nginxsystemctl start nginx.service #启动nginx
systemctl stop nginx.service #关闭nginx
systemctl enable nginx.service #设置nginx开机自启
systemctl status nginx.service #查看nginx运行状态systemctl stop firewalld #关闭防火墙# For more information on configuration, see:
# * Official English Documentation: http://nginx.org/en/docs/
# * Official Russian Documentation: http://nginx.org/ru/docs/
user root; #运行用户
worker_processes auto; ##启动进程,通常设置成和cpu的数量相等
error_log /var/log/nginx/error.log; #错误日志位置
pid /run/nginx.pid; #全局错误日志及PID文件
# Load dynamic modules. See /usr/share/nginx/README.dynamic.
include /usr/share/nginx/modules/*.conf;
worker_rlimit_nofile 51200; #单个后台worker process进程的最大并发链接数
events {
use epoll; #仅用于linux2.6以上内核,可以大大提高nginx的性能
worker_connections 51200;
multi_accept on;
}
http {
log_format main '$remote_addr - $remote_user [$time_local] "$request" '
'$status $body_bytes_sent "$http_referer" '
'"$http_user_agent" "$http_x_forwarded_for"';
access_log /var/log/nginx/access.log main;
charset utf-8;
sendfile on;
tcp_nopush on;
tcp_nodelay on;
keepalive_timeout 65;
types_hash_max_size 2048;
include /etc/nginx/mime.types;
default_type application/octet-stream;
# Load modular configuration files from the /etc/nginx/conf.d directory.
# See http://nginx.org/en/docs/ngx_core_module.html#include
# for more information.
include /etc/nginx/conf.d/*.conf;
fastcgi_connect_timeout 300;
fastcgi_send_timeout 300;
fastcgi_read_timeout 300;
fastcgi_send_timeout 300;
fastcgi_read_timeout 300;
fastcgi_buffer_size 64k;
fastcgi_buffers 4 64k;
fastcgi_busy_buffers_size 128k;
fastcgi_temp_file_write_size 256k;
server {
listen 80 default_server;
listen [::]:80 default_server;
server_name _;
index index.html index.htm index.php;
# root /usr/share/nginx/html; #默认网站根目录
root /home/www; #自定义网站根目录 需要给足读写权限
# Load configuration files for the default server block.
include /etc/nginx/default.d/*.conf;
location / {
index index.html index.htm index.php;
autoindex on;
}
location ~ .php$ {
#root /usr/share/nginx/html; #指定php的根目录
root /home/www; #自定义网站根目录 需要给足读写权限
fastcgi_pass 127.0.0.1:9000;#php-fpm的默认端口是9000
fastcgi_index index.php;
fastcgi_param SCRIPT_FILENAME $document_root$fastcgi_script_name;
include fastcgi_params;
}
error_page 404 /404.html;
location = /40x.html {
}
error_page 500 502 503 504 /50x.html;
location = /50x.html {
}
}
# Settings for a TLS enabled server.
#
# server {
# listen 443 ssl http2 default_server;
# listen [::]:443 ssl http2 default_server;
# listen 443 ssl http2 default_server;
# listen [::]:443 ssl http2 default_server;
# server_name _;
# root /usr/share/nginx/html;
#
# ssl_certificate "/etc/pki/nginx/server.crt";
# ssl_certificate_key "/etc/pki/nginx/private/server.key";
# ssl_session_cache shared:SSL:1m;
# ssl_session_timeout 10m;
# ssl_ciphers HIGH:!aNULL:!MD5;
# ssl_prefer_server_ciphers on;
#
# # Load configuration files for the default server block.
# include /etc/nginx/default.d/*.conf;
#
# location / {
# }
#
# error_page 404 /404.html;
# location = /40x.html {
# }
#
# error_page 500 502 503 504 /50x.html;
# location = /50x.html {
# }
# }
include vhosts/*.conf;
}5.启动php-fpm(有两种启动方式,1.手动切换到目录下启动,2.设置开机自启动)
a.手动启动:切换到php-fpm目录 执行./php-fpm </usr/sbin/php-fpm>
b.开机自启:systemctl enable php-fpm.service
6.关闭 selinux(selinux开启可能会导致访问时出现403)
a. 临时关闭
setenforce 0b. 永久关闭
vi /etc/selinux/config(find / -name selinux)设置后需要重启才能生效
7.配置虚拟站点
a.find / -name nginx.conf #找到nginx.conf目录路径 </etc/nginx/nginx.conf>
b.在nginx目录下新建文件夹vhosts
c.切换到vhosts目录,新建web1.conf,web1.conf配置如下
server {
    listen       80;
    server_name  web1.com;
    root        /home/www/web/;
    index  index.php index.html;


    location / {
        index  index.php index.html;
    }
    location ~ .*.(php|php5)?$ {
        fastcgi_pass  127.0.0.1:9000;
        fastcgi_index index.php;
        fastcgi_param   SCRIPT_FILENAME   $document_root$fastcgi_script_name;
        fastcgi_param APPLICATION_ENV development;
        include fastcgi_params;
    }
}e.配置解析,find / -name hosts </etc/hosts> 添加域名及ip,还需在本机hosts中也添加ip地址
8.如果nginx安装或运行过程中出现 403 错误 首先检查是否具有读写权限,如果出现其他错误,可使用cat命令查看错误日志进行问题排查 </var/log/nginx/error.log>
9.部署tp框架在Nginx中(或者出现 No input file)
使Nginx支持tp框架支持:common中加入以下配置
return array(
	'URL_MODEL' => '2', //URL模式 或者 'URL_MODEL' =>3(URL兼容模式)
	'URL_PATHINFO_FETCH' => ':get_path_info', //加入此项配置
);
Nginx.conf:
location / { // …..省略部分代码
if (!-e $request_filename) {
rewrite ^(.*)$ /index.php?s=$1 last;
break;
}
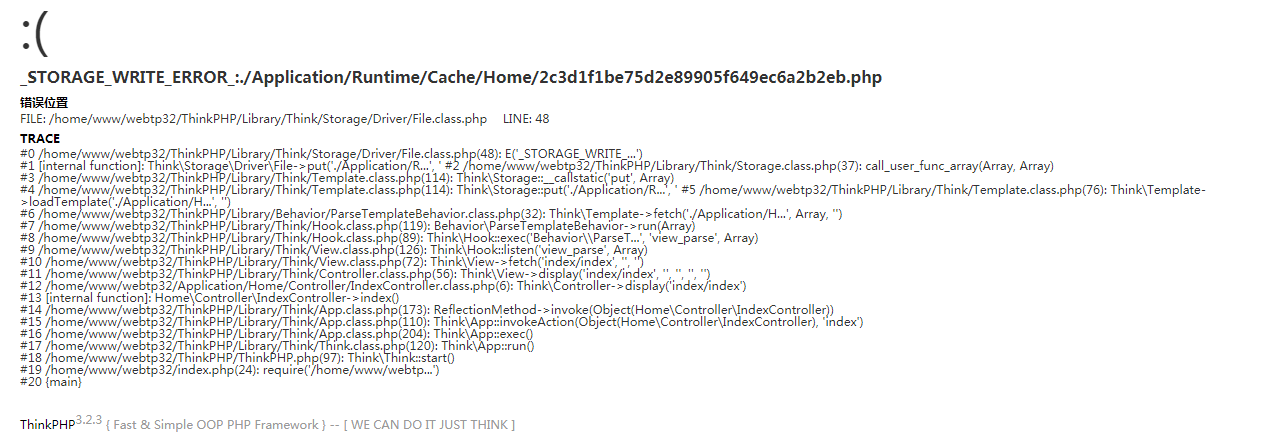
}如出现下图情况(_STORAGE_WRITE_ERROR_),请检查Runtime目录是否具有读写权限
最后
以上就是斯文身影最近收集整理的关于Nginx安装与配置(包括解决403错误,站点配置,_STORAGE_WRITE_ERROR_,No input file)的全部内容,更多相关Nginx安装与配置(包括解决403错误,站点配置,_STORAGE_WRITE_ERROR_,No内容请搜索靠谱客的其他文章。
本图文内容来源于网友提供,作为学习参考使用,或来自网络收集整理,版权属于原作者所有。


发表评论 取消回复