教学app案例之音频播放器(二)
- 一、开发环境
- 二、项目介绍
- 三、开始主界面
- 四、显示歌曲列表
- 五、播放音乐的服务
- 六、实现播放音乐
一、开发环境
软件环境: Android Studio 4.1.3 + JDK1.8
API版本:API 16
操作系统:Windows 10
二、项目介绍
项目结构如下图所示:
项目名称为MySongPlayer
java目录存放着实现各种功能的java代码
res目录存放着各类资源文件,如图片、音频等,还有各类.xml布局文件
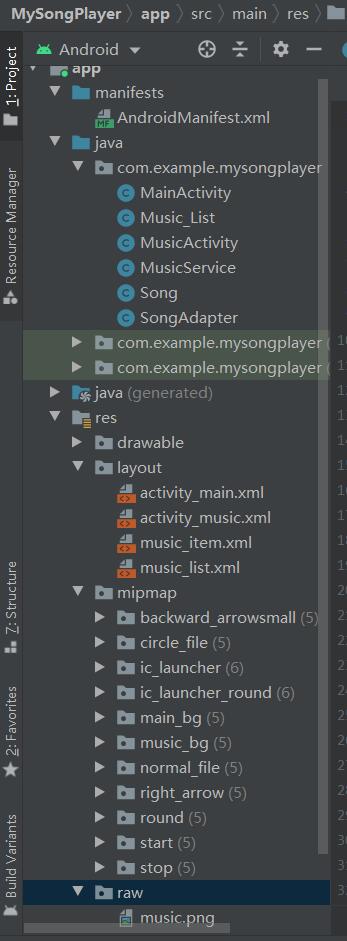
layout文件夹放的就是我们的布局文件
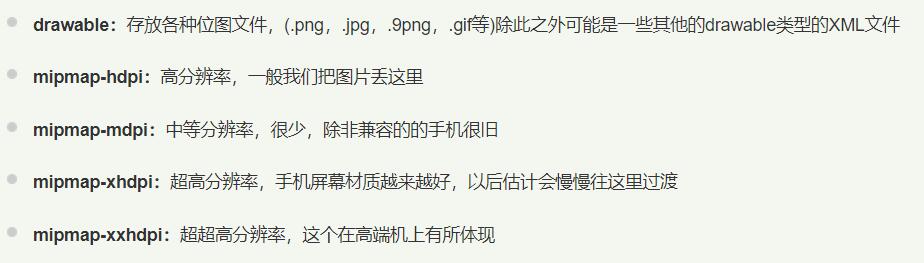
而drawable和mipmap文件夹介绍如下(来自菜鸟教程)
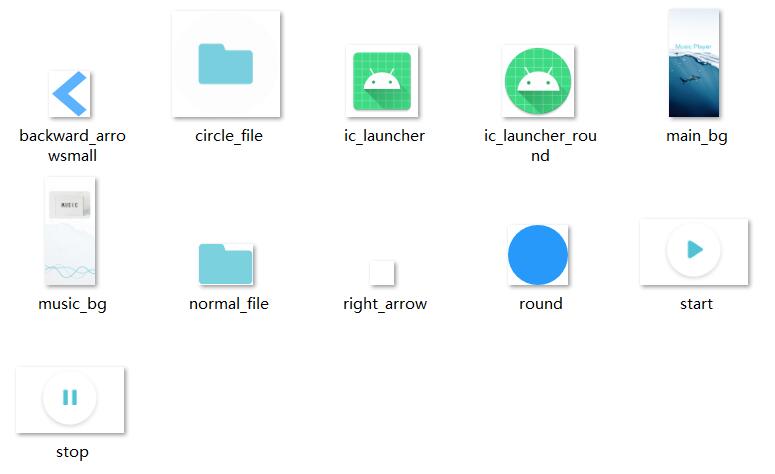
本次项目用到的图片大部分都在mipmap文件夹下,音乐目录图片在res里新建的raw文件夹下
三、开始主界面
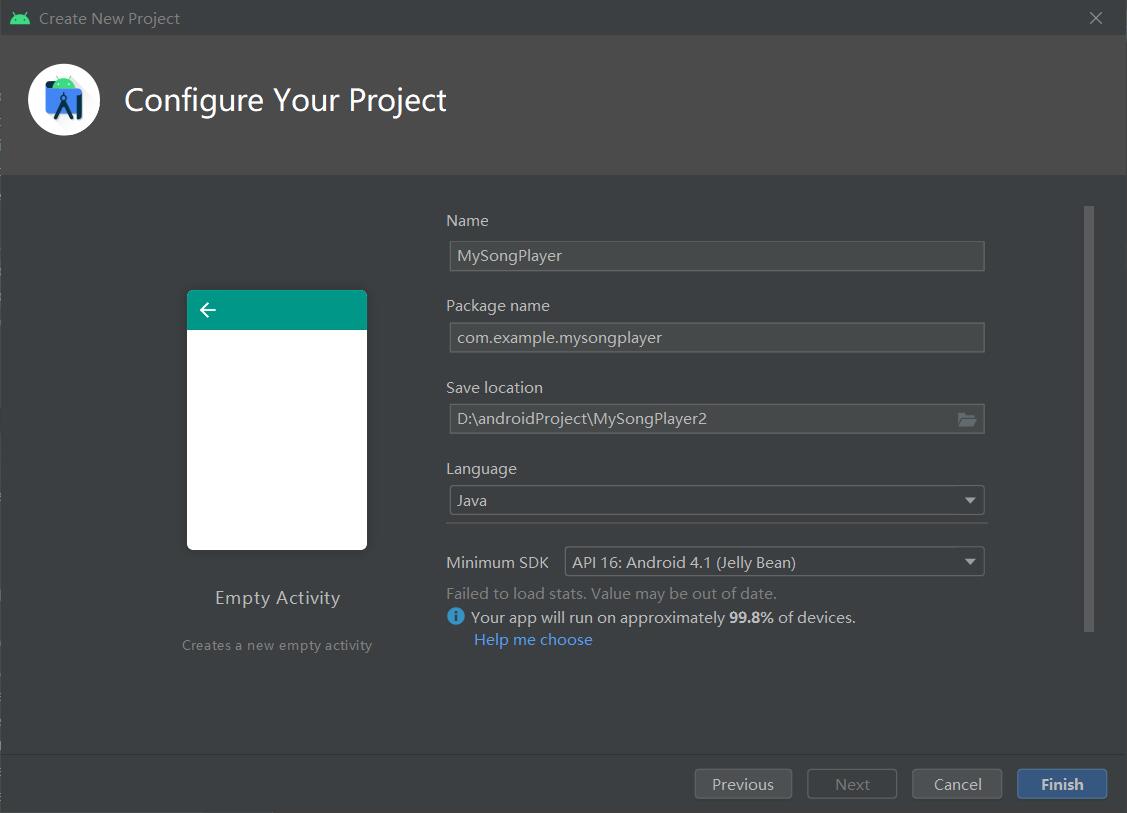
首先新建一个project
Language选择java
Minimum SDK选择推荐的API 16,下方的数字代表能兼容99.8%的设备
点击Finish
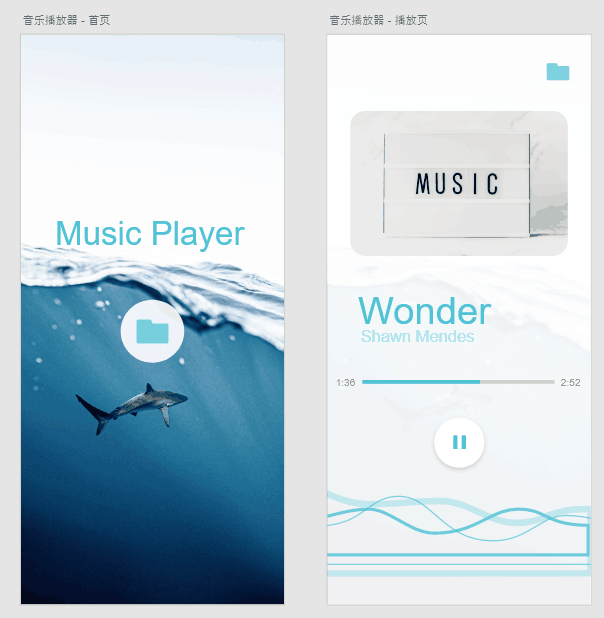
根据设计图分析首页内容
界面:一个背景+一个图片按钮
功能:点击图片按钮可以跳转到手机音乐列表
首先写界面
首页的布局文件为res - layout下默认生成的activity_main.xml
从这里可以切换代码和可视化工具的显示
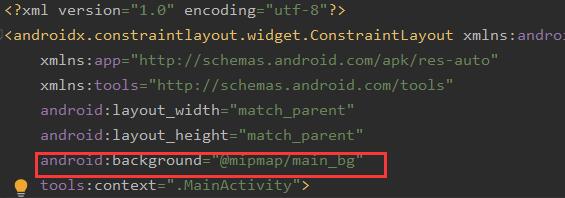
切换到Code 设置背景为mipmap中的素材图片
android:background="@mipmap/main_bg"
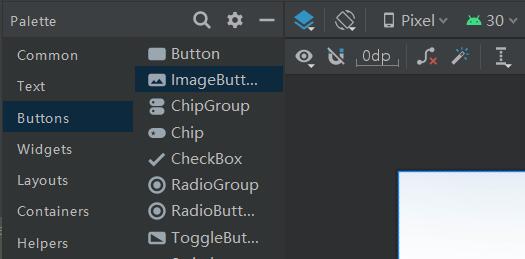
然后切换到可视化工具,从左边Palette里找到Buttons - ImageButton,选中拖动到右边,可以快速添加一个图片按钮
选中ImageButton
拖动方框点四个角可以放大和缩小按钮,也可以自己设定按钮大小参数
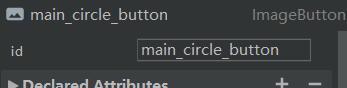
在右边设置其id为main_circle_button,便于我们在java代码里通过id来选中这个组件(注意选中的是否为按钮,当你后续点击了其他地方时,会默认跳转到布局的设置)
默认的ImageButton会在你自定义的图片外围出现一个方框背景,不太美观
切换到Code,将默认的src的那行代码删掉,重新将自定义图片设置为背景,方框就消失了(或者可以不改变src,将背景设置为透明)
android:background="@mipmap/circle_file"
接下来要给这个图片按钮设置位置。
虽然你将图片拖动到了你想要的位置,但是在运行的时候因为没有位置约束,图片会自动加载在左上角。
Android Studio 3.0 及以上支持使用ConstraintLayout构建自适应界面
官方指南ConstraintLayout
ConstraintLayout 可让您使用扁平视图层次结构(无嵌套视图组)创建复杂的大型布局。它与 RelativeLayout 相似,其中所有的视图均根据同级视图与父布局之间的关系进行布局,但其灵活性要高于 RelativeLayout,并且更易于与 Android Studio 的布局编辑器配合使用。
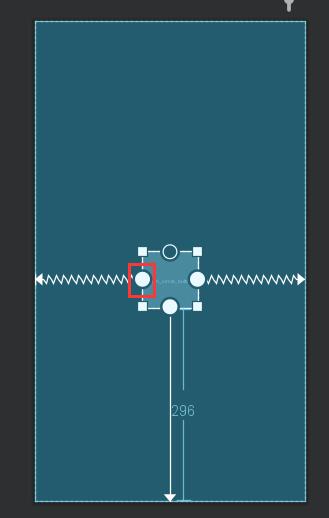
通过拖动四个边上的圆圈到你想设置约束的地方(想以谁为标准设置相对位置)
此处设置了左右和下三个约束
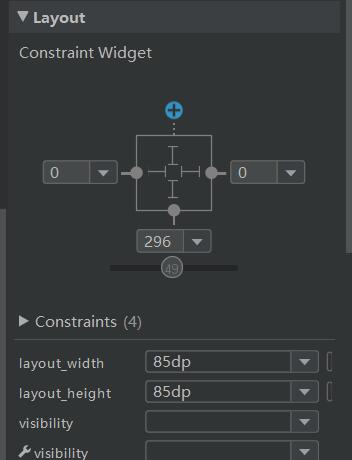
在右边可以修改约束的参数和图片按钮的宽高
参考设置如下
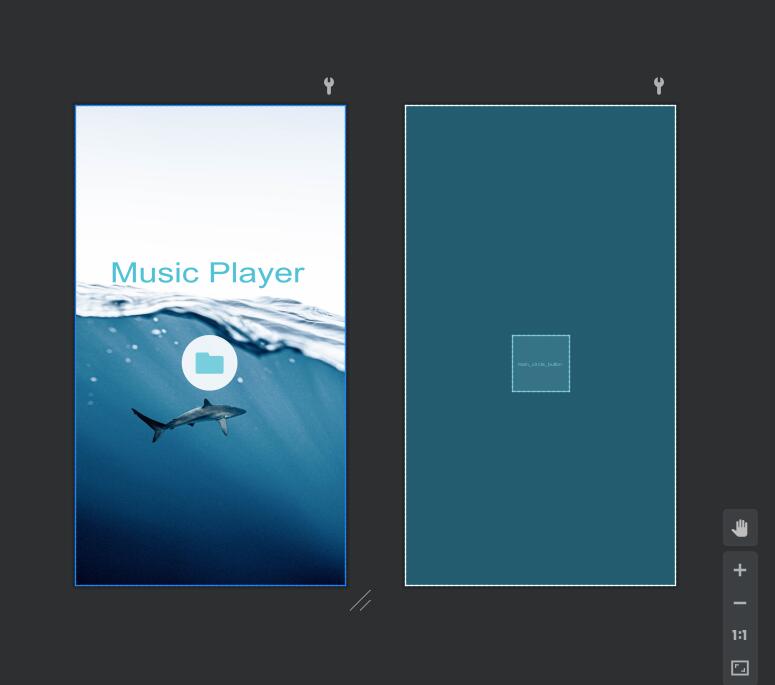
最终效果如图
activity_main.xml完整代码如下
<?xml version="1.0" encoding="utf-8"?>
<androidx.constraintlayout.widget.ConstraintLayout xmlns:android="http://schemas.android.com/apk/res/android"
    xmlns:app="http://schemas.android.com/apk/res-auto"
    xmlns:tools="http://schemas.android.com/tools"
    android:layout_width="match_parent"
    android:layout_height="match_parent"
    android:background="@mipmap/main_bg"
    tools:context=".MainActivity">

    <ImageButton
        android:id="@+id/main_circle_button"
        android:layout_width="85dp"
        android:layout_height="85dp"
        android:layout_marginBottom="296dp"
        android:background="@mipmap/circle_file"
        app:layout_constraintBottom_toBottomOf="parent"
        app:layout_constraintEnd_toEndOf="parent"
        app:layout_constraintHorizontal_bias="0.498"
        app:layout_constraintStart_toStartOf="parent" />
</androidx.constraintlayout.widget.ConstraintLayout>
然后是Activity的编写,Activity 是与用户交互的入口点,它表示拥有界面的单个屏幕
首页的对应的文件为java - com.example.mysongplayer下默认生成的MainActivity
为首页的按钮绑定点击事件(onClick),实现点击跳转至歌曲列表
为按钮绑定事件有两种方法:
1.java文件中通过java代码实现按钮功能的绑定
2.在界面设计的xml文件中,在相应的控件中直接绑定功能函数
此处采用方法1,先实例化按钮
ImageButton mButton = null;
进行功能事件绑定,在onCreate函数内
mButton = (ImageButton)findViewById(R.id.main_circle_button);
        mButton.setOnClickListener(new View.OnClickListener() {
            @Override
            public void onClick(View v) {
            	//下面是自己想要实现的功能
            	//此处实现跳转
                Intent intent = new Intent();
                //Music_List为跳转后到达的页面
                intent.setClass(MainActivity.this, Music_List.class);
                startActivity(intent);
            }
Intent是一个消息传递对象,可以通过多种方式促进组件之间的通信。此处用于启动Activity,Activity 表示应用中的一个屏幕。通过将 Intent 传递给startActivity(),您可以启动新的 Activity 实例。Intent 用于描述要启动的 Activity,并携带任何必要的数据。
MainActivity的完整代码如下
public class MainActivity extends AppCompatActivity {
    ImageButton mButton = null;

    @Override
    protected void onCreate(Bundle savedInstanceState) {
        super.onCreate(savedInstanceState);
        setContentView(R.layout.activity_main);
        mButton = (ImageButton)findViewById(R.id.main_circle_button);
        mButton.setOnClickListener(new View.OnClickListener() {
            @Override
            public void onClick(View v) {
                Intent intent = new Intent();
                intent.setClass(MainActivity.this, Music_List.class);
                startActivity(intent);
            }
        });
    }
}
四、显示歌曲列表
首先先写布局文件
歌曲列表需要一个一行一行显示的列表布局(List) + 每一行是如何显示的列表项布局(item)
在res - layout下右键新建Layout Resouse File,一个命名为music_list,一个命名为music_item

先编写music_item.xml 列表项布局
显示的效果如下

分析可得由图像+歌名+歌手组成
切换至Design可视化工具
从左边找到一个ImageView(图像视图),用来显示图像的一个控件,拖入手机中偏左上角的位置,设置其id为song_cover,srcCompat设置为你设计的图片,此处设置大小为50dp x 50dp。
约束为离左边缘14dp,上边缘16dp
分别拖入两个TextView来显示歌名和歌手,设置id为song_name,song_singer。大小为wrap_content 即根据内容自动调整大小。
约束为左侧离ImageView的5dp,歌名离上边缘16dp,两个TextView之间相隔5dp
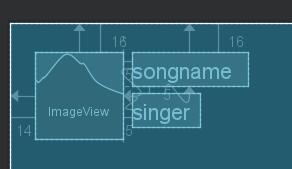
最终效果如下

music_item.xml 完整代码如下
<?xml version="1.0" encoding="utf-8"?>
<androidx.constraintlayout.widget.ConstraintLayout xmlns:android="http://schemas.android.com/apk/res/android"
    xmlns:app="http://schemas.android.com/apk/res-auto"
    xmlns:tools="http://schemas.android.com/tools"
    android:layout_width="match_parent"
    android:layout_height="match_parent">

    <ImageView
        android:id="@+id/song_cover"
        android:layout_width="50dp"
        android:layout_height="50dp"
        android:layout_marginStart="14dp"
        android:layout_marginLeft="14dp"
        android:layout_marginTop="16dp"
        app:layout_constraintStart_toStartOf="parent"
        app:layout_constraintTop_toTopOf="parent"
        app:srcCompat="@raw/music" />

    <TextView
        android:id="@+id/song_name"
        android:layout_width="wrap_content"
        android:layout_height="wrap_content"
        android:layout_marginStart="5dp"
        android:layout_marginLeft="5dp"
        android:layout_marginTop="16dp"
        android:text="songname"
        app:layout_constraintStart_toEndOf="@+id/song_cover"
        app:layout_constraintTop_toTopOf="parent" />

    <TextView
        android:id="@+id/song_singer"
        android:layout_width="wrap_content"
        android:layout_height="wrap_content"
        android:layout_marginStart="5dp"
        android:layout_marginLeft="5dp"
        android:layout_marginTop="5dp"
        android:text="singer"
        app:layout_constraintStart_toEndOf="@+id/song_cover"
        app:layout_constraintTop_toBottomOf="@+id/song_name" />
</androidx.constraintlayout.widget.ConstraintLayout>
下面编写music_list.xml
从左边Legacy中找到ListView拖入右边
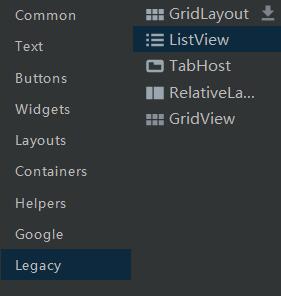
按照它默认的占满整个屏幕就行
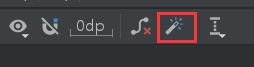
点击Infer Constraints 快速创建约束
到此音乐列表的布局就完成了
下面是 java 的编写
先创建一个类来存放歌曲信息
在java - com.example.mysongplayer 下右键new一个java class,命名为Song
public class Song {
    //用于存放歌曲的歌名、歌手等信息

    private String name;//歌曲名
    private String singer;//歌手
    private long size;//歌曲所占空间大小
    private int duration;//歌曲时间长度
    private String path;//歌曲地址
    private long  albumId;//图片id
    private long id;//歌曲id
    public Song(String name,String singer,String path,long size,long albumId,long id,int duration){
        this.name=name;
        this.singer=singer;
        this.path=path;
        this.size=size;
        this.albumId=albumId;
        this.id=id;
        this.duration=duration;
    }
    public Song(){

    }
    public long getAlbumId()
    {
        return albumId;
    }

    public void setAlbumId(long albumId)
    {
        this.albumId = albumId;
    }

    public long getId()
    {
        return id;
    }

    public void setId(long id)
    {
        this.id = id;
    }

    public String getName() {
        return name;
    }

    public void setName(String name) {
        this.name = name;
    }

    public String getSinger() {
        return singer;
    }

    public void setSinger(String singer) {
        this.singer = singer;
    }

    public long getSize() {
        return size;
    }

    public void setSize(long size) {
        this.size = size;
    }

    public int getDuration() {
        return duration;
    }

    public void setDuration(int duration) {
        this.duration = duration;
    }

    public String getPath() {
        return path;
    }

    public void setPath(String path) {
        this.path = path;
    }
}
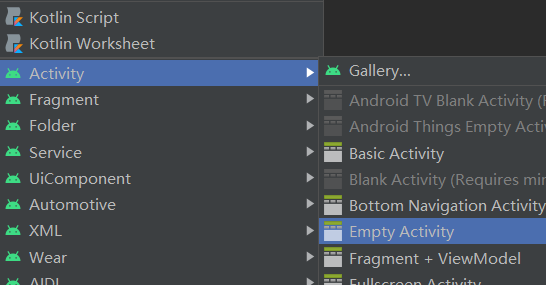
再右键new一个empty Activity,命名为Music_List,用来显示歌曲列表
先实例化一个歌曲列表list
private List<Song> list=new ArrayList<Song>();
本项目实现的是从手机存储空间读取音乐
在pick()函数中实现,位置与onCreate平行
private List<Song> pick(){
        List<Song> list=new ArrayList<Song>();
        Song song=null;
        //创建一个LocalMusicUtils来获取我们设备本地的音乐
        //通过getContentResolver()获取到contentPervider的cursor对象
        Cursor cursor= getApplicationContext().getContentResolver().query(MediaStore.Audio.Media.EXTERNAL_CONTENT_URI,
                null,null,null, MediaStore.Audio.Media.DEFAULT_SORT_ORDER);
        //放到list中去
        if(cursor!=null){
            while (cursor.moveToNext()){
                song=new Song();
                //获取名字等信息
                String name=cursor.getString(cursor.getColumnIndexOrThrow(MediaStore.Audio.Media.DISPLAY_NAME));
                String singer=cursor.getString(cursor.getColumnIndexOrThrow(MediaStore.Audio.Media.ARTIST));
                String path=cursor.getString(cursor.getColumnIndexOrThrow(MediaStore.Audio.Media.DATA));
                int duration=cursor.getInt(cursor.getColumnIndexOrThrow(MediaStore.Audio.Media.DURATION));
                long size=cursor.getLong(cursor.getColumnIndexOrThrow(MediaStore.Audio.Media.SIZE));
                long albumid=cursor.getLong(cursor.getColumnIndexOrThrow(MediaStore.Audio.Media.ALBUM_ID));
                long id=cursor.getLong(cursor.getColumnIndexOrThrow(MediaStore.Audio.Media._ID));
                //有的时候名字和歌手会放在一起
                if(name.contains("-")){
                    String[] str=name.split("-");
                    singer=str[0];
                    name=str[1];
                }

                //把它放入song中
                song.setName(name);
                song.setSinger(singer);
                song.setPath(path);
                song.setDuration(duration);
                song.setSize(size);
                song.setAlbumId(albumid);
                song.setId(id);

                //把建好的歌曲信息放入list中
                //除去Unknown的作者
                if(!singer.contains("unknown")) {
                    list.add(song);
                }
            }
        }
        cursor.close();
        return list;
    }
从手机取出数据后要想显示到前端的View中,需要使用适配器 Adapter
右键 new 一个 java class 命名为SongAdapter,继承ArrayAdapter
列表的展示需要
1.listview 展示列表的view
2.适配器 把数据映射到ListView上的中介
3.数据 具体的将被映射的字符串,图片,或者基本组件
//连接后端数据和前端显示的适配器接口,数据和View之间的纽带
public class SongAdapter extends ArrayAdapter {
    private final int resourceid;
    public SongAdapter(Context context, int textViewResourceid, List<Song> songs){
        super(context,textViewResourceid,songs);
        resourceid=textViewResourceid;
    }
    @SuppressLint("ResourceType")
    public View getView(int positon , View convertView, ViewGroup parent){
        Song song=(Song)getItem(positon);
        View view = LayoutInflater.from(getContext()).inflate(resourceid,null);
        ImageView songImage=(ImageView)view.findViewById(R.id.song_cover);
        TextView textView=(TextView)view.findViewById(R.id.song_name);
        TextView singer_View=(TextView)view.findViewById(R.id.song_singer);
        songImage.setImageResource(R.raw.music);
        textView.setText(song.getName());
        singer_View.setText(song.getSinger());
        return view;
    }

}
再返回到 Music_List.java 编写初始化函数init()
功能如下:
1.从手机中读取音乐再放入list中
2.显示歌曲列表
3.点击列表中的歌曲跳转到播放界面
 private void init(){
        SongAdapter songAdapter=new SongAdapter(
                Music_List.this,R.layout.music_item,list
        );

        List<String> data=new ArrayList<String>();
        Iterator<Song> iterator=list.iterator();
        while (iterator.hasNext()){
            Song song=(Song) iterator.next();
            data.add(song.getName()+"-"+song.getSinger());
        }
        if(data.isEmpty()){//打印日志
            Log.i("tt","list is empty");
        }
        else{
            Log.i("tt","list is not empty");
        }
        ArrayAdapter<String> arrayAdapter=new ArrayAdapter<String>(
                Music_List.this,android.R.layout.simple_expandable_list_item_1,data
        );
        ListView listView=(ListView)findViewById(R.id.List_song);
        listView.setAdapter(songAdapter);
        //点击音乐跳转到播放界面
       listView.setOnItemClickListener(new AdapterView.OnItemClickListener() {
            @Override
            public void onItemClick(AdapterView<?> parent, View view, int position, long id) {
                Song song = list.get(position);
                Log.i("tt", song.getName());
                Log.i("tt", song.getPath());
                //跳转到播放界面
                if (intent == null) {
                    intent = new Intent(Music_List.this, MusicActivity.class);
                    intent.putExtra("path", song.getPath());
                    intent.putExtra("song_name", song.getName());
                    intent.putExtra("singer", song.getSinger());
                    finish();
                    startActivity(intent);
                } else {
                    Toast.makeText(Music_List.this,"还有歌曲在播放",Toast.LENGTH_SHORT);
                }
            }
        });
    }
读取手机的存储空间需要向用户获取权限,Android 6.0 之后需要动态获取权限
打开 app - manifests 目录下的AndroidManifest.xml
在application上面添加一句
<uses-permission android:name="android.permission.READ_EXTERNAL_STORAGE" />
然后在Music_List里编写动态申请权限的代码
//动态申请权限
//用户选择是否同意授权后,会回调这个方法
    @Override
    public void onRequestPermissionsResult(int requestCode, @NonNull String[] permissions, @NonNull int[] grantResults) {
        if(requestCode==1){
            if(permissions[0].equals(Manifest.permission.READ_EXTERNAL_STORAGE)&&grantResults[0]== PackageManager.PERMISSION_GRANTED){
                //用户同意授权,执行读取文件的代码
                list = pick();
                if(list.isEmpty()){//打印日志
                    Log.i("tt","list is empty");
                }
                else{
                    Log.i("tt","list is not empty");
                }
                init();
            }else{
                //若用户不同意授权,直接暴力退出应用。
                finish();
            }
        }
    }
在 onCreate 函数中初始化时调用上述方法
 @Override
    protected void onCreate(Bundle savedInstanceState) {
        super.onCreate(savedInstanceState);
        setContentView(R.layout.music_list);

        //检查当前权限(若没有该权限,值为-1;若有该权限,值为0)
        int hasReadExternalStoragePermission = ContextCompat.checkSelfPermission(getApplication(),Manifest.permission.READ_EXTERNAL_STORAGE);
        Log.e("PERMISION_CODE",hasReadExternalStoragePermission+"***");
        if(hasReadExternalStoragePermission== PackageManager.PERMISSION_GRANTED){
            list = pick();
            if(list.isEmpty()){//打印日志
                Log.i("tt","list is empty");
            }
            else{
                Log.i("tt","list is not empty");
            }
            init();
        }else{
            //若没有授权,会弹出一个对话框(这个对话框是系统的,开发者不能自己定制),用户选择是否授权应用使用系统权限
            ActivityCompat.requestPermissions(this,new String[]{Manifest.permission.READ_EXTERNAL_STORAGE},1);
        }

    }
五、播放音乐的服务
下面编写实现播放音乐的Service
服务是一个通用入口点,用于因各种原因使应用在后台保持运行状态。它是一种在后台运行的组件,用于执行长时间运行的操作或为远程进程执行作业。服务不提供界面。例如,当用户使用其他应用时,服务可能会在后台播放音乐或通过网络获取数据,但这不会阻断用户与 Activity 的交互。诸如 Activity 等其他组件可以启动服务,使该服务运行或绑定到该服务,以便与其进行交互。
需要使用 MediaPlayer
MediaPlayer API,播放存储在应用资源(原始资源)内的媒体文件、文件系统中的独立文件或者通过网络连接获得的数据流中的音频或视频。
此类的对象能够获取、解码以及播放音频和视频,而且只需极少量设置。
右键 new 一个 Service - Service,命名为 MusicService
参考 MediaPlayer 的文档来进行编写
Binder 用于跨进程通信
public class MusicService extends Service {
    private MediaPlayer player;
    private Timer timer;
    public MusicService() {}

    @Override
    public IBinder onBind(Intent intent) {
        return new MusicControl();
    }

    @Override
    public void onCreate(){
        super.onCreate();
        //创建音乐播放器对象
        player = new MediaPlayer();
    }

    //添加用于进度条的计时器
    public void addTimer(){
        if(timer == null){
            timer = new Timer();
            TimerTask task = new TimerTask() {
                @Override
                public void run() {
                    if(player == null) return;
                    //获取歌曲总时长
                    int duration = player.getDuration();
                    //获取播放进度
                    int currentPosition = player.getCurrentPosition();
                    //创建消息对象
                    Message msg = MusicActivity.handler.obtainMessage();
                    //封装总时长和播放进度至消息对象
                    Bundle bundle = new Bundle();
                    bundle.putInt("duration", duration);
                    bundle.putInt("currentPosition", currentPosition);
                    msg.setData(bundle);
                    //发送消息至主线程的消息队列
                    MusicActivity.handler.sendMessage(msg);

                }
            };
            //开始计时后5ms第一次执行task,此后每500ms执行一次
            timer.schedule(task, 5, 500);

        }
    }

    class MusicControl extends Binder{
        //使用Binder跨进程通信
        public void play(String path){
            //File file = new File(path);
            try{
                //重置音乐播放器
                player.reset();
                //加载多媒体文件
                player = new MediaPlayer();
                //设置播放源
                player.setDataSource(path);
                player.prepare();
                //播放音乐
                player.start();
                //添加计时器
                addTimer();
            }catch (Exception e){
                //捕捉异常不然会报错
                e.printStackTrace();
            }
        }
        //暂停播放
        public void pausePlay(){
                player.pause();
        }
        //继续播放
        public void continuePlay(){
            player.start();
        }
        //设置音乐的播放位置
        public void seekTo(int progress){
            player.seekTo(progress);
        }
    }
    //释放播放器资源
    @Override
    public void onDestroy(){
        super.onDestroy();
        if(player == null) return;
        //停止播放
        if(player.isPlaying())
            player.stop();
        player.release();
        //将player置为空
        player = null;
    }

}
六、实现播放音乐
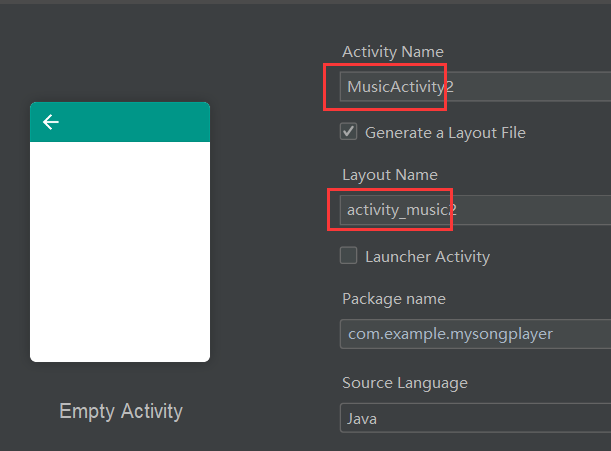
右键 new 一个 Empty Activity,命名为 MusicActivity,并命名其对应布局文件为activity_music.xml
先编写布局文件 activity_music.xml
分析界面的元素有
1.一个能播放、暂停的按钮
2.显示歌名
3.显示歌手
4.一个可拖动的进度条
5.显示播放时间
6.显示歌曲总时长
7.一个能返回音乐列表的按钮
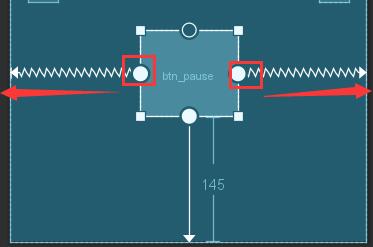
从左边找到ImageButton拖至右边,设置id为btn_pause,先暂时设置一个自定义src,播放/暂停的两个图将在java代码中实现更换,background 设置为透明
android:background="#00FFFFFF"
位置约束:垂直方向距离屏幕最底端145dp;水平方向居中,拖动左右两个圆圈都连至左/右边缘即可
新建两个TextView分别显示歌名(id=thesong_name)和歌手(id=thesong_singer),宽layout_width设为wrap_content根据文字长度自适应,歌名字号设为40sp,歌名字号设为20sp,颜色按照喜好修改
android:textSize="40sp"
位置约束:歌手垂直方向距屏幕最顶端300dp,距屏幕左端20dp;歌名垂直方向距歌手8dp,距屏幕左端20dp
新建一个SeekBar作为歌曲播放进度条,id为seekB。两个TextView分别显示当前播放时间(id=tv_progress)和全曲长度(id=tv_total)
新建一个Button,id设为btn_backlist,作为返回歌曲列表的按钮。
长宽和位置约束根据之前的教学自行调整合适即可
播放界面效果如下

完整的布局代码activity_music.xml如下
<?xml version="1.0" encoding="utf-8"?>
<androidx.constraintlayout.widget.ConstraintLayout xmlns:android="http://schemas.android.com/apk/res/android"
    xmlns:app="http://schemas.android.com/apk/res-auto"
    xmlns:tools="http://schemas.android.com/tools"
    android:layout_width="match_parent"
    android:layout_height="match_parent"
    android:background="@mipmap/music_bg"
    tools:context=".MusicActivity">

    <SeekBar
        android:id="@+id/seekB"
        android:layout_width="0dp"
        android:layout_height="30dp"
        android:layout_marginStart="5dp"
        android:layout_marginLeft="5dp"
        android:layout_marginTop="405dp"
        android:layout_marginEnd="5dp"
        android:layout_marginRight="5dp"
        app:layout_constraintEnd_toEndOf="parent"
        app:layout_constraintHorizontal_bias="1.0"
        app:layout_constraintStart_toStartOf="parent"
        app:layout_constraintTop_toTopOf="parent" />

    <ImageButton
        android:id="@+id/btn_pause"
        android:layout_width="112dp"
        android:layout_height="99dp"
        android:layout_marginBottom="145dp"
        android:background="#00FFFFFF"
        android:src="@mipmap/start"
        app:layout_constraintBottom_toBottomOf="parent"
        app:layout_constraintEnd_toEndOf="parent"
        app:layout_constraintStart_toStartOf="parent" />

    <TextView
        android:id="@+id/thesong_name"
        android:layout_width="wrap_content"
        android:layout_height="0dp"
        android:layout_marginStart="20dp"
        android:layout_marginLeft="20dp"
        android:layout_marginTop="300dp"
        android:text="songname"
        android:textSize="40sp"
        android:textColor="#51C2D5"
        app:layout_constraintStart_toStartOf="parent"
        app:layout_constraintTop_toTopOf="parent" />

    <TextView
        android:id="@+id/thesong_singer"
        android:layout_width="wrap_content"
        android:layout_height="0dp"
        android:layout_marginStart="20dp"
        android:layout_marginLeft="20dp"
        android:layout_marginTop="8dp"
        android:text="singer"
        android:textSize="20sp"
        android:textColor="#A4EBF3"
        app:layout_constraintStart_toStartOf="parent"
        app:layout_constraintTop_toBottomOf="@+id/thesong_name" />

    <ImageButton
        android:id="@+id/btn_backlist"
        android:layout_width="44dp"
        android:layout_height="35dp"
        android:layout_marginTop="14dp"
        android:layout_marginEnd="14dp"
        android:layout_marginRight="14dp"
        android:background="@mipmap/normal_file"
        app:layout_constraintEnd_toEndOf="parent"
        app:layout_constraintTop_toTopOf="parent" />

    <TextView
        android:id="@+id/tv_progress"
        android:layout_width="wrap_content"
        android:layout_height="wrap_content"
        android:layout_marginStart="20dp"
        android:layout_marginLeft="20dp"
        android:layout_marginTop="1dp"
        android:text="00:00"
        app:layout_constraintStart_toStartOf="parent"
        app:layout_constraintTop_toBottomOf="@+id/seekB" />

    <TextView
        android:id="@+id/tv_total"
        android:layout_width="wrap_content"
        android:layout_height="wrap_content"
        android:layout_marginTop="1dp"
        android:layout_marginEnd="20dp"
        android:layout_marginRight="20dp"
        android:text="00:00"
        app:layout_constraintEnd_toEndOf="parent"
        app:layout_constraintTop_toBottomOf="@+id/seekB" />
 </androidx.constraintlayout.widget.ConstraintLayout>
下面编写MusicActivity.java
播放/暂停键的图片切换通过一个int类型的pauseIndex来实现。初值设为0,每次触发按钮都+1,奇数为暂停,偶数为播放
使用setImageResource方法更换按钮背景图
播放音乐的路径由意图对象intent1从Music_List这个Activity传递过来
下列代码绑定了播放/暂停和返回音乐列表的按钮点击事件
    @RequiresApi(api = Build.VERSION_CODES.KITKAT)
    @Override
    public void onClick(View v){
        btn_pause = (ImageButton)findViewById(R.id.btn_pause);
        //点击暂停/播放按钮
        if (v.getId() == R.id.btn_pause){
            //第一次点击,开始播放
            if(pauseIndex == 0) {
                pauseIndex++;
                btn_pause.setImageResource(R.mipmap.stop);
                String path = intent1.getStringExtra("path");
                musicControl.play(path);
            }else if(pauseIndex % 2 == 1){
                pauseIndex++;
                btn_pause.setImageResource(R.mipmap.start);
                musicControl.pausePlay();
            }else{//index为偶数,继续播放
                pauseIndex++;
                btn_pause.setImageResource(R.mipmap.stop);
                musicControl.continuePlay();
            }
        }
        //点击返回文件列表,退出播放
        if(v.getId() == R.id.btn_backlist){
            unbind(isUnbind);
            isUnbind = true;
            Intent intent3 = new Intent();
            intent3.setClass(MusicActivity.this, Music_List.class);
            startActivity(intent3);
        }
    }
接下来编写消息处理器,根据子线程传来的音乐播放进度显示到对应的TextView中
 //创建消息处理器对象
    public static Handler handler = new Handler(){
        //在主线程中处理子线程发送过来的消息
        @Override
        public void handleMessage(Message msg){
            //获取从子线程发送过来的音乐播放进度
            Bundle bundle = msg.getData();
            int duration = bundle.getInt("duration");
            int currentPosition = bundle.getInt("currentPosition");
            seekB.setMax(duration);
            seekB.setProgress(currentPosition);
            //歌曲总时长
            int minute = duration/1000/60;
            int second = duration/1000%60;
            String strMinute = null;
            String strSecond = null;
            //歌曲中的分<10
            if(minute < 10){
                //在分的前面加一个0
                strMinute = "0" + minute;
            }else {
                strMinute = minute+"";
            }
            //歌曲中的秒 <10
            if(second < 10){
                strSecond = "0" + second;
            }else{
                strSecond = second + "";
            }
            tv_total.setText(strMinute + ":" + strSecond);

            //获取音乐的总时长
            minute = currentPosition/1000/60;
            second = currentPosition/1000%60;
            //歌曲中的分<10
            if(minute < 10){
                //在分的前面加一个0
                strMinute = "0" + minute;
            }else {
                strMinute = minute+"";
            }
            //歌曲中的秒 <10
            if(second < 10){
                strSecond = "0" + second;
            }else{
                strSecond = second + "";
            }
            tv_progress.setText(strMinute + ":" + strSecond);

        }
    };
根据以上这些方法进行初始化,编写init()方法
private void init(){
        //绑定各个组件
        tv_progress = (TextView)findViewById(R.id.tv_progress);
        tv_total = (TextView)findViewById(R.id.tv_total);
        seekB = (SeekBar)findViewById(R.id.seekB);
        thesong_name = (TextView)findViewById(R.id.thesong_name);
        thesong_singer = (TextView)findViewById(R.id.thesong_singer);

        findViewById(R.id.btn_pause).setOnClickListener(this);
        findViewById(R.id.btn_backlist).setOnClickListener(this);

        //接收来自intent1的消息
        name = intent1.getStringExtra("song_name");
        singer = intent1.getStringExtra("singer");
        //写入TextView中
        thesong_name.setText(name);
        thesong_singer.setText(singer);

        //创建意图对象
        intent2 = new Intent(this, MusicService.class);
        //创建服务连接对象
        conn = new MyServiceConn();
        //绑定服务
        bindService(intent2, conn, BIND_AUTO_CREATE);
        //给滑动条添加事件监听
        seekB.setOnSeekBarChangeListener(new SeekBar.OnSeekBarChangeListener(){
            @RequiresApi(api = Build.VERSION_CODES.KITKAT)
            @Override
            public void onProgressChanged(SeekBar seekBar, int progress, boolean fromUser){
                //进度条改变时调用此方法
            }
            @Override
            public void onStartTrackingTouch(SeekBar seekBar) {//滑动条开始时调用
            }
            @Override
            public void onStopTrackingTouch(SeekBar seekBar){//滑动条停止时调用
                //根据拖动的进度调整音乐播放进度
                //获取进度条的进度
                int progress = seekBar.getProgress();
                //改变播放进度
                musicControl.seekTo(progress);
            }

        });

    }
MusicActivity.java 完整代码如下
public class MusicActivity extends AppCompatActivity implements View.OnClickListener {
    private static SeekBar seekB;
    private static TextView tv_progress, tv_total, thesong_name, thesong_singer;
    private static ImageButton btn_pause;
    private MusicService.MusicControl musicControl;
    String name, singer;
    Intent intent1, intent2;
    MyServiceConn conn;
    private boolean isUnbind = false;//记录服务是否被解绑
    private int pauseIndex = 0;//记录按钮为播放还是暂停,奇数暂停,偶数播放

    @Override
    protected void onCreate(Bundle savedInstanceState) {
        super.onCreate(savedInstanceState);
        setContentView(R.layout.activity_music);
        intent1 = getIntent();
        init();
    }

    private void init(){
        //绑定各个组件
        tv_progress = (TextView)findViewById(R.id.tv_progress);
        tv_total = (TextView)findViewById(R.id.tv_total);
        seekB = (SeekBar)findViewById(R.id.seekB);
        thesong_name = (TextView)findViewById(R.id.thesong_name);
        thesong_singer = (TextView)findViewById(R.id.thesong_singer);

        findViewById(R.id.btn_pause).setOnClickListener(this);
        findViewById(R.id.btn_backlist).setOnClickListener(this);

        //接收来自intent1的消息
        name = intent1.getStringExtra("song_name");
        singer = intent1.getStringExtra("singer");
        //写入TextView中
        thesong_name.setText(name);
        thesong_singer.setText(singer);

        //创建意图对象
        intent2 = new Intent(this, MusicService.class);
        //创建服务连接对象
        conn = new MyServiceConn();
        //绑定服务
        bindService(intent2, conn, BIND_AUTO_CREATE);
        //给滑动条添加事件监听
        seekB.setOnSeekBarChangeListener(new SeekBar.OnSeekBarChangeListener(){
            @RequiresApi(api = Build.VERSION_CODES.KITKAT)
            @Override
            public void onProgressChanged(SeekBar seekBar, int progress, boolean fromUser){
                //进度条改变时调用此方法
            }
            @Override
            public void onStartTrackingTouch(SeekBar seekBar) {//滑动条开始时调用
            }
            @Override
            public void onStopTrackingTouch(SeekBar seekBar){//滑动条停止时调用
                //根据拖动的进度调整音乐播放进度
                //获取进度条的进度
                int progress = seekBar.getProgress();
                //改变播放进度
                musicControl.seekTo(progress);
            }

        });

    }

    //创建消息处理器对象
    public static Handler handler = new Handler(){
        //在主线程中处理子线程发送过来的消息
        @Override
        public void handleMessage(Message msg){
            //获取从子线程发送过来的音乐播放进度
            Bundle bundle = msg.getData();
            int duration = bundle.getInt("duration");
            int currentPosition = bundle.getInt("currentPosition");
            seekB.setMax(duration);
            seekB.setProgress(currentPosition);
            //歌曲总时长
            int minute = duration/1000/60;
            int second = duration/1000%60;
            String strMinute = null;
            String strSecond = null;
            //歌曲中的分<10
            if(minute < 10){
                //在分的前面加一个0
                strMinute = "0" + minute;
            }else {
                strMinute = minute+"";
            }
            //歌曲中的秒 <10
            if(second < 10){
                strSecond = "0" + second;
            }else{
                strSecond = second + "";
            }
            tv_total.setText(strMinute + ":" + strSecond);

            //获取音乐的总时长
            minute = currentPosition/1000/60;
            second = currentPosition/1000%60;
            //歌曲中的分<10
            if(minute < 10){
                //在分的前面加一个0
                strMinute = "0" + minute;
            }else {
                strMinute = minute+"";
            }
            //歌曲中的秒 <10
            if(second < 10){
                strSecond = "0" + second;
            }else{
                strSecond = second + "";
            }
            tv_progress.setText(strMinute + ":" + strSecond);

        }
    };

    //实现连接服务
    class MyServiceConn implements ServiceConnection{
        @Override
        public void onServiceConnected(ComponentName name, IBinder service){
            musicControl = (MusicService.MusicControl) service;
        }
        @Override
        public void onServiceDisconnected(ComponentName name){}

    }

    //判断服务是否解绑
    private void unbind(boolean isUnbind){
        if(!isUnbind){
            //暂停播放音乐
            musicControl.pausePlay();
            //解绑服务
            unbindService(conn);
        }
    }

    @RequiresApi(api = Build.VERSION_CODES.KITKAT)
    @Override
    public void onClick(View v){
        btn_pause = (ImageButton)findViewById(R.id.btn_pause);
        //点击暂停/播放按钮
        if (v.getId() == R.id.btn_pause){
            //第一次点击,开始播放
            if(pauseIndex == 0) {
                pauseIndex++;
                btn_pause.setImageResource(R.mipmap.stop);
                String path = intent1.getStringExtra("path");
                musicControl.play(path);
            }else if(pauseIndex % 2 == 1){
                pauseIndex++;
                btn_pause.setImageResource(R.mipmap.start);
                musicControl.pausePlay();
            }else{//index为偶数,继续播放
                pauseIndex++;
                btn_pause.setImageResource(R.mipmap.stop);
                musicControl.continuePlay();
            }
        }
        //点击返回文件列表,退出播放
        if(v.getId() == R.id.btn_backlist){
            unbind(isUnbind);
            isUnbind = true;
            Intent intent3 = new Intent();
            intent3.setClass(MusicActivity.this, Music_List.class);
            startActivity(intent3);
        }
    }

    @Override
    protected void onDestroy(){
        super.onDestroy();
        //解绑服务
        unbind(isUnbind);
    }

}
项目完成,运行即可
最后
以上就是忐忑美女最近收集整理的关于【创新项目实训】Android移动开发教学app案例之音频播放器(二)一、开发环境二、项目介绍三、开始主界面四、显示歌曲列表五、播放音乐的服务六、实现播放音乐的全部内容,更多相关【创新项目实训】Android移动开发教学app案例之音频播放器(二)一、开发环境二、项目介绍三、开始主界面四、显示歌曲列表五、播放音乐内容请搜索靠谱客的其他文章。


发表评论 取消回复