目录
1.C7服务管理
2.systemctl管理服务:
3.切换操作环境:
4.实验使用systemctl管理源码包nginx:
1.C7服务管理
可执行文件要加上x执行权限才行。比如要开机自动创建/root/hf06文件
第一步:直接进行vim /etc/rc.d/rc.local打开,末行添加touch /root/hf06
第二步:reboot重启后查看没有生效
第三步:加上执行权限:chmod +x /etc/rc.d/rc.local
ll /etc/rc.d/rc.local 查看一下是否有x权限
第四步:reboot重启之后发现生效了,生成了hf06文件
1.1systemd的配置文件位置:
/usr/lib/systemd/system/: 服务启动脚本存放位置。
/run/systemd/system/: 系统执行过程中产生的服务脚本。
/etc/systemd/system/: 管理员根据自己主机系统的需求所创建的执行脚本。操作系统启动后到底会不会执行某些服务 其实是看/etc/systemd/system/目录的。
2.systemctl管理服务:
基本上服务的管理都是通过systemctl命令来完成的。
systemctl:管理服务状态,开机是否启动等。
格式: systemctl 选项 执行服务的守护进程名称
选项:
start: 启动服务。
stop: 停止服务。
restart: 重启。
reload: 不关闭服务的情况下,重新读取服务配置文件。
enable: 开机启动。
disable: 开机不启动。
status: 查看指定服务状态。
is-enable: 查看指定服务是否为开机启动。enabled启动/disable不启动。
查看系统上所有服务:
命令:systemctl
选项:
list-units:显示当前启动unit,添加--all选项则列出启动和未启动的所有unit。
list-unit-files:显示/usr/lib/systemd/system/的unit状态。
3.切换操作环境:
在centos7中虽然还是可以使用init * 的命令。但是已经没有了运行级别的概念。这种启动/运行级别的概念转变成了切换操作环境。那么我们可以切换的操作环境有:
1.graphical.target: 图形化界面。
2.multi-user.target: 命令行模式。
3.rescue.target: 救援模式。
4.emergency.target: 紧急处理系统的错误,需要使用root登录,再无法使用rescue.target的情况下可以尝试使用此模式。
5.shutdown.target: 关机。
4.实验使用systemctl管理源码包nginx:
- 实验准备:CentOS7.6版本192.168.132.163
2.[root@localhost ~]# mkdir  /lnmp/
3.[root@localhost ~]# cd /lnmp/
4.[root@localhost lnmp]# rz -E	#上传nginx-1.21.3.tar.gz源码包
5.[root@localhost lnmp]# vim  /etc/shells	#打开文件
/sbin/nologin    #在文件末尾添加此行内容
6.[root@localhost lnmp]# useradd -r -s /sbin/nologin nginx	#创建nginx用户
7.[root@localhost lnmp]# yum -y install gcc gcc-c++ cmake3 pcre pcre-devel libxml2 libxml2-devel zlib zlib-devel openssl openssl-devel  autoconf automake bison ncurses ncurses-devel php-mcrypt libmcrypt libmcrypt-devel freetype gd libpng libpng-devel libjpeg zlib curl curl-devel re2c net-snmp-devel libjpeg-devel freetype-devel  #解决依赖
8.[root@localhost lnmp]# tar -xf nginx-1.21.3.tar.gz 	#解压缩
9.[root@localhost lnmp]# cd nginx-1.21.3/
10.[root@localhost nginx-1.21.3]# ./configure --prefix=/usr/local/nginx --user=nginx --group=nginx  --with-http_ssl_module --with-http_v2_module --with-http_stub_status_module
  #执行文件
11.[root@localhost nginx-1.21.3]# echo $?
12.[root@localhost nginx-1.21.3]# make && make install	#编译安装
13.[root@localhost nginx-1.21.3]# echo $?
14.[root@localhost nginx-1.21.3]# cd  /usr/local/nginx/conf
15.[root@localhost conf]# vim nginx.conf	#进入配置文件
将#user  nobody;修改为user  nginx nginx;
将worker_processes  1;修改为worker_processes  auto;
16.[root@localhost conf]# vim  /etc/init.d/nginx	#创建命令管理脚本,添加如下内容:
#!/bin/bash
#Author:liu
#chkconfig: 2345 99 33
#description: nginx server control tools

ngxc="/usr/local/nginx/sbin/nginx"
ngxc_fpm="/usr/local/php/sbin/php-fpm"
case "$1" in
    start)
        $ngxc -t &> /dev/null
        if [ $? -eq 0 ];then
                $ngxc
                $ngxc_fpm
                echo "nginx service start success!"
        else
                $ngxc -t
        fi
        ;;
    stop)
        $ngxc  -s  stop
        killall  php-fpm
        echo "nginx service stop success!"
        ;;
    restart)
        $0 stop
        $0 start
        ;;
    reload)
        $ngxc -t &> /dev/null
        if [ $? -eq 0 ];then
               $ngxc  -s  reload
                pkill  -HUP  php-fpm
                echo "reload nginx config success!"
        else
                $ngxc -t
        fi
        ;;
    *)
        echo "please input stop|start|restart|reload."
        exit 1
esac
17.[root@localhost conf]# chmod  +x  /etc/init.d/nginx 	#添加权限
18.[root@localhost conf]# service  nginx  start	    #测试启动脚本
19.[root@localhost conf]# service  nginx  restart	#结束进程,重新加载
20.[root@localhost conf]# service  nginx  reload	#不结束进程,只重新加载
21.[root@localhost conf]# chkconfig nginx on	#设为开机自启动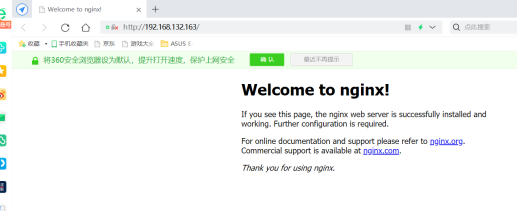
22.[root@localhost conf]# netstat -antp #查看发现nginx的80端口开启了- Windows浏览器中输入192.168.132.163访问,发现如下页面,nginx运行正常,如下图:
最后
以上就是矮小毛衣最近收集整理的关于37.CentOS7.X服务管理及实战的全部内容,更多相关37内容请搜索靠谱客的其他文章。


![[转]最详细的CentOS 6与CentOS 7对比(二):服务管理对比](https://www.shuijiaxian.com/files_image/reation/bcimg13.png)
![[CentOS7] 默认命令行启动/默认桌面启动/默认图形界面启动[CentOS7] 默认命令行启动/默认桌面启动/默认图形界面启动](https://www.shuijiaxian.com/files_image/reation/bcimg14.png)

发表评论 取消回复