本系列博文基于廖雪峰老师的官网Python教程,笔者在大学期间已经阅读过廖老师的Python教程,教程相当不错,官网链接: 廖雪峰官方网站.请需要系统学习Python的小伙伴到廖老师官网学习,笔者的编程环境是Anaconda+Pycharm,Python版本:Python3.
1.Pillow
# PIL:Python Imaging Library,图像处理库
# 1.操作图像
from PIL import Image

img = Image.open("J20.jpg")    # 打开图像文件
width, height = img.size    # 获取图像尺寸
print("Original image size:%s x %s" % (width, height))

img.thumbnail((width // 2, height // 2))  # 缩放到50%
print("Resize image to:%s x %s" % (width // 2, height // 2))

img.save("willard.jpg", "jpeg")  # 以jpeg格式保存

# 结果输出:
# Original image size:2116 x 2448
# Resize image to:1058 x 1224
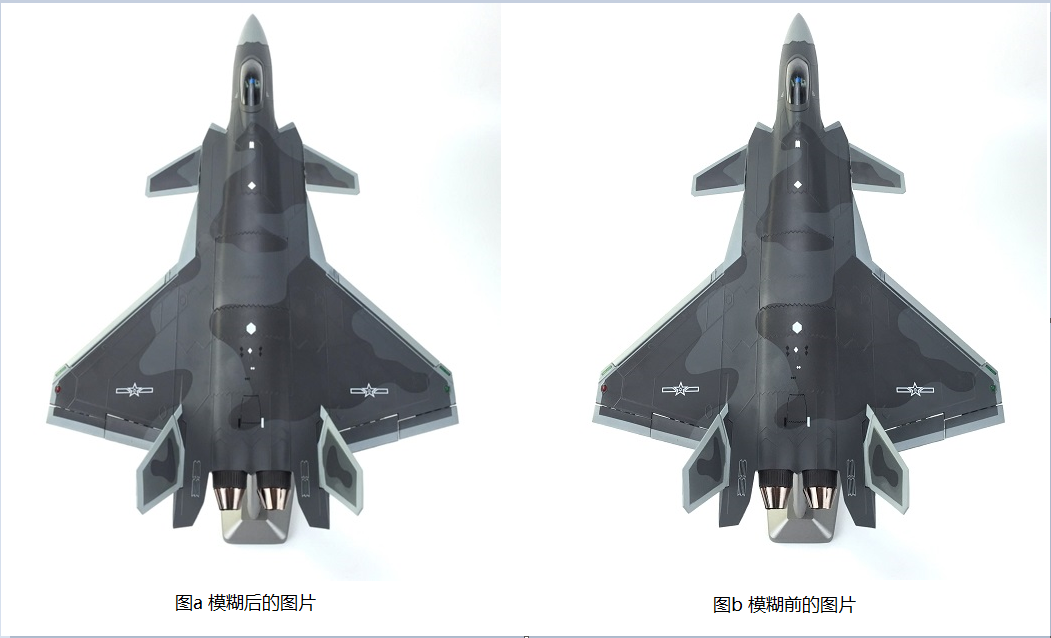
# 模糊效果
from PIL import Image, ImageFilter

# 打开图片
img1 = Image.open("J20.jpg")
img2 = img1.filter(ImageFilter.BLUR)
img2.save("blur.jpg", "jpeg")
# 生成字母验证码图片
from PIL import Image, ImageDraw, ImageFont, ImageFilter
import random

# 随机字母
def rndChar():
    return chr(random.randint(80, 90))

# 随机颜色1
def rndColor1():
    return (random.randint(64, 255), random.randint(64, 255), random.randint(64, 255))

# 随机颜色2
def rndColor2():
    return (random.randint(32, 127), random.randint(32, 127), random.randint(32, 127))

width = 60 * 4
height = 60

image = Image.new("RGB", (width, height), (255, 255, 255))
font = ImageFont.truetype("arial.ttf", 36)  # 创建Font对象
draw = ImageDraw.Draw(image)

# 填充每个像素
for x in range(width):
    for y in range(height):
        draw.point((x, y), fill = rndColor1())

# 输出文字
for t in range(4):
    draw.text((60 * t + 10, 10), rndChar(), font = font, fill = rndColor2())

# 模糊
image = image.filter(ImageFilter.BLUR)
image.save("code.jpg", "jpeg")
2.requests
# 使用requests
# 通过GET访问一个页面
import requests

request_get = requests.get("http://www.fsghzn.com/")
print("status_code:", request_get.status_code)
#print("text:", request_get.text)

# 结果输出:
# status_code: 200
# 带参数的URL
import requests

request_get = requests.get("http://www.fsghzn.com/", params = {"q" : "AGV", "cat": "1001"})
print("request_get.url:", request_get.url)
print("encoding:", request_get.encoding)
#print("获得bytes对象:", request_get.content)

# 结果输出:
# request_get.url: http://www.fsghzn.com/?q=AGV&cat=1001
# encoding: ISO-8859-1
3.chardet
# chardet:检测编码
import chardet

# encoding:编码方式为ascii;
# confidence:检测的概率,1.0
en_str = b"Welcome to FUXI Technology."
cn_str = "欢迎来到伏羲科技".encode("gbk")

print("en_str编码:n", chardet.detect(en_str))
print("---------------------------------------------------------")
print("cn_str编码:n", chardet.detect(cn_str))
# 结果输出:
en_str编码:
 {'encoding': 'ascii', 'confidence': 1.0, 'language': ''}
---------------------------------------------------------
cn_str编码:
 {'encoding': 'GB2312', 'confidence': 0.99, 'language': 'Chinese'}
4.psutil
# psutil:process and system utilities
# psutil:系统监控

import psutil

# 1.获取CPU信息
print("CPU逻辑数量:", psutil.cpu_count())
print("CPU物理核心:", psutil.cpu_count(logical = False))
print("统计CPU的用户、系统、空闲时间:")
print(psutil.cpu_times())
print("---------------------------------------------------------")

print("监控CPU是使用率:")
for x in range(5):
    print(psutil.cpu_percent(interval = 1, percpu = True))
# 结果输出:
CPU逻辑数量: 16
CPU物理核心: 8
统计CPU的用户、系统、空闲时间:
scputimes(user=25779.796875, system=19071.703124998137, idle=14269224.484375, interrupt=2578.703125, dpc=717.9375)
---------------------------------------------------------
监控CPU是使用率:
[0.0, 0.0, 1.6, 1.6, 3.2, 1.6, 0.0, 0.0, 0.0, 1.6, 0.0, 0.0, 1.6, 0.0, 3.1, 0.0]
[4.6, 3.1, 6.2, 3.1, 3.1, 4.7, 1.6, 0.0, 6.2, 1.6, 3.1, 0.0, 1.5, 0.0, 1.6, 0.0]
[0.0, 0.0, 0.0, 0.0, 0.0, 0.0, 0.0, 1.6, 3.1, 0.0, 0.0, 0.0, 0.0, 0.0, 0.0, 0.0]
[0.0, 0.0, 0.0, 1.6, 4.6, 4.8, 0.0, 0.0, 0.0, 1.6, 0.0, 0.0, 0.0, 0.0, 0.0, 0.0]
[0.0, 0.0, 0.0, 1.5, 0.0, 1.5, 1.5, 0.0, 1.5, 0.0, 0.0, 0.0, 0.0, 0.0, 0.0, 0.0]
# 2.获取内存信息
import psutil

print("获取物理内存:")
print(psutil.virtual_memory())
print("------------------------------------------------------------------")

print("获取交换内存信息:")
print(psutil.swap_memory())
# 结果输出:
获取物理内存:
svmem(total=16904769536, available=11956195328, percent=29.3, used=4948574208, free=11956195328)
------------------------------------------------------------------
获取交换内存信息:
sswap(total=19991777280, used=6579138560, free=13412638720, percent=32.9, sin=0, sout=0)
# 3.获取磁盘信息
import psutil

print("获取磁盘分区信息:")
print(psutil.disk_partitions())
print("----------------------------------------------------------------")

print("获取磁盘使用情况:")
print(psutil.disk_usage("/"))
print("----------------------------------------------------------------")

print("获取磁盘IO信息:")
print(psutil.disk_io_counters())
# 结果输出:
获取磁盘分区信息:
[sdiskpart(device='C:\', mountpoint='C:\', fstype='NTFS', opts='rw,fixed'), sdiskpart(device='D:\', mountpoint='D:\', fstype='NTFS', opts='rw,fixed'), sdiskpart(device='E:\', mountpoint='E:\', fstype='NTFS', opts='rw,fixed'), sdiskpart(device='F:\', mountpoint='F:\', fstype='NTFS', opts='rw,fixed')]
----------------------------------------------------------------
获取磁盘使用情况:
sdiskusage(total=297428578304, used=54766501888, free=242662076416, percent=18.4)
----------------------------------------------------------------
获取磁盘IO信息:
sdiskio(read_count=235029, write_count=1395100, read_bytes=7817571328, write_bytes=25201313792, read_time=147, write_time=791)
# 4.获取网络信息
import psutil

print("获取网络读写字节/包的个数:")
print(psutil.net_io_counters())
print("----------------------------------------------------------------")

print("获取网络接口信息:")
print(psutil.net_if_addrs())
print("----------------------------------------------------------------")

print("获取网络接口状态:")
print(psutil.net_if_stats())
print("----------------------------------------------------------------")

print("获取当前网络连接信息:")
print(psutil.net_connections())
# 5.获取进程信息
import psutil

print("获取所有进程ID:")
#print(psutil.pids())
print("----------------------------------------------------------------")

print("获取指定进程ID:")
print(psutil.Process(480))
print("----------------------------------------------------------------")

process = psutil.Process(480)
print("获取进程名称:")
print(process.name)
print("----------------------------------------------------------------")

print("获取进程exe路径:")
print(process.exe())
print("----------------------------------------------------------------")

print("获取进程工作目录:")
print(process.cwd())
print("----------------------------------------------------------------")

print("获取进程启动的命令行:")
print(process.cmdline())
print("----------------------------------------------------------------")

print("获取父进程ID:")
print(process.ppid())
print("----------------------------------------------------------------")

print("获取父进程:")
print(process.parent())
print("----------------------------------------------------------------")

print("获取子进程列表:")
print(process.children())
print("----------------------------------------------------------------")

print("获取进程状态:")
print(process.status())
print("----------------------------------------------------------------")

print("获取进程用户名:")
print(process.username())
print("----------------------------------------------------------------")

print("获取进程创建时间:")
print(process.create_time())
print("----------------------------------------------------------------")

# print("获取进程终端:")
# print(process.terminal())
# print("----------------------------------------------------------------")

print("获取进程使用的CPU时间:")
print(process.cpu_times())
print("----------------------------------------------------------------")

print("获取进程使用的内存:")
print(process.memory_info())
print("----------------------------------------------------------------")

print("获取进程打开的文件:")
print(process.open_files())
print("----------------------------------------------------------------")

print("获取进程相关网络连接:")
print(process.connections())
print("----------------------------------------------------------------")

print("获取进程的线程数量:")
print(process.threads())
print("----------------------------------------------------------------")

# print("获取进程环境变量:")
# print(process.environ())
# print("----------------------------------------------------------------")

print("结束进程:")
#print(process.terminate())
# 结果输出:
获取所有进程ID:
----------------------------------------------------------------
获取指定进程ID:
psutil.Process(pid=480, name='QQProtect.exe', started='2022-03-08 18:14:42')
----------------------------------------------------------------
获取进程名称:
<bound method Process.name of psutil.Process(pid=480, name='QQProtect.exe', started='2022-03-08 18:14:42')>
----------------------------------------------------------------
获取进程exe路径:
C:Program Files (x86)Common FilesTencentQQProtectBinQQProtect.exe
----------------------------------------------------------------
获取进程工作目录:
C:Windowssystem32
----------------------------------------------------------------
获取进程启动的命令行:
['C:\Program Files (x86)\Common Files\Tencent\QQProtect\Bin\QQProtect.exe']
----------------------------------------------------------------
获取父进程ID:
984
----------------------------------------------------------------
获取父进程:
psutil.Process(pid=984, name='services.exe', started='2022-03-06 16:44:24')
----------------------------------------------------------------
获取子进程列表:
[]
----------------------------------------------------------------
获取进程状态:
running
----------------------------------------------------------------
获取进程用户名:
NT AUTHORITYSYSTEM
----------------------------------------------------------------
获取进程创建时间:
1646734482.0
----------------------------------------------------------------
获取进程使用的CPU时间:
pcputimes(user=4.40625, system=6.84375, children_user=0.0, children_system=0.0)
----------------------------------------------------------------
获取进程使用的内存:
pmem(rss=13848576, vms=16691200, num_page_faults=285464, peak_wset=23371776, wset=13848576, peak_paged_pool=200200, paged_pool=185432, peak_nonpaged_pool=39840, nonpaged_pool=30136, pagefile=16691200, peak_pagefile=18644992, private=16691200)
----------------------------------------------------------------
获取进程打开的文件:
[popenfile(path='C:\Program Files\WindowsApps\Microsoft.LanguageExperiencePackzh-CN_19041.38.119.0_neutral__8wekyb3d8bbwe\Windows\System32\zh-CN\avicap32.dll.mui', fd=-1), popenfile(path='C:\Program Files\WindowsApps\Microsoft.LanguageExperiencePackzh-CN_19041.38.119.0_neutral__8wekyb3d8bbwe\Windows\System32\zh-CN\msvfw32.dll.mui', fd=-1), popenfile(path='C:\Program Files\WindowsApps\Microsoft.LanguageExperiencePackzh-CN_19041.38.119.0_neutral__8wekyb3d8bbwe\Windows\System32\zh-CN\crypt32.dll.mui', fd=-1), popenfile(path='C:\Program Files\WindowsApps\Microsoft.LanguageExperiencePackzh-CN_19041.38.119.0_neutral__8wekyb3d8bbwe\Windows\System32\zh-CN\dnsapi.dll.mui', fd=-1)]
----------------------------------------------------------------
获取进程相关网络连接:
[pconn(fd=-1, family=<AddressFamily.AF_INET: 2>, type=2, laddr=addr(ip='0.0.0.0', port=60682), raddr=(), status='NONE'), pconn(fd=-1, family=<AddressFamily.AF_INET: 2>, type=2, laddr=addr(ip='0.0.0.0', port=52407), raddr=(), status='NONE')]
----------------------------------------------------------------
获取进程的线程数量:
[pthread(id=5808, user_time=0.0, system_time=0.0), pthread(id=8048, user_time=0.0, system_time=0.0), pthread(id=9352, user_time=4.0, system_time=4.71875), pthread(id=5416, user_time=0.0, system_time=0.0), pthread(id=12484, user_time=0.0, system_time=0.0), pthread(id=10804, user_time=0.03125, system_time=0.5625), pthread(id=11744, user_time=0.234375, system_time=0.234375), pthread(id=6072, user_time=0.0, system_time=0.0), pthread(id=12632, user_time=0.0, system_time=0.46875), pthread(id=12460, user_time=0.0, system_time=0.0), pthread(id=5404, user_time=0.0, system_time=0.0), pthread(id=9484, user_time=0.0, system_time=0.0), pthread(id=17972, user_time=0.0, system_time=0.0)]
----------------------------------------------------------------
结束进程:
# 模拟ps命令
import psutil

print(psutil.test())
# 结果输出:
USER         PID %MEM     VSZ     RSS TTY           START    TIME  COMMAND
SYSTEM         0    ?      60       8 ?             Mar06   09:29  System Idle Process
SYSTEM         4    ?     196      32 ?             Mar06   53:41  System
SYSTEM       116  0.2   15388   28020 ?             Mar06   01:20  svchost.exe
SYSTEM       172  0.1    1324   21988 ?             Mar06   00:01  Registry
SYSTEM       480  0.1   16300   13524 ?             Mar08   00:11  QQProtect.exe
SYSTEM       560    ?    1104     620 ?             Mar06   00:00  smss.exe
SYSTEM       808    ?    2336    4432 ?             Mar06   00:10  csrss.exe
SYSTEM       912    ?    1712    4876 ?             Mar06   00:00  wininit.exe
.....
最后
以上就是哭泣小虾米最近收集整理的关于Python3学习23--常用第三方模块的全部内容,更多相关Python3学习23--常用第三方模块内容请搜索靠谱客的其他文章。
本图文内容来源于网友提供,作为学习参考使用,或来自网络收集整理,版权属于原作者所有。


发表评论 取消回复