在使用OpenCV时候,我们首先会做的是获取待处理的图像,这个图像可能来源于已存储的视频文件、也可能来源于实时的摄像头画面、或是某个文件夹下的一系列图片。或许你会觉得,这都是小菜一碟,因为我们学习OpenCV的第一步一般是学习如何加载和显示一幅图片。对于打开摄像头或是读取视频的程序,网上也是一抓一大把。如果你是初学者,不妨看一下我下面的总结,或许有你不曾注意到的。
对于图像或视频的加载、显示、窗口设置、工具条、图像合并为视频、视频分割成图像、打开视频或摄像头等操作的定义是放在OpenCV的highGui模块中的,说到这,还是建议初学者尽量多看看opencv2refman.pdf这个文件,你会对opencv的结构更清晰。下面仅就图像和视频的读取和显示方面做探究。
1.读图像
OpenCV可以读取哪些格式的图片?如何读取?
在OpenCV中,对于单幅图像的读取,我们一般使用imread()函数,先看下面一段代码:
#include <opencv2/core/core.hpp>
#include <opencv2/highgui/highgui.hpp>
#include <iostream>

using namespace cv;
using namespace std;

int _tmain(int argc, _TCHAR* argv[])
{
	Mat img;

	//img = imread("images//frame_0001.jpg");
	img = imread("images//frame_0001.jpg",0);

	if (img.empty())
	{
		cout<<"cannot load image"<<endl;
		return 0;
	}

	//namedWindow("image");

	imshow("image",img);
	waitKey(0);
	return 0;
}
对于使用红蓝颜色加亮的代码,你可以尝试一下,看看有什么不同?你会发现namedWindow("image");有没有这句都是一样的,而imread第二参数不同将显示出不同的图像,一个是原图,另一个是灰度图。为什么呢,我们不妨看一下imread()函数接口:
C++: Mat imread(conststring& filename, int flags=1 )
Parameters
filename – Name of file tobe loaded.
flags – Flags specifyingthe color type of a loaded image:
– >0 Return a 3-channelcolor image.
Note: In the currentimplementation the alpha channel, if any, is stripped from the
output image. Use negativevalue if you need the alpha channel.
– =0 Return a grayscaleimage.
– <0 Return the loadedimage as is (with alpha channel).</span>
可以看到filename中存放的是图片的名字,如果图片不在本项目文件下,必须给出图片的绝对路径。对于flags参数有三种取值,取值为0时输出为灰度图,取值大于0时输出值为三通道图像,如果你需要带有alpha通道的图像,则必须使用负值参数。
我们知道图片的封装格式有好多种,比如jpg,bmp,png,但OpenCV可以读取哪些呢?其实在不同的操作系统下使用OpenCV时,可以读取图像的种类还是有区别的。在opencv2refman.pdf这个文档中对这个还是有些介绍的:
The function imread loads an image from the specified file and returns it. If the image cannot be read (because
of missing file, improper permissions, unsupported or invalid format), the function returns an empty matrix
( Mat::data==NULL ). Currently, the following file formats are supported:
• Windows bitmaps - *.bmp, *.dib (always supported)
• JPEG files - *.jpeg, *.jpg, *.jpe (see the Notes section)
• JPEG 2000 files - *.jp2 (see the Notes section)
• Portable Network Graphics - *.png (see the Notes section)
• Portable image format - *.pbm, *.pgm, *.ppm (always supported)
• Sun rasters - *.sr, *.ras (always supported)
• TIFF files - *.tiff, *.tif (see the Notes section)
另外,在windows和linux下使用OpenCV读取图像时还是有一定区别的,不管格式还是OpenCV的配置,但这些内容会留在OpenCV移植相关章节中去详述。
2.读视频
OpenCV中有一个专门读取摄像头或者视频文件的类,叫VideoCapture,这个类的功能很强大,建议初学者参考opencv2refman.pdf来学习,我们先来看一段代码
#include <opencv2/core/core.hpp>
#include <opencv2/highgui/highgui.hpp>
#include <iostream>

using namespace cv;
using namespace std;

int _tmain(int argc, _TCHAR* argv[])
{
	Mat img;
	VideoCapture cap(0);
	if (!cap.isOpened())
	{
		cout<<"cannot open camera"<<endl;
		return 0;
	}
	while (true)
	{
		cap >> img;
		imshow("image",img);
		waitKey(30);
	}
	return 0;
}
这是读取视频时最常用的方法,使用<<号称是最方便快捷的方法。
以上的的这些内容是你在OpenCV的开发手册上可以看到的,但有一些在实际开发中很常见的,而开发手册中却没有的,来看看吧:
3. 读取图片文件夹
我们从一些数据库中下载下来的测试数据,有些是视频文件,而有些是一帧帧的图片,比如下图中的这种情况:
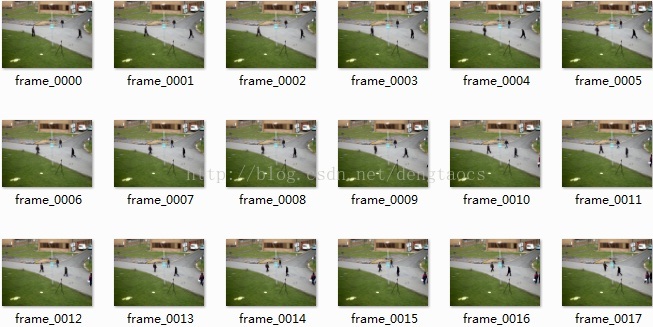
我该如何设计程序,才能方便的去让程序逐个读取这些图片文件呢?我们可能会首先排除VideoCapture类,我们认为他只能读取视频文件或者摄像头。我们一般会选择使用imread函数,只是我们必须在读取下一帧图片时更换filename参数,其实这样也不难,我们可以尝试将每个图片的文件名按顺序存放在一个文本文件中,然后可以从文本文件中逐个提取文件名。我们还可以将数字转化为字符串,再与frame_和,jpg结合在一块租出文件名,我第一次碰到这个问题时曾经尝试了很多方法,但一次在OpenCV的samples中我发现原来OpenCV可以使用VideoCapture类读取图像序列的。看下面一段代码:
#include <opencv2/core/core.hpp>
#include <opencv2/highgui/highgui.hpp>

#include <iostream>

using namespace cv;
using namespace std;

int main(int argc, char** argv)
{
	string first_file = "images//frame_%04d.jpg";
	VideoCapture sequence(first_file);

	if (!sequence.isOpened())
	{
		cerr << "Failed to open the image sequence!n" << endl;
		return 1;
	}

	Mat image;
	namedWindow("Image sequence", 1);

	for(;;)
	{

		sequence >> image;

		if(image.empty())
		{
			cout << "End of Sequence" << endl;
			break;
		}

		imshow("Image sequence", image);
		waitKey(0);
	}

	return 0;
}
是不是一个很好的方法!其实VideoCapture可以做的事还有很多,包括读取流媒体文件,网络摄像头等,这个暂且就不说了!会在以后章节中涉及!
最后
以上就是害怕诺言最近收集整理的关于OpenCV读取视频和图像序列的全部内容,更多相关OpenCV读取视频和图像序列内容请搜索靠谱客的其他文章。


发表评论 取消回复