在《spring源码解析之一 ----- 默认标签的解析注册》中,已经介绍了Spring对于默认标签(beans、bean、alias、import)的解析注册。看到这个时候,你也会明白,我们常用的aop标签,并不是spring的默认标签,而是自定义标签。spring对自定义标签,提供了良好的扩展和支持。在上篇文章中,按照源码看bean的解析过程中,在下方的代码里,是自定义标签和Default标签的分开点。
再谈具体实现自定义标签之前,通过下面的代码,我们可以简单推测出一些东西。Node是存放标签的节点元素,在if语句中,通过node instanceof Element,来判断node节点是不是Element元素,如果是Element类型,name就会解析。所以Element类型,对应着一个标签,比如bean标签就是Element类型。
protected void parseBeanDefinitions(Element root, BeanDefinitionParserDelegate delegate) {
    if(delegate.isDefaultNamespace(root)) {
        NodeList nl = root.getChildNodes();

        for(int i = 0; i < nl.getLength(); ++i) {
            Node node = nl.item(i);
            if(node instanceof Element) {
                Element ele = (Element)node;
                if(delegate.isDefaultNamespace(ele)) {
                    this.parseDefaultElement(ele, delegate);//进入
                } else {
                    delegate.parseCustomElement(ele);
                }
            }
        }
    } else {
        delegate.parseCustomElement(root);
    }

}
这里先宏观介绍一下自定义标签的实现过程
1.实现一个POJO类,定义标签对应的相关参数
2.实现一个XSD文件,用来描述POJO类
3.实现一个解析类,用来解析XSD和POJO。Spring为我们提供了抽象类 AbstractSingleBeanDefinitionParser
4.实现一个Handler类,该类被Spring使用,用来注册bean到容器中。Spring为我们提供了抽象类 NamespaceHandlerSupport
5.添加我们自定义的handler,schema和location到spring.handlers 和 spring.schemas
二、User类型的POJO
package com.heitian.ssm.model;

/**
 * Created by weili on 17/6/27.
 */
public class UserInfo {
    String name;
    String id;
    String tel;
    String address;

    public String getName() {
        return name;
    }

    public void setName(String name) {
        this.name = name;
    }

    public String getId() {
        return id;
    }

    public void setId(String id) {
        this.id = id;
    }

    public String getTel() {
        return tel;
    }

    public void setTel(String tel) {
        this.tel = tel;
    }

    public String getAddress() {
        return address;
    }

    public void setAddress(String address) {
        this.address = address;
    }

}XSD的文件格式规范和入门学习,可以去这个网址 http://www.phpstudy.net/e/schema/ 。
<?xml version="1.0" encoding="UTF-8"?>
<schema xmlns="http://www.w3.org/2001/XMLSchema"
        targetNamespace="http://www.weili.com/schema/userinfo"
        xmlns:tns="http://www.weili.com/schema/userinfo"
        elementFormDefault="qualified">


    <element name="userinfo">
        <complexType>
            <attribute name="id" type="string" />
            <attribute name="name" type="string" />
            <attribute name="address" type="string" />
            <attribute name="tel" type="string" />
        </complexType>
    </element>

</schema>
package com.heitian.ssm.model;

import org.springframework.beans.factory.support.AbstractBeanDefinition;
import org.springframework.beans.factory.support.BeanDefinitionBuilder;
import org.springframework.beans.factory.xml.AbstractBeanDefinitionParser;
import org.springframework.beans.factory.xml.AbstractSingleBeanDefinitionParser;
import org.springframework.beans.factory.xml.ParserContext;
import org.springframework.util.StringUtils;
import org.w3c.dom.Element;

/**
 * Created by weili on 17/6/27.
 */
public class UserBeanDefinitionParser extends AbstractSingleBeanDefinitionParser{
    @Override
    protected Class<?> getBeanClass(Element element) {
        return UserInfo.class;
    }

    @Override
    protected void doParse(Element element, BeanDefinitionBuilder builder) {
        String id=element.getAttribute("id");
        String name=element.getAttribute("name");
        String tel=element.getAttribute("tel");
        String address=element.getAttribute("address");
        //将提取到的数据放入beanDefinitionBuilder 中,待完成所有的bean解析后统一放到beanfactory
        if(StringUtils.hasText(id)){
            builder.addPropertyValue("id", id);
        }
        if(StringUtils.hasText(name)){
            builder.addPropertyValue("name", name);
        }
        if(StringUtils.hasText(tel)){
            builder.addPropertyValue("tel", tel);
        }
        if(StringUtils.hasText(address)){
            builder.addPropertyValue("address", address);
        }
    }


}
五、实现Handler类
该类的作用是将解析器和相应的标签名字,关联起来,告诉Spring
package com.heitian.ssm.model;

import org.springframework.beans.factory.xml.NamespaceHandlerSupport;

/**
 * Created by weili on 17/6/27.
 */
public class userInfoNamespaceHandler extends NamespaceHandlerSupport {
    public void init() {
        registerBeanDefinitionParser("userinfo", new UserBeanDefinitionParser());
    }
}
六、修改spring的schema和handler
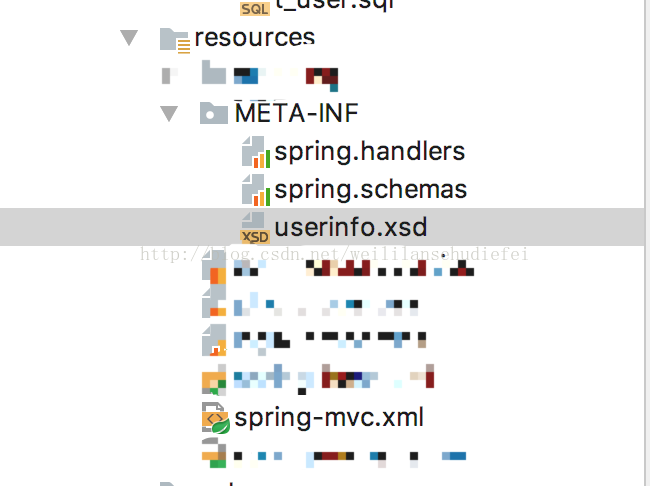
我用的Intellij建立的maven工程,所以工程下没有spring.handlers和spring.shcemas这两个文件。为了让maven能够读取这俩文件,需要在你工程的Resource目录下新建一个META-INF目录,然后再这个目录下新建spring.handlers和spring.schemas。同时需要把你定义的xsd文件也移动到META-INF文件下。
spring.handlers:
http://www.weili.com/schema/userinfo = com.heitian.ssm.model.userInfoNamespaceHandlerspring.schemas:
http://www.weili.com/schema/userinfo/userinfo.xsd = META-INF/userinfo.xsdspring.handlers文件中增加(告诉spring,这样的URI应该去用哪个handler去调用解析)
spring.schemas文件中增加(告诉spring,这样的URI应该去什么地方找到xsd文件描述)
这个时候你的resource目录下应该和图上的差不多:因为我是在一个SSM Demo上直接写的,所以无关的配置打了马赛克。
七、配置spring-bean.xml
注意第四行的xmlns:myname 需要和定义的标签<myname:userinfo>相一致。
通过下面的xml,我们就配置了一个userinfo的标签,也可以说是我们自己实现的bean。最后就可以在测试类里面读取这个配置文件了。
<?xml version="1.0" encoding="UTF-8"?>
<beans xmlns="http://www.springframework.org/schema/beans"
       xmlns:xsi="http://www.w3.org/2001/XMLSchema-instance"
       xmlns:myname="http://www.weili.com/schema/userinfo"
       xsi:schemaLocation="http://www.springframework.org/schema/beans
                        http://www.springframework.org/schema/beans/spring-beans-4.0.xsd
                        http://www.weili.com/schema/userinfo
                        http://www.weili.com/schema/userinfo/userinfo.xsd">
<myname:userinfo id="userinfoId" name="userinfoName" tel="18801289635" address="bupt"></myname:userinfo>
</beans>
八、测试类
最后就是写个测试类,从classpath中加载xml,然后获取我们自己定义的bean。可以看到,我们在xml文件中自己定义了一个<userinfo>标签或者bean,然后通过这个标签的id属性的名字,获取相应的标签元素。
package com.heitian.ssm;

import com.heitian.ssm.model.UserInfo;
import org.springframework.context.support.ClassPathXmlApplicationContext;

/**
 * Created by weili on 17/6/25.
 */
public class SpringBean {
    public static void main (String args[]){
        ClassPathXmlApplicationContext ctx = new ClassPathXmlApplicationContext("spring-bean.xml");
        UserInfo usrInfo = (UserInfo) ctx.getBean("userinfoId");
        System.out.print(usrInfo.getName());


    }
}
以上就是自己实现自定义标签的过程,我们通过spring提供的相应接口和类,实现了一个userinfo的标签,这个标签类似于bean标签,可以配置id、name等属性。
这个方法虽然简单,但是确实自定义标签的基本步骤。在阿里巴巴的开源分布式服务框架Dubbo中,dubbo-config-spring中就是dubbo和spring结合的配置文件。里面充分用了这个方法,可能你很清楚的直到一个文件dubbo.xsd。
二、自定义bean的源码解析
自定义bean和spring的默认bean的流程基本是一致的。除了之前提到的,spring的default bean和自定义bean进入的parse方法不同外,基本没啥大区别。本文的源码解析,着重看自定义的标签的shecma和handler是怎么联系和加载的,然后又是怎么通过handler调用了我们自己的解析方法。
还是和之前spring默认bean的加载过程一样,我们一路debug直到下面这个地方:
XmlBeanDefinitionReader 下的doLoadBeanDefinitions
    protected int doLoadBeanDefinitions(InputSource inputSource, Resource resource) throws BeanDefinitionStoreException {
        try {
            Document doc = this.doLoadDocument(inputSource, resource);
            return this.registerBeanDefinitions(doc, resource);
        } catch (BeanDefinitionStoreException var4) {
            throw var4;
        } catch (SAXParseException var5) {
            throw new XmlBeanDefinitionStoreException(resource.getDescription(), "Line " + var5.getLineNumber() + " in XML document from " + resource + " is invalid", var5);
        } catch (SAXException var6) {
            throw new XmlBeanDefinitionStoreException(resource.getDescription(), "XML document from " + resource + " is invalid", var6);
        } catch (ParserConfigurationException var7) {
            throw new BeanDefinitionStoreException(resource.getDescription(), "Parser configuration exception parsing XML from " + resource, var7);
        } catch (IOException var8) {
            throw new BeanDefinitionStoreException(resource.getDescription(), "IOException parsing XML document from " + resource, var8);
        } catch (Throwable var9) {
            throw new BeanDefinitionStoreException(resource.getDescription(), "Unexpected exception parsing XML document from " + resource, var9);
        }
}进入这个方法,一直到如下这个方法。
    public Document loadDocument(InputSource inputSource, EntityResolver entityResolver, ErrorHandler errorHandler, int validationMode, boolean namespaceAware) throws Exception {
        DocumentBuilderFactory factory = this.createDocumentBuilderFactory(validationMode, namespaceAware);
        if(logger.isDebugEnabled()) {
            logger.debug("Using JAXP provider [" + factory.getClass().getName() + "]");
        }

        DocumentBuilder builder = this.createDocumentBuilder(factory, entityResolver, errorHandler);
        return builder.parse(inputSource);
    }
    public Document parse(InputSource is) throws SAXException, IOException {
        if (is == null) {
            throw new IllegalArgumentException(
                DOMMessageFormatter.formatMessage(DOMMessageFormatter.DOM_DOMAIN,
                "jaxp-null-input-source", null));
        }
        if (fSchemaValidator != null) {
            if (fSchemaValidationManager != null) {
                fSchemaValidationManager.reset();
                fUnparsedEntityHandler.reset();
            }
            resetSchemaValidator();
        }
        domParser.parse(is); //在这里对inputSource进行解析
        Document doc = domParser.getDocument(); //将解析的结果传给doc
        domParser.dropDocumentReferences();
        return doc;     //结果返回
    }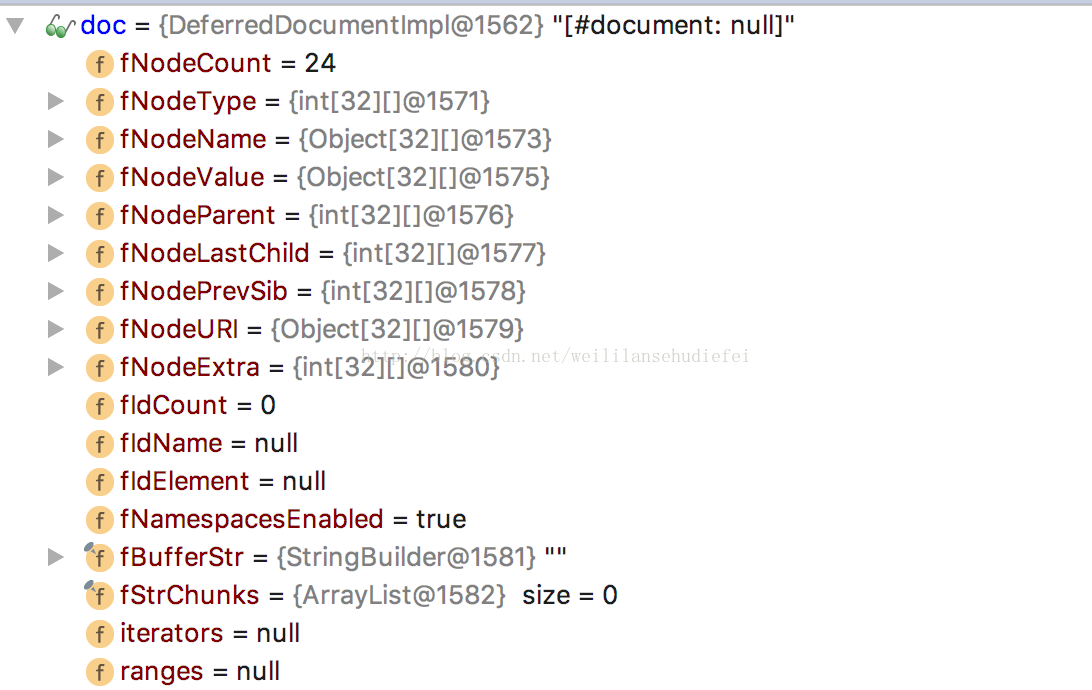
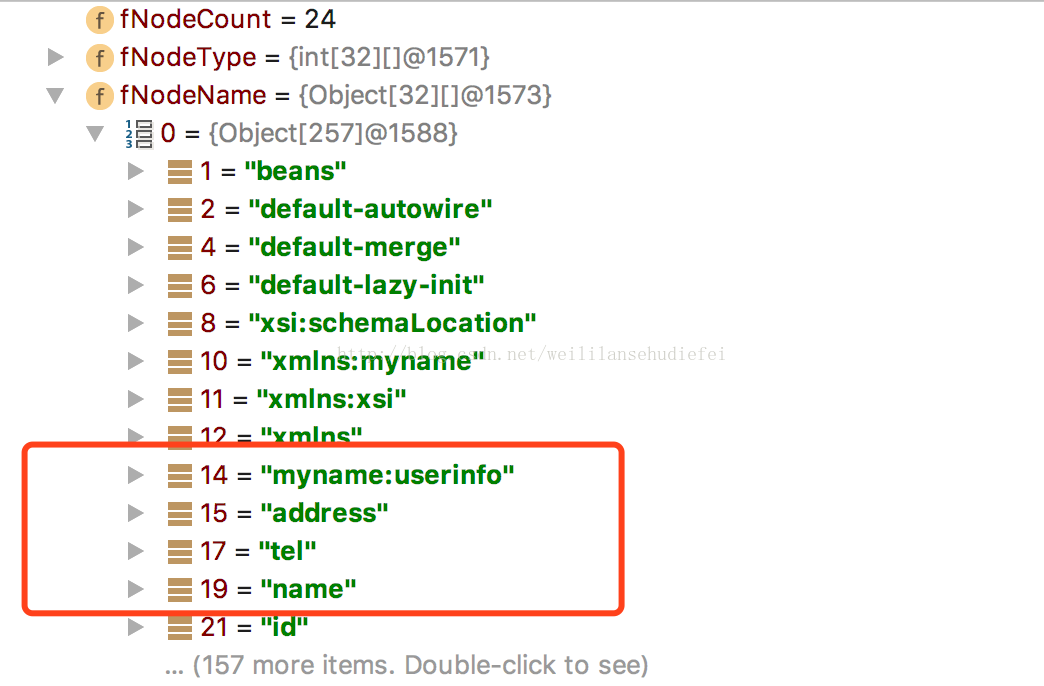
我们看到,在NodeName里面已经有我们自己定义的标签的名字和相应的属性。
那么doc对象生成了,接下来就该解析bean(myname:userinfo),然后注册。那么接下来就进入解析的方法。
进入之后,获取doc对象的根节点。xml文档的根节点是beans,然后进入真正的解析方法。
    public void registerBeanDefinitions(Document doc, XmlReaderContext readerContext) {
        this.readerContext = readerContext;
        this.logger.debug("Loading bean definitions");
        Element root = doc.getDocumentElement();
        this.doRegisterBeanDefinitions(root);
    }
到下面的方法后,就是默认bean和自定义bean的分界点了。在这个方法里,不同的bean,进入不同的解析方法。现在我们都是自定义bean,所以走下面的parseCustomElement(ele)。这个ele是我们自己定义的标签:myname:userinfo
    protected void parseBeanDefinitions(Element root, BeanDefinitionParserDelegate delegate) {
        if(delegate.isDefaultNamespace(root)) {
            NodeList nl = root.getChildNodes();

            for(int i = 0; i < nl.getLength(); ++i) {
                Node node = nl.item(i);
                if(node instanceof Element) {
                    Element ele = (Element)node;
                    if(delegate.isDefaultNamespace(ele)) {
                        this.parseDefaultElement(ele, delegate);
                    } else {
                        delegate.parseCustomElement(ele);
                    }
                }
            }
        } else {
            delegate.parseCustomElement(root);
        }

}这个方法首先从ele中获取namespaceUri,这个namespaceUri = “www.weili.com/schema/userinfo”。
然后获取handler。
    public BeanDefinition parseCustomElement(Element ele, BeanDefinition containingBd) {
        String namespaceUri = this.getNamespaceURI(ele);
        NamespaceHandler handler = this.readerContext.getNamespaceHandlerResolver().resolve(namespaceUri);
        if(handler == null) {
            this.error("Unable to locate Spring NamespaceHandler for XML schema namespace [" + namespaceUri + "]", ele);
            return null;
        } else {
            return handler.parse(ele, new ParserContext(this.readerContext, this, containingBd));
        }
    }
进去获取handler的方法,你可以发现这个handler的获取非常简单。就是从map里面取出来的,key就是namespaceUri,取出来的value就是我们在spring.handlers中说明的 自定义的handler类
com.heitian.ssm.model.userInfoNamespaceHandler
既然获取到了类的权限定名,那么接下来自然想到的就是反射生成对应的类,也就是反射生成namespaceHandler。
这个namespaceHandler就是我们自己定义的userInfoNamespaceHandler。
有的人可能好奇,我们自己定义handler的时候,继承的是NamespaceHandlerSupport,这里的类型是NamespaceHandler。
原因是这样的:NamespaceHandler是一个接口,而
NamespaceHandlerSupport实现了NamespaceHandler接口,而我们自定义的类userInfoNamespaceHandler又继承了NamespaceHandlerSupport.
理清关系后,我们继续看。
接下里namespaceHandler调用了初始化方法init(),也就是我们写的userInfoNamespaceHandler中的init()方法。在初始化方法里,我们做了如下的事情
registerBeanDefinitionParser("userinfo", new UserBeanDefinitionParser());这个注册告诉spring,userinfo这个bean,应该用什么样的解析器。
到了这里,所有的一切就都串联起来了。
    public NamespaceHandler resolve(String namespaceUri) {
        Map<String, Object> handlerMappings = this.getHandlerMappings();
        Object handlerOrClassName = handlerMappings.get(namespaceUri);
        if(handlerOrClassName == null) {
            return null;
        } else if(handlerOrClassName instanceof NamespaceHandler) {
            return (NamespaceHandler)handlerOrClassName;
        } else {
            String className = (String)handlerOrClassName;

            try {
                Class<?> handlerClass = ClassUtils.forName(className, this.classLoader);
                if(!NamespaceHandler.class.isAssignableFrom(handlerClass)) {
                    throw new FatalBeanException("Class [" + className + "] for namespace [" + namespaceUri + "] does not implement the [" + NamespaceHandler.class.getName() + "] interface");
                } else {
                    NamespaceHandler namespaceHandler = (NamespaceHandler)BeanUtils.instantiateClass(handlerClass);
                    namespaceHandler.init();//这个初始化方法,向spring注册我们的bean名和handler的对应关系。
                    handlerMappings.put(namespaceUri, namespaceHandler);
                    return namespaceHandler;
                }
            } catch (ClassNotFoundException var7) {
                throw new FatalBeanException("NamespaceHandler class [" + className + "] for namespace [" + namespaceUri + "] not found", var7);
            } catch (LinkageError var8) {
                throw new FatalBeanException("Invalid NamespaceHandler class [" + className + "] for namespace [" + namespaceUri + "]: problem with handler class file or dependent class", var8);
            }
        }
    }
接下里,方法返回我们自己定义的handler,然后开始进入下面的方法
return handler.parse(ele, new ParserContext(this.readerContext, this, containingBd));
进入上面的方法,到了下面这个方法里。我们可以看到,程序开始查找 bean标签element 对应的解析器。因为在上面已经向spring注册过,bean名字和解析器的对应关系,
所以在这里找解析器骗人色弱,就是一个从map中取出value的过程。
找到我们自己定义的解析器后,就开始调用parse方法。进入相应的方法,直到下面。在这个方法里,我们看到了BeanDefinitionBuilder,public BeanDefinition parse(Element element, ParserContext parserContext) { return this.findParserForElement(element, parserContext).parse(element, parserContext); } private BeanDefinitionParser findParserForElement(Element element, ParserContext parserContext) { String localName = parserContext.getDelegate().getLocalName(element); BeanDefinitionParser parser = (BeanDefinitionParser)this.parsers.get(localName); if(parser == null) { parserContext.getReaderContext().fatal("Cannot locate BeanDefinitionParser for element [" + localName + "]", element); } return parser; }
如果你还记得,在我们自己的实现的解析器里,有一个builder,我们将解析的属性名字和其对应的value,全部都放到了这个builder里。
如果你忘了,也没关系,进入这个方法的倒数第二行,doparse方法。
    protected final AbstractBeanDefinition parseInternal(Element element, ParserContext parserContext) {
        BeanDefinitionBuilder builder = BeanDefinitionBuilder.genericBeanDefinition();
        String parentName = this.getParentName(element);
        if(parentName != null) {
            builder.getRawBeanDefinition().setParentName(parentName);
        }

        Class<?> beanClass = this.getBeanClass(element);
        if(beanClass != null) {
            builder.getRawBeanDefinition().setBeanClass(beanClass);
        } else {
            String beanClassName = this.getBeanClassName(element);
            if(beanClassName != null) {
                builder.getRawBeanDefinition().setBeanClassName(beanClassName);
            }
        }

        builder.getRawBeanDefinition().setSource(parserContext.extractSource(element));
        if(parserContext.isNested()) {
            builder.setScope(parserContext.getContainingBeanDefinition().getScope());
        }

        if(parserContext.isDefaultLazyInit()) {
            builder.setLazyInit(true);
        }

        this.doParse(element, parserContext, builder);
        return builder.getBeanDefinition();
    }
进入之后是如图的调用,

再进去这个方法,然后你就会惊喜的发现,进入我们自己实现的解析器的parse方法了。
解析完毕后,开始一步步返回。
接下里的过程就是将,刚刚解析的beanDefinition注册到容器map的过程。这个和spring默认bean的注册时一致的。
相信如果你看懂了上篇文章,这篇文章也不会很难。
到这里,自定义标签的实现和解析原理,就讲完了。
有任何问题,欢迎留言交流!
最后
以上就是畅快高跟鞋最近收集整理的关于Spring源码解析之二 ------ 自定义标签的解析和注册(IOC的第一步)的全部内容,更多相关Spring源码解析之二内容请搜索靠谱客的其他文章。


发表评论 取消回复