Mavlink.cs 代码生成
参考博主 audupilot自定义mavlink消息与地面站通信 在 Ubuntu 端完成 Ardupilot 代码修改和地面站端 Mavlink.cs 代码更新
增加代码如下所示:
 /// extensions_start 0
    [StructLayout(LayoutKind.Sequential, Pack = 1, Size = 20)]
    ///<summary> send the waypoints that UAV has reached from Missionplanner. </summary>
    public struct mavlink_wp_process_t
    {
        /// packet ordered constructor
        public mavlink_wp_process_t(float yaw, float rollspeed, float pitchspeed, float yawspeed, ushort total_wp, ushort reached_wp)
        {
            this.yaw = yaw;
            this.rollspeed = rollspeed;
            this.pitchspeed = pitchspeed;
            this.yawspeed = yawspeed;
            this.total_wp = total_wp;
            this.reached_wp = reached_wp;

        }

        /// packet xml order
        public static mavlink_wp_process_t PopulateXMLOrder(ushort total_wp, ushort reached_wp, float yaw, float rollspeed, float pitchspeed, float yawspeed)
        {
            var msg = new mavlink_wp_process_t();

            msg.total_wp = total_wp;
            msg.reached_wp = reached_wp;
            msg.yaw = yaw;
            msg.rollspeed = rollspeed;
            msg.pitchspeed = pitchspeed;
            msg.yawspeed = yawspeed;

            return msg;
        }


        /// <summary>Yaw angle (-pi..+pi)  [rad] </summary>
        [Units("[rad]")]
        [Description("Yaw angle (-pi..+pi)")]
        //[FieldOffset(0)]
        public float yaw;

        /// <summary>Roll angular speed  [rad/s] </summary>
        [Units("[rad/s]")]
        [Description("Roll angular speed")]
        //[FieldOffset(4)]
        public float rollspeed;

        /// <summary>Pitch angular speed  [rad/s] </summary>
        [Units("[rad/s]")]
        [Description("Pitch angular speed")]
        //[FieldOffset(8)]
        public float pitchspeed;

        /// <summary>Yaw angular speed  [rad/s] </summary>
        [Units("[rad/s]")]
        [Description("Yaw angular speed")]
        //[FieldOffset(12)]
        public float yawspeed;

        /// <summary>total nums   </summary>
        [Units("")]
        [Description("total nums")]
        //[FieldOffset(16)]
        public ushort total_wp;

        /// <summary>reached index   </summary>
        [Units("")]
        [Description("reached index")]
        //[FieldOffset(18)]
        public ushort reached_wp;
    };
CurrentState.cs
定义新的变量接收消息
[DisplayText("WPpro1")][GroupText("Replan")] public ushort totalwpuav1 { get; set; }
[DisplayText("WPpro1")][GroupText("Replan")] public ushort reachedwpuav1 { get; set; }
新建静态成员变量保存得到的消息
public static ushort hahaha = 1;
public static ushort aha = 1;
在 Parent_OnPacketReceived() 私有函数中增加新的 case:
case (uint)MAVLink.MAVLINK_MSG_ID.WP_PROCESS:

{
    var wpprodata = mavLinkMessage.ToStructure<MAVLink.mavlink_wp_process_t>();
    // if (wpprodata.id == 0)
    totalwpuav1 = wpprodata.total_wp;
    reachedwpuav1 = wpprodata.reached_wp;
    hahaha = reachedwpuav1;
    aha = totalwpuav1;
}

break;
消息显示
将接收到的消息在 FlightData 界面显示,创建 Label 图标和 MyButton 按钮

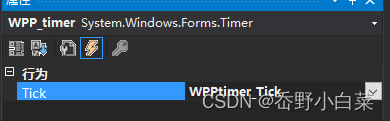
增加 Timer 定时器按钮,命名为 WPP_timer,在 FlightData.cs 文件中增加定时器函数,刷新显示 Label.Text 数据
 // 创建定时器,负责飞机航点进程消息的传输
        private void WPPtimer_Tick(object sender, EventArgs e)
        {
            lbl_wppro.Text = "WPpro: " + "Total WP = " + CurrentState.hahaha + "dafsaf: " + CurrentState.aha;
            // lbl_wppro.Text = "WPpro: " + "Total WP = ";
        }
在定时器行为中关联此函数
在 Button 按钮中开启定时器
private void but_start_Click(object sender, EventArgs e)
{
    WPP_timer.Start();
}
完成点击按钮开启实时接收消息并更新
最后
以上就是粗心狗最近收集整理的关于Mission Planner 地面站通过 MAVLink 接收消息并显示的全部内容,更多相关Mission内容请搜索靠谱客的其他文章。
本图文内容来源于网友提供,作为学习参考使用,或来自网络收集整理,版权属于原作者所有。


发表评论 取消回复