步骤一: 新建 constructortoArgsTest.xml
<?xml version="1.0" encoding="UTF-8"?>
<beans xmlns="http://www.springframework.org/schema/beans"
      xmlns:xsi="http://www.w3.org/2001/XMLSchema-instance"
      xmlns:context="http://www.springframework.org/schema/context" xmlns:tx="http://www.springframework.org/schema/tx"
      xsi:schemaLocation="http://www.springframework.org/schema/beans
      http://www.springframework.org/schema/beans/spring-beans.xsd
      http://www.springframework.org/schema/context
      http://www.springframework.org/schema/context/spring-context.xsd
      http://www.springframework.org/schema/tx
      http://www.springframework.org/schema/tx/spring-tx.xsd">
<bean  id="student" class="com.hyq.test.bean.Student" >
   <constructor-arg   value="hajji" index="0" >
      <description>1223</description>
   </constructor-arg>
   <constructor-arg value="123456" index="1" />
</bean>
</beans>
步骤二: 新建java bean
public class Student {

   private String username = "jack";
   private String password;
   public String getUsername() {
      return username;
   }
   public void setUsername(String username) {
      this.username = username;
   }
   public String getPassword() {
      return password;
   }
   public void setPassword(String password) {
      this.password = password;
   }

   public Student(){};
   public Student(String username, String password){
      this.username = username;
      this.password = password;
   }
@Override
public String toString() {
   return "Student{" +
         "username='" + username + ''' +
         ", password='" + password + ''' +
         '}';
}
步骤三: 新建测试类MyTestLabel
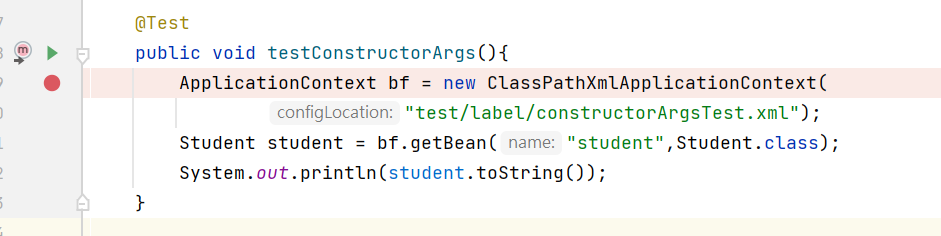
public calss MyTestLabel{

@Test
public void testConstructorArgs(){
   ApplicationContext bf = new ClassPathXmlApplicationContext(
         "test/label/constructorArgsTest.xml");
   Student student = bf.getBean("student",Student.class);
   System.out.println(student.toString());
}
}
启动测试项目
1) 如何在下面的测试方法处打上断点:
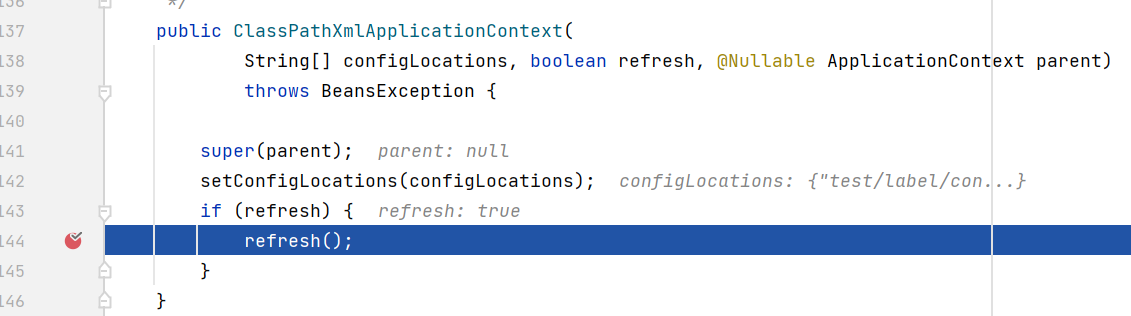
2)在 ClassPathXmlApplicationContext类上的构造方法上打上断点.
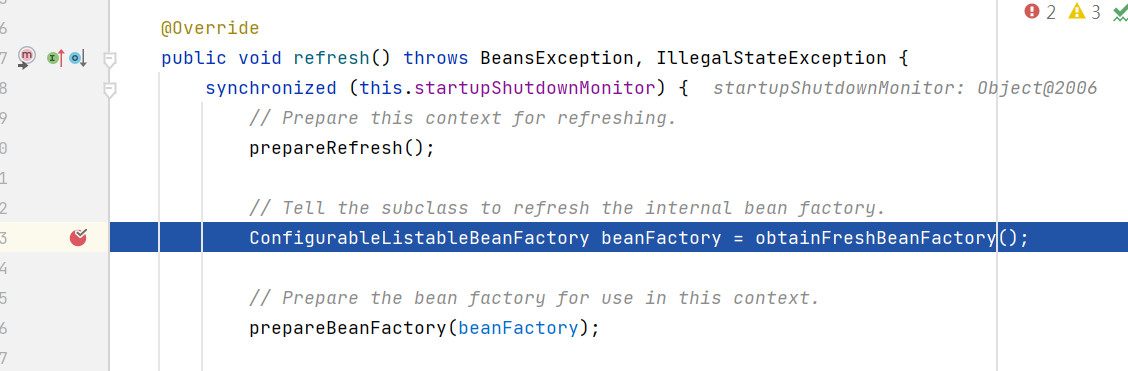
3) 在AbstractApplicationContext的refresh()方法打上断点
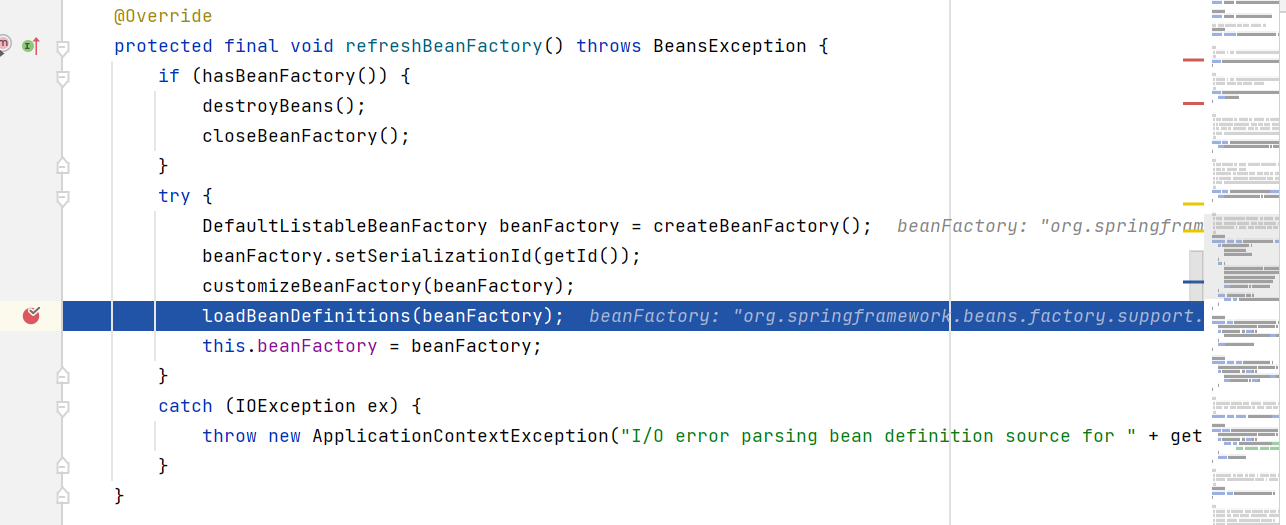
4) 在AbstractRefreshableApplicationContext中的refreshBeanFactory()上打上断点.
5)在defaultBeanDefinitionDocumentReader中打上断点.
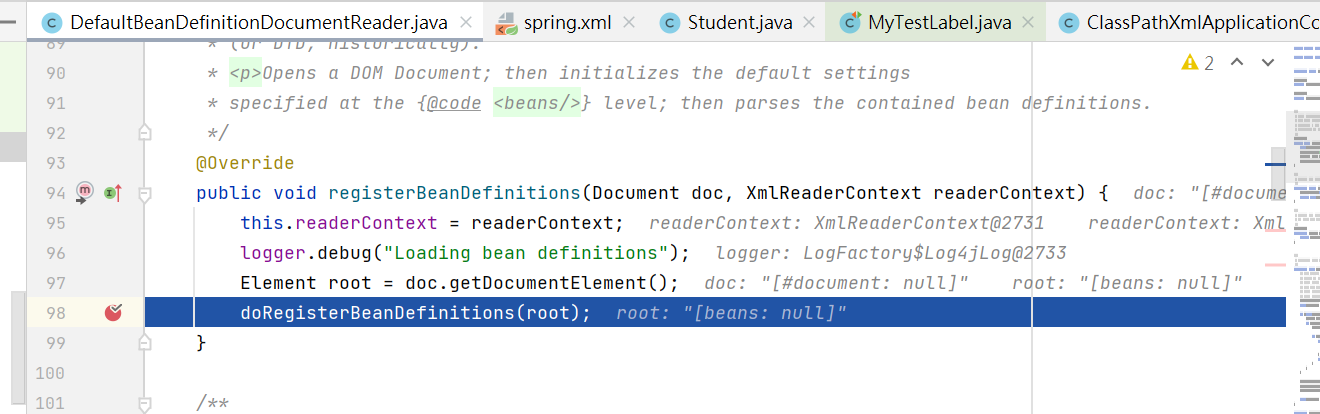
如上图这个方法就是spring框架解析xml标签的方法.step into进入.
6)
protected void parseBeanDefinitions(Element root, BeanDefinitionParserDelegate delegate) {
if (delegate.isDefaultNamespace(root)) {
NodeList nl = root.getChildNodes();
for (int i = 0; i < nl.getLength(); i++) {
Node node = nl.item(i);
if (node instanceof Element) {
Element ele = (Element) node;
if (delegate.isDefaultNamespace(ele)) {
// 处理spring的默认标签
parseDefaultElement(ele, delegate);
}
else {
//处理用户自定义的标签.
delegate.parseCustomElement(ele);
}
}
}
}
else {
delegate.parseCustomElement(root);
}
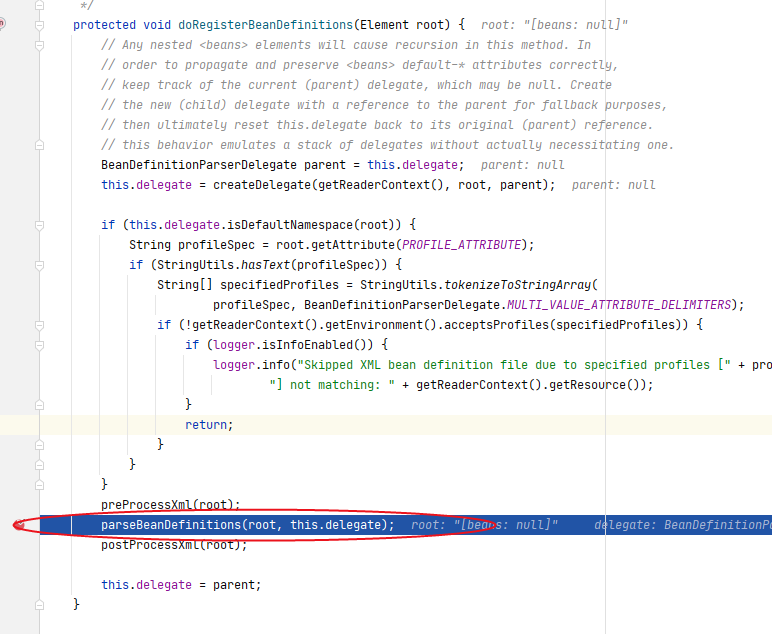
}在获取了xml的根元素后,进入到 parseBeanDefinitions(),而后根据xml的命名空间的判断进而选择进入默认标签的方法,还是处理用户自定义标签的方法.
而本文主要解析spring的默认标签,故给parsedefaultElement打上断点,setpinto。
7)
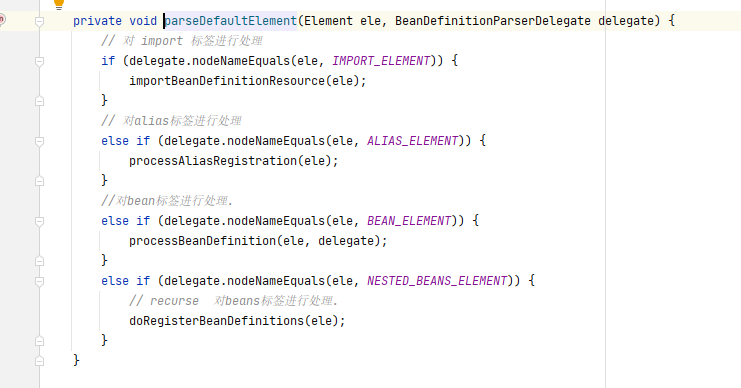
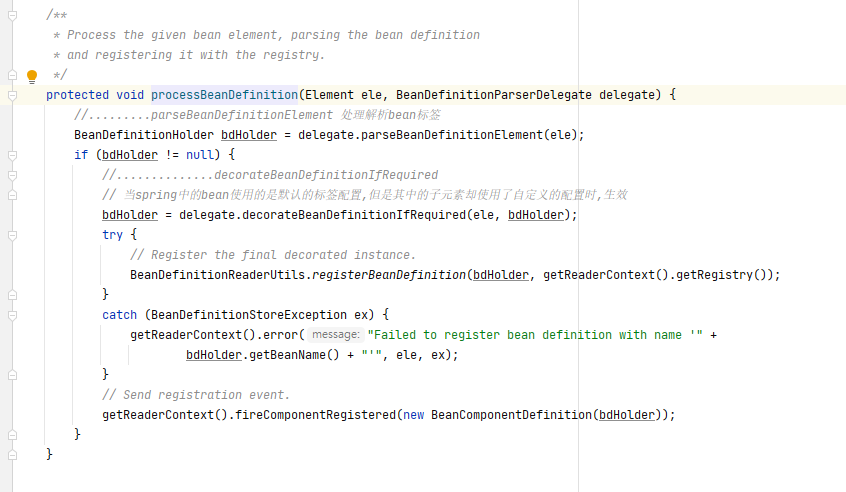
上图所示进行spring对默认的import alias bean 以及 beans标签的解析.而上述 中最要的是bean标签的解析.故进入processBeanDefinition();
8)
9)
@Nullable
public BeanDefinitionHolder parseBeanDefinitionElement(Element ele, @Nullable BeanDefinition containingBean) {
   String id = ele.getAttribute(ID_ATTRIBUTE);
   String nameAttr = ele.getAttribute(NAME_ATTRIBUTE);

   List<String> aliases = new ArrayList<>();
   if (StringUtils.hasLength(nameAttr)) {
      String[] nameArr = StringUtils.tokenizeToStringArray(nameAttr, MULTI_VALUE_ATTRIBUTE_DELIMITERS);
      aliases.addAll(Arrays.asList(nameArr));
   }

   String beanName = id;
   if (!StringUtils.hasText(beanName) && !aliases.isEmpty()) {
      beanName = aliases.remove(0);
      if (logger.isDebugEnabled()) {
         logger.debug("No XML 'id' specified - using '" + beanName +
               "' as bean name and " + aliases + " as aliases");
      }
   }

   if (containingBean == null) {
      checkNameUniqueness(beanName, aliases, ele);
   }
   // 进一步解析其他所有属性并统一封装至GenericBeanDefinition类型实例中.
   AbstractBeanDefinition beanDefinition = parseBeanDefinitionElement(ele, beanName, containingBean);
   if (beanDefinition != null) {
      if (!StringUtils.hasText(beanName)) {
         try {
            //如何不存在beanName 那么根据Spring中提供的命名规则为当前Bean生成对应的beanName
            if (containingBean != null) {
               beanName = BeanDefinitionReaderUtils.generateBeanName(
                     beanDefinition, this.readerContext.getRegistry(), true);
            }
            else {
               beanName = this.readerContext.generateBeanName(beanDefinition);
               // Register an alias for the plain bean class name, if still possible,
               // if the generator returned the class name plus a suffix.
               // This is expected for Spring 1.2/2.0 backwards compatibility.
               String beanClassName = beanDefinition.getBeanClassName();
               if (beanClassName != null &&
                     beanName.startsWith(beanClassName) && beanName.length() > beanClassName.length() &&
                     !this.readerContext.getRegistry().isBeanNameInUse(beanClassName)) {
                  aliases.add(beanClassName);
               }
            }
            if (logger.isDebugEnabled()) {
               logger.debug("Neither XML 'id' nor 'name' specified - " +
                     "using generated bean name [" + beanName + "]");
            }
         }
         catch (Exception ex) {
            error(ex.getMessage(), ele);
            return null;
         }
      }
      // 将获取的信息封装到BeanDefinitionHolder
      String[] aliasesArray = StringUtils.toStringArray(aliases);
      return new BeanDefinitionHolder(beanDefinition, beanName, aliasesArray);
   }

   return null;
}
解析完成!
最后
以上就是难过悟空最近收集整理的关于spring解析xml默认标签源码解析的全部内容,更多相关spring解析xml默认标签源码解析内容请搜索靠谱客的其他文章。
本图文内容来源于网友提供,作为学习参考使用,或来自网络收集整理,版权属于原作者所有。


发表评论 取消回复