文章目录
- Tomcat安装及配置
- Eclipse安装
- Eclipse+Tomcat
- Eclipse+MySQL
- Hello World! (for JSP)
- Hello World! (for Servlet)
- Tomcat执行原理
- web.xml
- JSP和Servlet的学习顺序
Tomcat安装及配置
CentOS Tomcat配置
他这个防火墙还是iptables,7的默认防火墙是firewalld
firewalld命令集
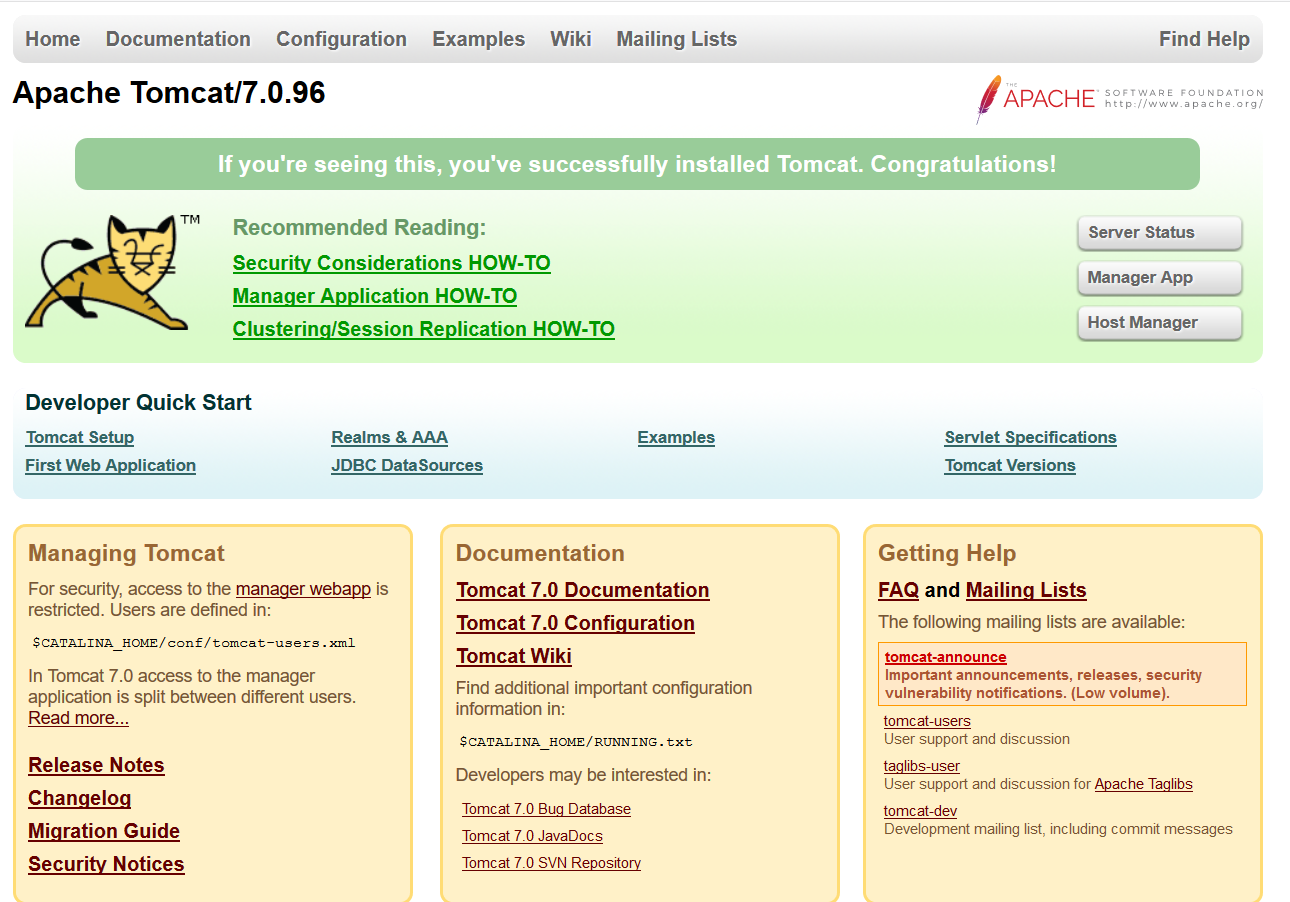
配好了以后启动一下tomcat试试
访问localhost:8080
Eclipse安装
CentOS安装Eclipse
有一个很有意思的bug
开机第一次运行Eclipse后输入中文没问题
但是保存时报了工作空间无权写入的问题
然后关闭再打开就死活输不进去中文了
所以为了防止这个bug需要改一下工作空间的权限
chmod -R 777 eclipse-workspace
再记一个小坑
开机运行后发现所有项目都不见了
报了类似于Cannot determine URI for ‘/Test/src/test/Buff.java’.的错误
不知道原因是什么
试着重新导入了一下成功了
import --> General --> Existing Projects into Workspace -->
Select Root Directory --> 选择工作空间 --> Finish
如果以后还出现的话再下功夫解决。
Eclipse+Tomcat
菜鸟教程
Eclipse+MySQL
首先需要一个jar包
MySQL 8.0以下版本
MySQL 8.0 以上版本
然后把jar包添加至tomcat的lib目录下
或者把jar包导入工程中
Eclipse导入外部jar包
MySQL建表
CREATE TABLE `websites` (
  `id` int(11) NOT NULL AUTO_INCREMENT,
  `name` char(20) NOT NULL DEFAULT '' COMMENT '站点名称',
  `url` varchar(255) NOT NULL DEFAULT '',
  `alexa` int(11) NOT NULL DEFAULT '0' COMMENT 'Alexa 排名',
  `country` char(10) NOT NULL DEFAULT '' COMMENT '国家',
  PRIMARY KEY (`id`)
) ENGINE=InnoDB AUTO_INCREMENT=10 DEFAULT CHARSET=utf8;
插数据
INSERT INTO `websites` VALUES
('1', 'Google', 'https://www.google.cm/', '1', 'USA'),
('2', '淘宝', 'https://www.taobao.com/', '13', 'CN'),
('3', '菜鸟教程', 'http://www.runoob.com', '5892', ''),
('4', '微博', 'http://weibo.com/', '20', 'CN'),
 ('5', 'Facebook', 'https://www.facebook.com/', '3', 'USA');
测试代码
package yourpackagename;

import java.sql.*;

public class MySQLDemo {

    // MySQL 8.0 以下版本 - JDBC 驱动名及数据库 URL
    static final String JDBC_DRIVER = "com.mysql.jdbc.Driver";
    static final String DB_URL = "jdbc:mysql://localhost:3306/数据库名";

    // MySQL 8.0 以上版本 - JDBC 驱动名及数据库 URL
    //static final String JDBC_DRIVER = "com.mysql.cj.jdbc.Driver";
    //static final String DB_URL = "jdbc:mysql://localhost:3306/RUNOOB?useSSL=false&serverTimezone=UTC";


    // 数据库的用户名与密码,需要根据自己的设置
    static final String USER = "root";
    static final String PASS = "123456";

    public static void main(String[] args) {
        Connection conn = null;
        Statement stmt = null;
        try{
            // 注册 JDBC 驱动
            Class.forName(JDBC_DRIVER);

            // 打开链接
            System.out.println("连接数据库...");
            conn = DriverManager.getConnection(DB_URL,USER,PASS);

            // 执行查询
            System.out.println(" 实例化Statement对象...");
            stmt = conn.createStatement();
            String sql;
            sql = "SELECT id, name, url FROM websites";
            ResultSet rs = stmt.executeQuery(sql);

            // 展开结果集数据库
            while(rs.next()){
                // 通过字段检索
                int id  = rs.getInt("id");
                String name = rs.getString("name");
                String url = rs.getString("url");

                // 输出数据
                System.out.print("ID: " + id);
                System.out.print(", 站点名称: " + name);
                System.out.print(", 站点 URL: " + url);
                System.out.print("n");
            }
            // 完成后关闭
            rs.close();
            stmt.close();
            conn.close();
        }catch(SQLException se){
            // 处理 JDBC 错误
            se.printStackTrace();
        }catch(Exception e){
            // 处理 Class.forName 错误
            e.printStackTrace();
        }finally{
            // 关闭资源
            try{
                if(stmt!=null) stmt.close();
            }catch(SQLException se2){
            }// 什么都不做
            try{
                if(conn!=null) conn.close();
            }catch(SQLException se){
                se.printStackTrace();
            }
        }
        System.out.println("Goodbye!");
    }
}
如果报错
 执行命令
执行命令
注意生产环境一定提前做好备份!!!
mysql_upgrade -u root -p
检查所有库的所有表是否与当前的新版本兼容,并更新系统库
然后重启一下mysql服务
systemctl restart mysqld
Hello World! (for JSP)
流程
File --> new --> Dynamic Web Project
注意最后勾选Generate web.xml deployment descriptor
忘记勾选下面有处理方法

工程名字即为网站子目录名
创建一个名为 WebTest 的工程

在WebContent文件夹下新建test.jsp

Run AS --> Run on Server
注意如果已经用startup.sh启动了Tomcat需要先stop,否则报错

访问localhost:8080//WebTest/test.jsp

Hello World!
忘记勾选后
/WebTest/WebContent/WEB-INF下新建web.xml
<?xml version="1.0" encoding="UTF-8"?>
<web-app version="2.5"
    xmlns="http://java.sun.com/xml/ns/javaee"
    xmlns:xsi="http://www.w3.org/2001/XMLSchema-instance"
    xsi:schemaLocation="http://java.sun.com/xml/ns/javaee
    http://java.sun.com/xml/ns/javaee/web-app_2_5.xsd">
  <servlet>
     <!-- 类名 -->
    <servlet-name>HelloServlet</servlet-name>
    <!-- 所在的包 -->
    <servlet-class>com.runoob.test.HelloServlet</servlet-class>
  </servlet>
  <servlet-mapping>
    <servlet-name>HelloServlet</servlet-name>
    <!-- 访问的网址 -->
    <url-pattern>/TomcatTest/HelloServlet</url-pattern>
    </servlet-mapping>
</web-app>
test.jsp代码
<%@ page language="java" contentType="text/html; charset=UTF-8"
    pageEncoding="UTF-8"%>
<!DOCTYPE html PUBLIC "-//W3C//DTD HTML 4.01 Transitional//EN" "http://www.w3.org/TR/html4/loose.dtd">
<html>
<head>
<meta http-equiv="Content-Type" content="text/html; charset=UTF-8">
<title>Test Page</title>
</head>
<body>
<%
    out.println("Hello World!");
%>
</body>
</html>
工程结构解析
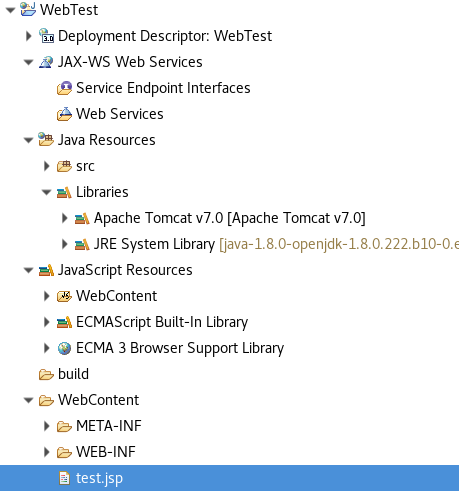
deployment descriptor:部署的描述。
Web App Libraries:自己加的包可以放在里面。
build:放入编译之后的文件。
WebContent:本工程下的发布目录,可以继续新建目录
比如WebContent下新建文件夹Test2,其下写一个test.jsp,运行
访问localhost:8080/WebTest/Test2/test.jsp 成功
Hello World! (for Servlet)
流程
File --> new --> Servlet
选择工程 我还是用的上次的WebTest
如果新建的话需要参考上面 忘记勾选后 的处理方法新建web.xml用于配置欢迎页、url pattern等
如果只想配置Servlet的话直接在代码中用 @WebServlet("/path"); 也可以

class name写 HelloWorldServlet
java package 写 servlet_test

运行
访问localhost:8080/WebTest/HelloWorldServlet
成功

注意HelloWorldServlet没有后缀
HelloWorldServlet.java如下
package servlet_test;


import java.io.IOException;
import javax.servlet.ServletException;
import javax.servlet.annotation.WebServlet;
import javax.servlet.http.HttpServlet;
import javax.servlet.http.HttpServletRequest;
import javax.servlet.http.HttpServletResponse;

/**
 * Servlet implementation class HelloServlet
 */
@WebServlet("/HelloWorldServlet")
//子目录名
public class HelloWorldServlet extends HttpServlet {
    private static final long serialVersionUID = 1L;

    /**
     * @see HttpServlet#HttpServlet()
     */
    public HelloWorldServlet() {
        super();
        // TODO Auto-generated constructor stub
    }

    /**
     * @see HttpServlet#doGet(HttpServletRequest request, HttpServletResponse response)
     */
    protected void doGet(HttpServletRequest request, HttpServletResponse response) throws ServletException, IOException {
        // 使用 GBK 设置中文正常显示
        response.setCharacterEncoding("GBK");
        response.getWriter().write("Hello World! this is a servlet");
    }

    /**
     * @see HttpServlet#doPost(HttpServletRequest request, HttpServletResponse response)
     */
    protected void doPost(HttpServletRequest request, HttpServletResponse response) throws ServletException, IOException {
        // TODO Auto-generated method stub
        doGet(request, response);
    }

}
@webservlet()的参数是访问时的最后名称
比如改为@webservlet("/Hello")
对应访问 localhost:8080/WebTest/Hello
Tomcat执行原理
Tomcat将jsp文件转java文件,然后把java文件编译为class文件,最终执行class文件
Tomcat执行原理
web.xml
web.xml
JSP和Servlet的学习顺序
开始也比较迷,在网上搜说啥的都有
我是先开始学的JSP,因为它不需要Servlet就可以独立运行
学到可以自如地配置JSP页面时再开始学Servlet
然后学JSP、Servlet、JavaBean、MySQL交互
最后
以上就是腼腆银耳汤最近收集整理的关于服务器运维:CentOS 7下搭建J2EE开发环境的全部内容,更多相关服务器运维:CentOS内容请搜索靠谱客的其他文章。


发表评论 取消回复