引言
两点:
一,使用MyBatis-Plus最新版(3.0.1)完成相关操作
二,好久没写MyBatis操作数据库的博文了,有没有想我啊,哈哈,认真看,认真听,认真学。
测试效果:
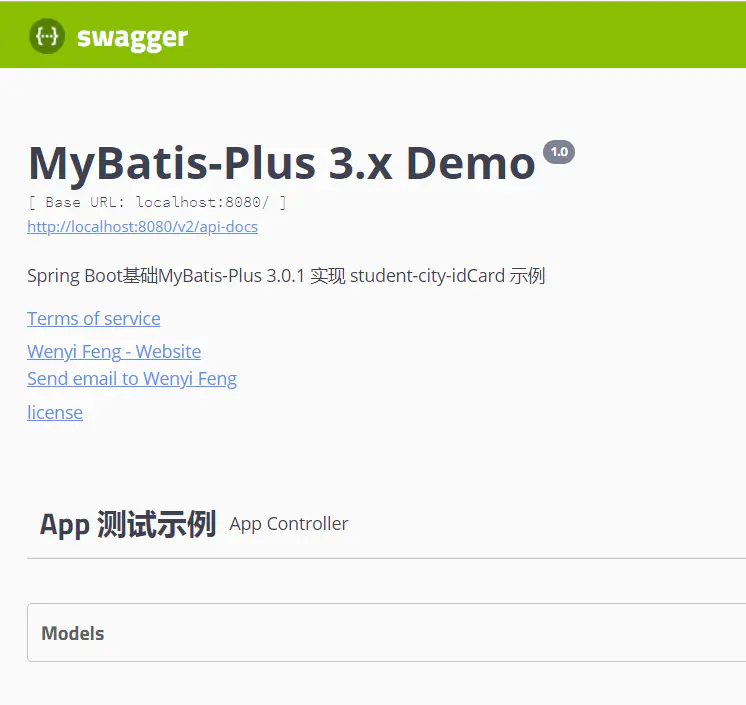
使用swagger2显示API接口
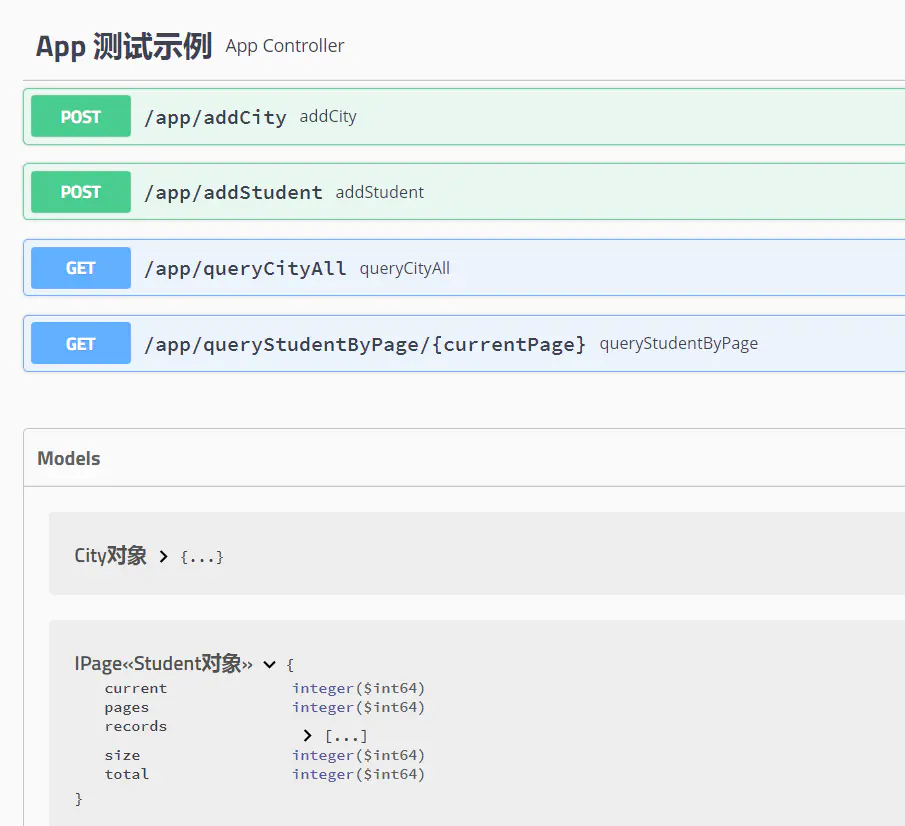
swagge2 接口以及model信息

分页接口测试.png
下面听我细细道来,MyBatis-Plus的优雅、简洁与强大。
代码生成器
代码生成器,又被叫做逆向工程,MyBatis官方为了推广,自己也写了一个,我之前也使用这个,功能也是非常强大,强大以为支持自定义配置,那么问题来了,我该怎么配置才合理呢,所以,有人把所有的配置项都弄成中文的,还有人开发了生成插件,这些在我以往的博文中都看看到。MyBatis-Plus的代码生成器到底怎么样,这我就不评判了,我就这样说,用用看吧。
在MyBatis-Plus的官网文档中,有将代码生成器的问题,有配置详解,也有项目示例代码,复制来就可用。
我这次是用MP 3.0.1,也就是最新版,官方还没有更新呢,所以,我去找了很久的源码,才将这个完成,勉强适合自己的了。这个在 CodeGenerator Module中,可以下下下来,导入到IDE中,看一下,修改配置就能运行。有问题,也可以与我讨论。
功能列表:
-
[✔] 自动生成model类
-
[✔] 自动生成dao接口
-
[✔] 自动生成xml文件
-
[✔] 自动生成service接口
-
[✔] 自动生成service实现类
-
[✔] model支持Builder模式
-
[✔] 支持swagger2
-
[✔] 支持生成数据库字段常量
-
[✔] 支持生成Kotlin代码
-
[] ......
项目初始化
第一步:pom.xml引入MyBatis-Plus依赖,注意,不需要再引入MyBatis的包,因为我这里使用Spring Boot搭建的工程,所有因为方式见下:
<dependencies>
    ...
    <dependency>
        <groupId>com.baomidou</groupId>
        <artifactId>mybatis-plus-boot-starter</artifactId>
        <version>3.0.1</version>
    </dependency>
    ...
</dependencies>
第二步:将生成的代码,拷贝到相应的包下
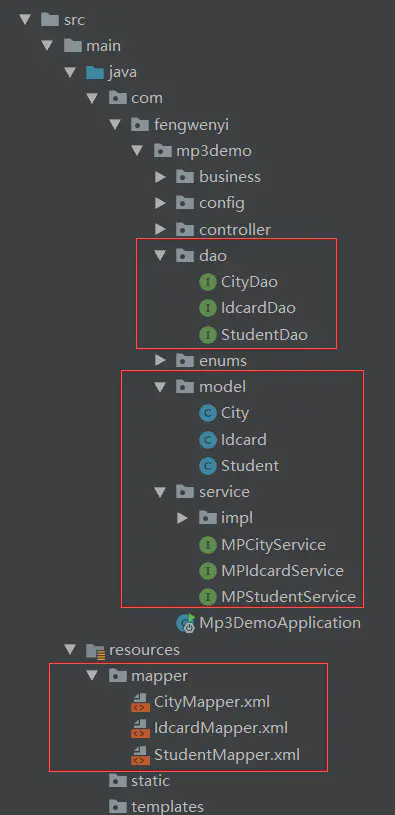
代码目录结构
第三步:在配置文件中进行相应的配置
具体配置可参考官网,这里需要注意这样几个地方:
mybatis-plus:
  # xml
  mapper-locations: classpath:mapper/*Mapper.xml
  # 实体扫描,多个package用逗号或者分号分隔
  type-aliases-package: com.fengwenyi.mp3demo.model
  configuration:
    # 这个配置会将执行的sql打印出来,在开发或测试的时候可以用
    log-impl: org.apache.ibatis.logging.stdout.StdOutImpl

日志:分页查询
第四步:在启动类上添加下面的注解
@EnableTransactionManagement
@MapperScan("com.fengwenyi.mp3demo.dao")
增删改
Service
我们一起去看源码 com.baomidou.mybatisplus.extension.service.IService<T>
增加:
    /**
     * <p>
     * 插入一条记录(选择字段,策略插入)
     * </p>
     *
     * @param entity 实体对象
     */
    boolean save(T entity);
修改:
    /**
     * <p>
     * 根据 ID 选择修改
     * </p>
     *
     * @param entity 实体对象
     */
    boolean updateById(T entity);

    /**
     * <p>
     * 根据 whereEntity 条件,更新记录
     * </p>
     *
     * @param entity        实体对象
     * @param updateWrapper 实体对象封装操作类
     * {@link com.baomidou.mybatisplus.core.conditions.update.UpdateWrapper}
     */
    boolean update(T entity, Wrapper<T> updateWrapper);
删除:
    /**
     * <p>
     * 根据 ID 删除
     * </p>
     *
     * @param id 主键ID
     */
    boolean removeById(Serializable id);

    /**
     * <p>
     * 根据 entity 条件,删除记录
     * </p>
     *
     * @param queryWrapper 实体包装类
     * {@link com.baomidou.mybatisplus.core.conditions.query.QueryWrapper}
     */
    boolean remove(Wrapper<T> queryWrapper);
Mapper
com.baomidou.mybatisplus.core.mapper.BaseMapper<T>
增加:
    /**
     * <p>
     * 插入一条记录
     * </p>
     *
     * @param entity 实体对象
     */
    int insert(T entity);
修改:
    /**
     * <p>
     * 根据 whereEntity 条件,更新记录
     * </p>
     *
     * @param entity        实体对象 (set 条件值,不能为 null)
     * @param updateWrapper 实体对象封装操作类(可以为 null,里面的 entity 用于生成 where 语句)
     */
    int update(@Param(Constants.ENTITY) T entity,
               @Param(Constants.WRAPPER) Wrapper<T> updateWrapper);

    /**
     * <p>
     * 根据 ID 修改
     * </p>
     *
     * @param entity 实体对象
     */
    int updateById(@Param(Constants.ENTITY) T entity);
删除:
    /**
     * <p>
     * 根据 entity 条件,删除记录
     * </p>
     *
     * @param queryWrapper 实体对象封装操作类(可以为 null)
     */
    int delete(@Param(Constants.WRAPPER) Wrapper<T> queryWrapper);

    /**
     * <p>
     * 根据 ID 删除
     * </p>
     *
     * @param id 主键ID
     */
    int deleteById(Serializable id);
以上相当于是常用API了,我们去看看,他是怎么实现的。毫无疑问,Mapper是底层,Service调用Mapper去执行sql,完成相关操作,所以,你完全可以直接调用Mapper完成相关操作,就跟使用MyBatis一样。下面我们去看看,他帮我们写的Service是什么样子,这里只看一个修改操作吧。
接口:
    /**
     * <p>
     * 根据 whereEntity 条件,更新记录
     * </p>
     *
     * @param entity        实体对象
     * @param updateWrapper 实体对象封装操作类
     * {@link com.baomidou.mybatisplus.core.conditions.update.UpdateWrapper}
     */
    boolean update(T entity, Wrapper<T> updateWrapper);
实现:
    @Override
    public boolean update(T entity, Wrapper<T> updateWrapper) {
        return ServiceImpl.retBool(baseMapper.update(entity, updateWrapper));
    }

    /**
     * <p>
     * 判断数据库操作是否成功
     * </p>
     * <p>
     * 注意!! 该方法为 Integer 判断,不可传入 int 基本类型
     * </p>
     *
     * @param result 数据库操作返回影响条数
     * @return boolean
     */
    protected static boolean retBool(Integer result) {
        return SqlHelper.retBool(result);
    }

    /**
     * <p>
     * 判断数据库操作是否成功
     * </p>
     *
     * @param result 数据库操作返回影响条数
     * @return boolean
     */
    public static boolean retBool(Integer result) {
        return null != result && result >= 1;
    }
哈哈,是不是我们自己也会这样写啊!
查询
接下来,我们一起讨论下查询吧。
MP 3.x,查询接口发生了很大的变化,反正我是不喜欢的,你就弄一个什么开头啊,到时候,我一点就知道有哪些方法了,他这里有 list*, get*,反正就是一个字——没必要。
先看下接口说明:
    /**
     * <p>
     * 查询列表
     * </p>
     *
     * @param queryWrapper 实体对象封装操作类
     * {@link com.baomidou.mybatisplus.core.conditions.query.QueryWrapper}
     */
    List<T> list(Wrapper<T> queryWrapper);

      /**
     * <p>
     * 根据 ID 查询
     * </p>
     *
     * @param id 主键ID
     */
    T getById(Serializable id);

    /**
     * <p>
     * 根据 Wrapper,查询一条记录
     * </p>
     *
     * @param queryWrapper 实体对象封装操作类
     * {@link com.baomidou.mybatisplus.core.conditions.query.QueryWrapper}
     */
    T getOne(Wrapper<T> queryWrapper);
嗯,差不多了吧,这样需要注意这样一个方法:
    /**
     * <p>
     * 从list中取第一条数据返回对应List中泛型的单个结果
     * </p>
     *
     * @param list
     * @param <E>
     * @return
     */
    public static <E> E getObject(List<E> list) {
        if (CollectionUtils.isNotEmpty(list)) {
            int size = list.size();
            if (size > 1) {
                SqlHelper.logger.warn(
String.format("Warn: execute Method There are  %s results.", size));
            }
            return list.get(0);
        }
        return null;
    }
下面说下分页的问题
根据官网的说法,需要借助插件,这我们是可以理解。
在Spring Boot启动类里面添加:
    /**
     * 分页插件
     */
    @Bean
    public PaginationInterceptor paginationInterceptor() {
        return new PaginationInterceptor();
    }
这样就可以使用他提供的分页接口了:
    /**
     * <p>
     * 翻页查询
     * </p>
     *
     * @param page         翻页对象
     * @param queryWrapper 实体对象封装操作类
     * {@link com.baomidou.mybatisplus.core.conditions.query.QueryWrapper}
     */
    IPage<T> page(IPage<T> page, Wrapper<T> queryWrapper);
我们去看一下:
    @Override
    public IPage<T> page(IPage<T> page, Wrapper<T> queryWrapper) {
        queryWrapper = (Wrapper<T>) SqlHelper.fillWrapper(page, queryWrapper);
        return baseMapper.selectPage(page, queryWrapper);
    }

    /**
     * <p>
     * 填充Wrapper
     * </p>
     *
     * @param page    分页对象
     * @param wrapper SQL包装对象
     */
    @SuppressWarnings("unchecked")
    public static Wrapper<?> fillWrapper(IPage<?> page, Wrapper<?> wrapper) {
        if (null == page) {
            return wrapper;
        }
        if (ArrayUtils.isEmpty(page.ascs())
            && ArrayUtils.isEmpty(page.descs())
            && ObjectUtils.isEmpty(page.condition())) {
            return wrapper;
        }
        QueryWrapper qw;
        if (null == wrapper) {
            qw = new QueryWrapper<>();
        } else {
            qw = (QueryWrapper) wrapper;
        }
        // 排序
        if (ArrayUtils.isNotEmpty(page.ascs())) {
            qw.orderByAsc(page.ascs());
        }
        if (ArrayUtils.isNotEmpty(page.descs())) {
            qw.orderByDesc(page.descs());
        }
        // MAP 参数查询
        if (ObjectUtils.isNotEmpty(page.condition())) {
            qw.allEq(page.condition());
        }
        return qw;
    }

    /**
     * <p>
     * 根据 entity 条件,查询全部记录(并翻页)
     * </p>
     *
     * @param page         分页查询条件(可以为 RowBounds.DEFAULT)
     * @param queryWrapper 实体对象封装操作类(可以为 null)
     */
    IPage<T> selectPage(IPage<T> page, @Param(Constants.WRAPPER) Wrapper<T> queryWrapper);
分页的代码大抵就是这样,我之前也自己写过,思路还是相当来说比较简单,关键是看你的查询添加如何封装,分页类如何构造。
这里有一点说明:
分页从 1 开始 !!!
枚举类
1、实现 接口
/**
 * <p>
 * 自定义枚举接口
 * </p>
 *
 * @author hubin
 * @since 2017-10-11
 */
public interface IEnum<T extends Serializable> {

    /**
     * 枚举数据库存储值
     */
    T getValue();

}
2、实现注意
    @Override
    public Integer getValue() {
        return this.value;
    }

    @JsonValue
    public String getDesc() {
        return desc;
    }
这是Jackson的写法,我没用FastJson,所以用的伙伴,去官网看一下:FastJson看官网。
3:被忘了在配置文件中添加扫描:
mybatis-plus:
  # 扫描枚举类 # 支持统配符 * 或者 ; 分割
  type-enums-package: com.fengwenyi.mp3demo.enums
差不多了吧,好像
逻辑删除
1、代码生成器中配置:
new StrategyConfig().setLogicDeleteFieldName("is_delete") // 逻辑删除属性名称
或者,你可以手写,参考:
    @ApiModelProperty(value = "是否逻辑删除(true:删除;false:正常(默认))")
    @TableLogic
    private Boolean isDelete;
2、自定义数据库的值:
mybatis-plus:
  global-config:
    db-config:
      #逻辑删除配置
      logic-delete-value: 1
      logic-not-delete-value: 0
MyBatis-Plus-Example
MyBatis-Plus的代码都会上传到github上
https://github.com/fengwenyi/MyBatis-Plus-Example
参考资料
-
MyBatis-Plus
-
MyBatis-Plus 使用枚举自动关联注入
-
mybatis-plus插件使用的一些问题
-
设计模式之Builder模式
-
修复Long类型太长,而Java序列化JSON丢失精度问题的方法
最后
以上就是饱满外套最近收集整理的关于MyBatis-Plus | 最优雅最简洁地完成数据库操作的全部内容,更多相关MyBatis-Plus内容请搜索靠谱客的其他文章。


发表评论 取消回复