
1.人脸模糊
人脸模糊是一种计算机视觉方法,用于匿名化图像和视频中的人脸,保护身份隐私。
思路:
- 输入视频或图像
- 检测出图像中的人脸
- 提取面部感兴趣区域ROI
- 使面部模糊化
- 返回结果,覆盖原图中的区域并显示
2.代码
环境:
- win10
- pycharm
- anaconda3
- python3.7
- opencv4.2.0
对于OpenCV尽量用最新版本,可参考这篇仅一个命令行简单快速安装:https://blog.csdn.net/y459541195/article/details/104851892
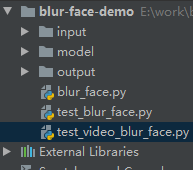
文件结构:
2.1 单图像人脸模糊
from blur_face import blurred_face_gauss
from blur_face import  blurred_face_pixel
import numpy as np
import cv2
import argparse

"""
#方法一
执行:
python test_blur_face.py

#方法二
执行:
python test_blur_face.py --method pixel
"""

ap = argparse.ArgumentParser()
ap.add_argument("-m", "--method", type=str, default="gauss",
	choices=["gauss", "pixel"],
	help="gauss/pixel method")
args = vars(ap.parse_args())
# 模型路径
prototxtPath ="./model/deploy.prototxt"
weightsPath = "./model/res10_300x300_ssd_iter_140000.caffemodel"
#加载模型
net  = cv2.dnn.readNet(prototxtPath,weightsPath)

#获取图像
image = cv2.imread("./input/test01.png")
src = image.copy()
(h,w)= image.shape[:2]

# 构造blob
blob = cv2.dnn.blobFromImage(image,1.0,(300,300),
                             (104,177,123))
# 送入网络计算
net.setInput(blob)
detect = net.forward()
# 检测
for i in range(0,detect.shape[2]):
    confidence = detect[0,0,i,2]
    # 过滤掉小的置信度,计算坐标,提取面部roi
    if confidence > 0.5:
        box = detect[0,0,i,3:7]*np.array([w,h,w,h])
        (startX,startY,endX,endY) = box.astype("int")
        face = image[startY:endY,startX:endX]

        #高斯方法
        if args["method"] == "gauss":
            face  = blurred_face_gauss(face,kernel_scale=3.0)

        # 像素模糊法
        else:
            face = blurred_face_pixel(face,pixel_blocks=20)

        image[startY:endY,startX:endX] = face

# 水平方向上平铺显示图
result = np.hstack([src,image])
cv2.imshow("Result",result)
cv2.waitKey(0)
2.2 视频流人脸模糊
from blur_face import blurred_face_gauss
from blur_face import  blurred_face_pixel
import numpy as np
import cv2
import argparse
import imutils


"""
#方法一
执行:
python test_video_blur_face.py

#方法二
执行:
python test_video_blur_face.py --method pixel
"""

ap = argparse.ArgumentParser()
ap.add_argument("-m", "--method", type=str, default="gauss",
	choices=["gauss", "pixel"],
	help="gauss/pixel method")
args = vars(ap.parse_args())
# 模型路径
prototxtPath ="./model/deploy.prototxt"
weightsPath = "./model/res10_300x300_ssd_iter_140000.caffemodel"
#加载模型
net  = cv2.dnn.readNet(prototxtPath,weightsPath)

#获取视频图像
videoPath = "./input/test1.mp4"
vs = cv2.VideoCapture(videoPath)

#处理视频流
while True:
    (grabbed,frame) = vs.read()

    # 判断是否结束
    if not grabbed:
        print("无视频读取...")
        break
    frame = imutils.resize(frame,width=720)

    (h,w) = frame.shape[:2]
    # 构造blob
    blob = cv2.dnn.blobFromImage(frame,1.0,(300,300),
                                 (104,177,123))
    # 送入网络计算
    net.setInput(blob)
    detect = net.forward()
    # 检测
    for i in range(0,detect.shape[2]):
        confidence = detect[0,0,i,2]
        # 过滤掉小的置信度,计算坐标,提取面部roi
        if confidence > 0.5:
            box = detect[0,0,i,3:7]*np.array([w,h,w,h])
            (startX,startY,endX,endY) = box.astype("int")
            face = frame[startY:endY,startX:endX]

            #高斯方法
            if args["method"] == "gauss":
                face  = blurred_face_gauss(face,kernel_scale=3.0)

            # 像素模糊法
            else:
                face = blurred_face_pixel(face,pixel_blocks=20)

            frame[startY:endY,startX:endX] = face

    cv2.imshow("Result", frame)
    key = cv2.waitKey(1) & 0xFF

    if key == ord("q"):
        break
cv2.destroyAllWindows()
vs.release()
3.测试
3.1 单图测试
高斯模糊法:
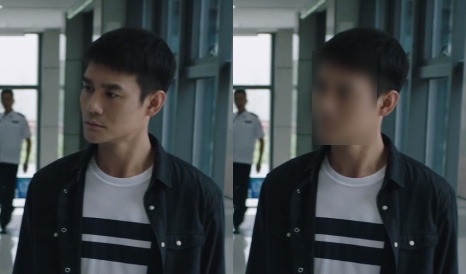
图1
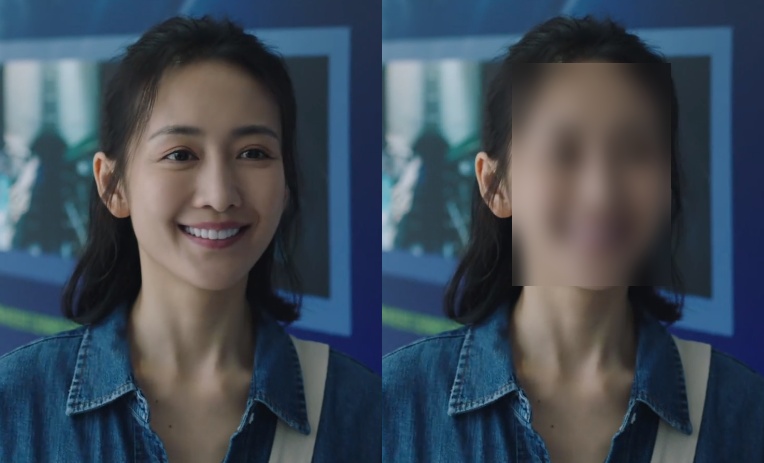
图2
像素模糊法:
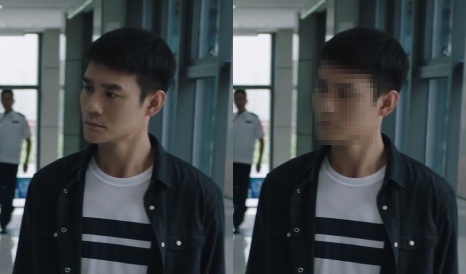
图1
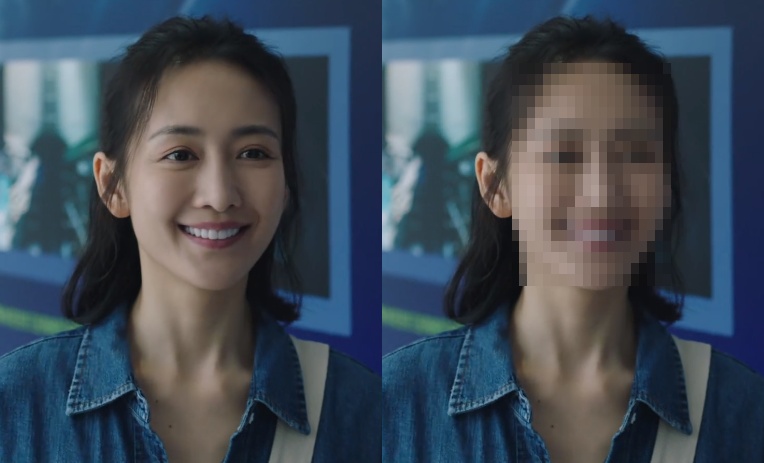
图2
3.2 视频流测试
方法一:
OpenCV之人脸模糊高斯法
视频地址:https://www.bilibili.com/video/BV1ti4y1t7Pp/
方法二:
OpenCV人脸模糊之像素模糊法
视频地址:https://www.bilibili.com/video/BV1x5411x74Y/
最后
以上就是顺心路人最近收集整理的关于OpenCV之人脸模糊的全部内容,更多相关OpenCV之人脸模糊内容请搜索靠谱客的其他文章。
本图文内容来源于网友提供,作为学习参考使用,或来自网络收集整理,版权属于原作者所有。


发表评论 取消回复