我是靠谱客的博主 苗条毛巾,这篇文章主要介绍TransUNet:使用自己的数据集完成训练后进行测试 1.修改test.py文件,需要与train.py中设置参数保持一致 2.修改utils.py中的test_single_volume函数,可以根据自己的分割类别修改,自定义不同颜色所代表的分割种类 3.运行test.py,测试结果会以.png格式保存在前面所设置的test_save_dir中,现在分享给大家,希望可以做个参考。
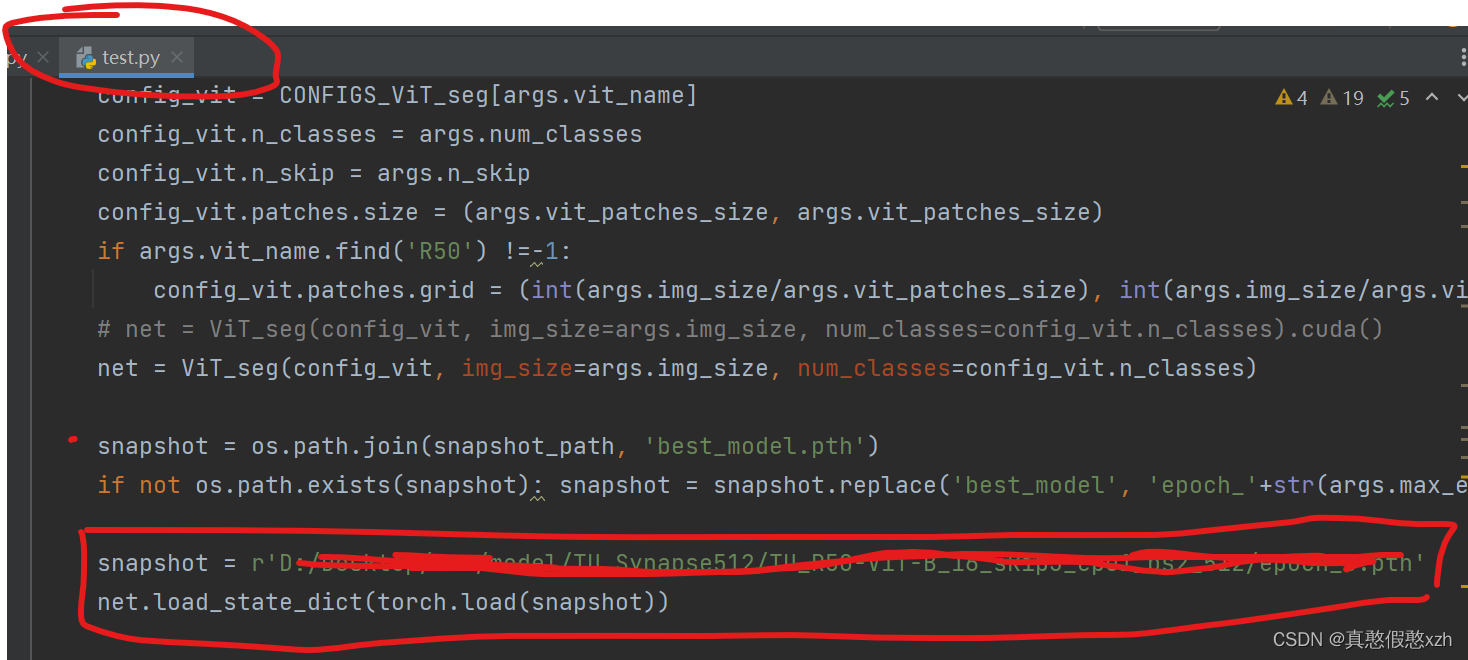
训练完成后,会保存模型 ,会显示权重保存的路径snapshot_path

1.修改test.py文件,需要与train.py中设置参数保持一致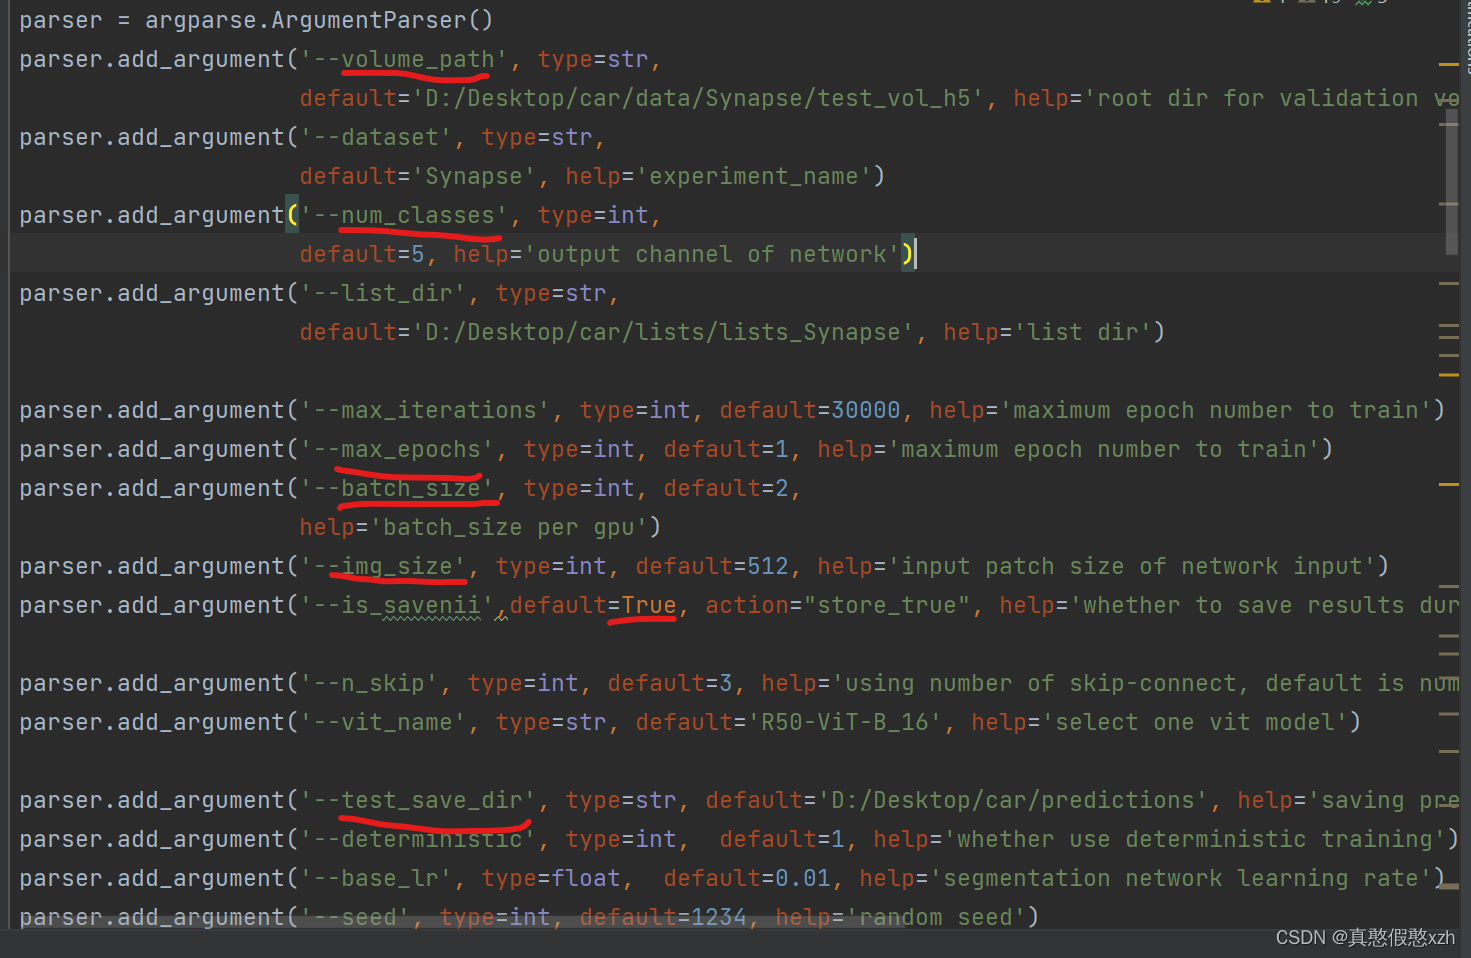
test_save_dir为测试结果的路径
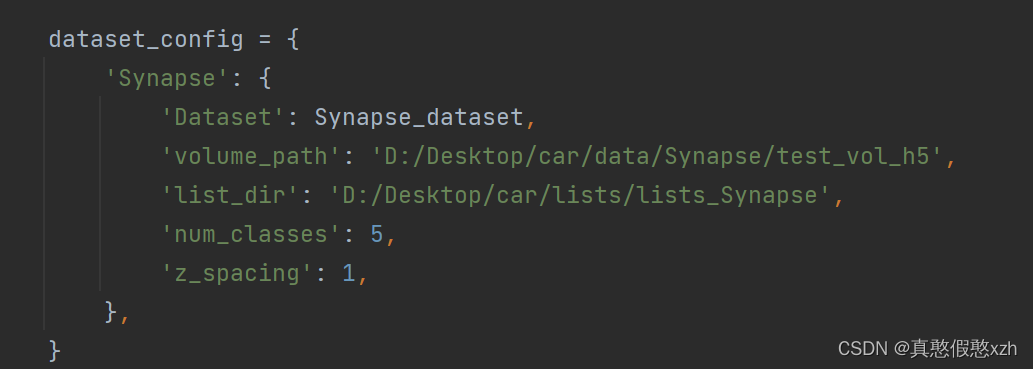
同样的与train.py中相同,配置自己数据集的相关信息
接着添加一下权重路径
2.修改utils.py中的test_single_volume函数,可以根据自己的分割类别修改,自定义不同颜色所代表的分割种类
def test_single_volume(image, label, net, classes, patch_size=[256, 256], test_save_path=None, case=None, z_spacing=1):
    image, label = image.squeeze(0).cpu().detach().numpy(), label.squeeze(0).cpu().detach().numpy()
    _,x, y = image.shape
    if x != patch_size[0] or y != patch_size[1]:
        image = zoom(image, (1,patch_size[0] / x, patch_size[1] / y), order=3)
        input = torch.from_numpy(image).unsqueeze(0).float()  #input = torch.from_numpy(image).unsqueeze(0).float().cuda()
    net.eval()
    with torch.no_grad():
        out = torch.argmax(torch.softmax(net(input), dim=1), dim=1).squeeze(0)
        out = out.cpu().detach().numpy()
        if x != patch_size[0] or y != patch_size[1]:
            prediction = zoom(out, (x / patch_size[0], y / patch_size[1]), order=0)
        else:
            prediction = out

    metric_list = []
    for i in range(1, classes):
        metric_list.append(calculate_metric_percase(prediction == i, label == i))

    if test_save_path is not None:
        a1 = copy.deepcopy(prediction)
        a2 = copy.deepcopy(prediction)
        a3 = copy.deepcopy(prediction)

##表示有4个类别
        a1[a1 == 1] = 255
        a1[a1 == 2] = 0   #代表R通道中输出结果为2的赋值0
        a1[a1 == 3] = 255
        a1[a1 == 4] = 20

        a2[a2 == 1] = 255
        a2[a2 == 2] = 255  #代表G通道中输出结果为2的赋值255
        a2[a2 == 3] = 0
        a2[a2 == 4] = 10

        a3[a3 == 1] = 255
        a3[a3 == 2] = 77   #代表B通道中输出结果为2的赋值77 ;(0,255,77)对应就是绿色,类别2就是绿色
        a3[a3 == 3] = 0
        a3[a3 == 4] = 120

        a1 = Image.fromarray(np.uint8(a1)).convert('L')  #array转换成image,Image.fromarray(np.uint8(img))
        a2 = Image.fromarray(np.uint8(a2)).convert('L')
        a3 = Image.fromarray(np.uint8(a3)).convert('L')
        prediction = Image.merge('RGB', [a1, a2, a3])
        prediction.save(test_save_path+'/'+case+'.png')


return metric_list3.运行test.py,测试结果会以.png格式保存在前面所设置的test_save_dir中
最后
以上就是苗条毛巾最近收集整理的关于TransUNet:使用自己的数据集完成训练后进行测试 1.修改test.py文件,需要与train.py中设置参数保持一致 2.修改utils.py中的test_single_volume函数,可以根据自己的分割类别修改,自定义不同颜色所代表的分割种类 3.运行test.py,测试结果会以.png格式保存在前面所设置的test_save_dir中的全部内容,更多相关TransUNet:使用自己内容请搜索靠谱客的其他文章。
本图文内容来源于网友提供,作为学习参考使用,或来自网络收集整理,版权属于原作者所有。


发表评论 取消回复