天地图API文档地址:天地图API
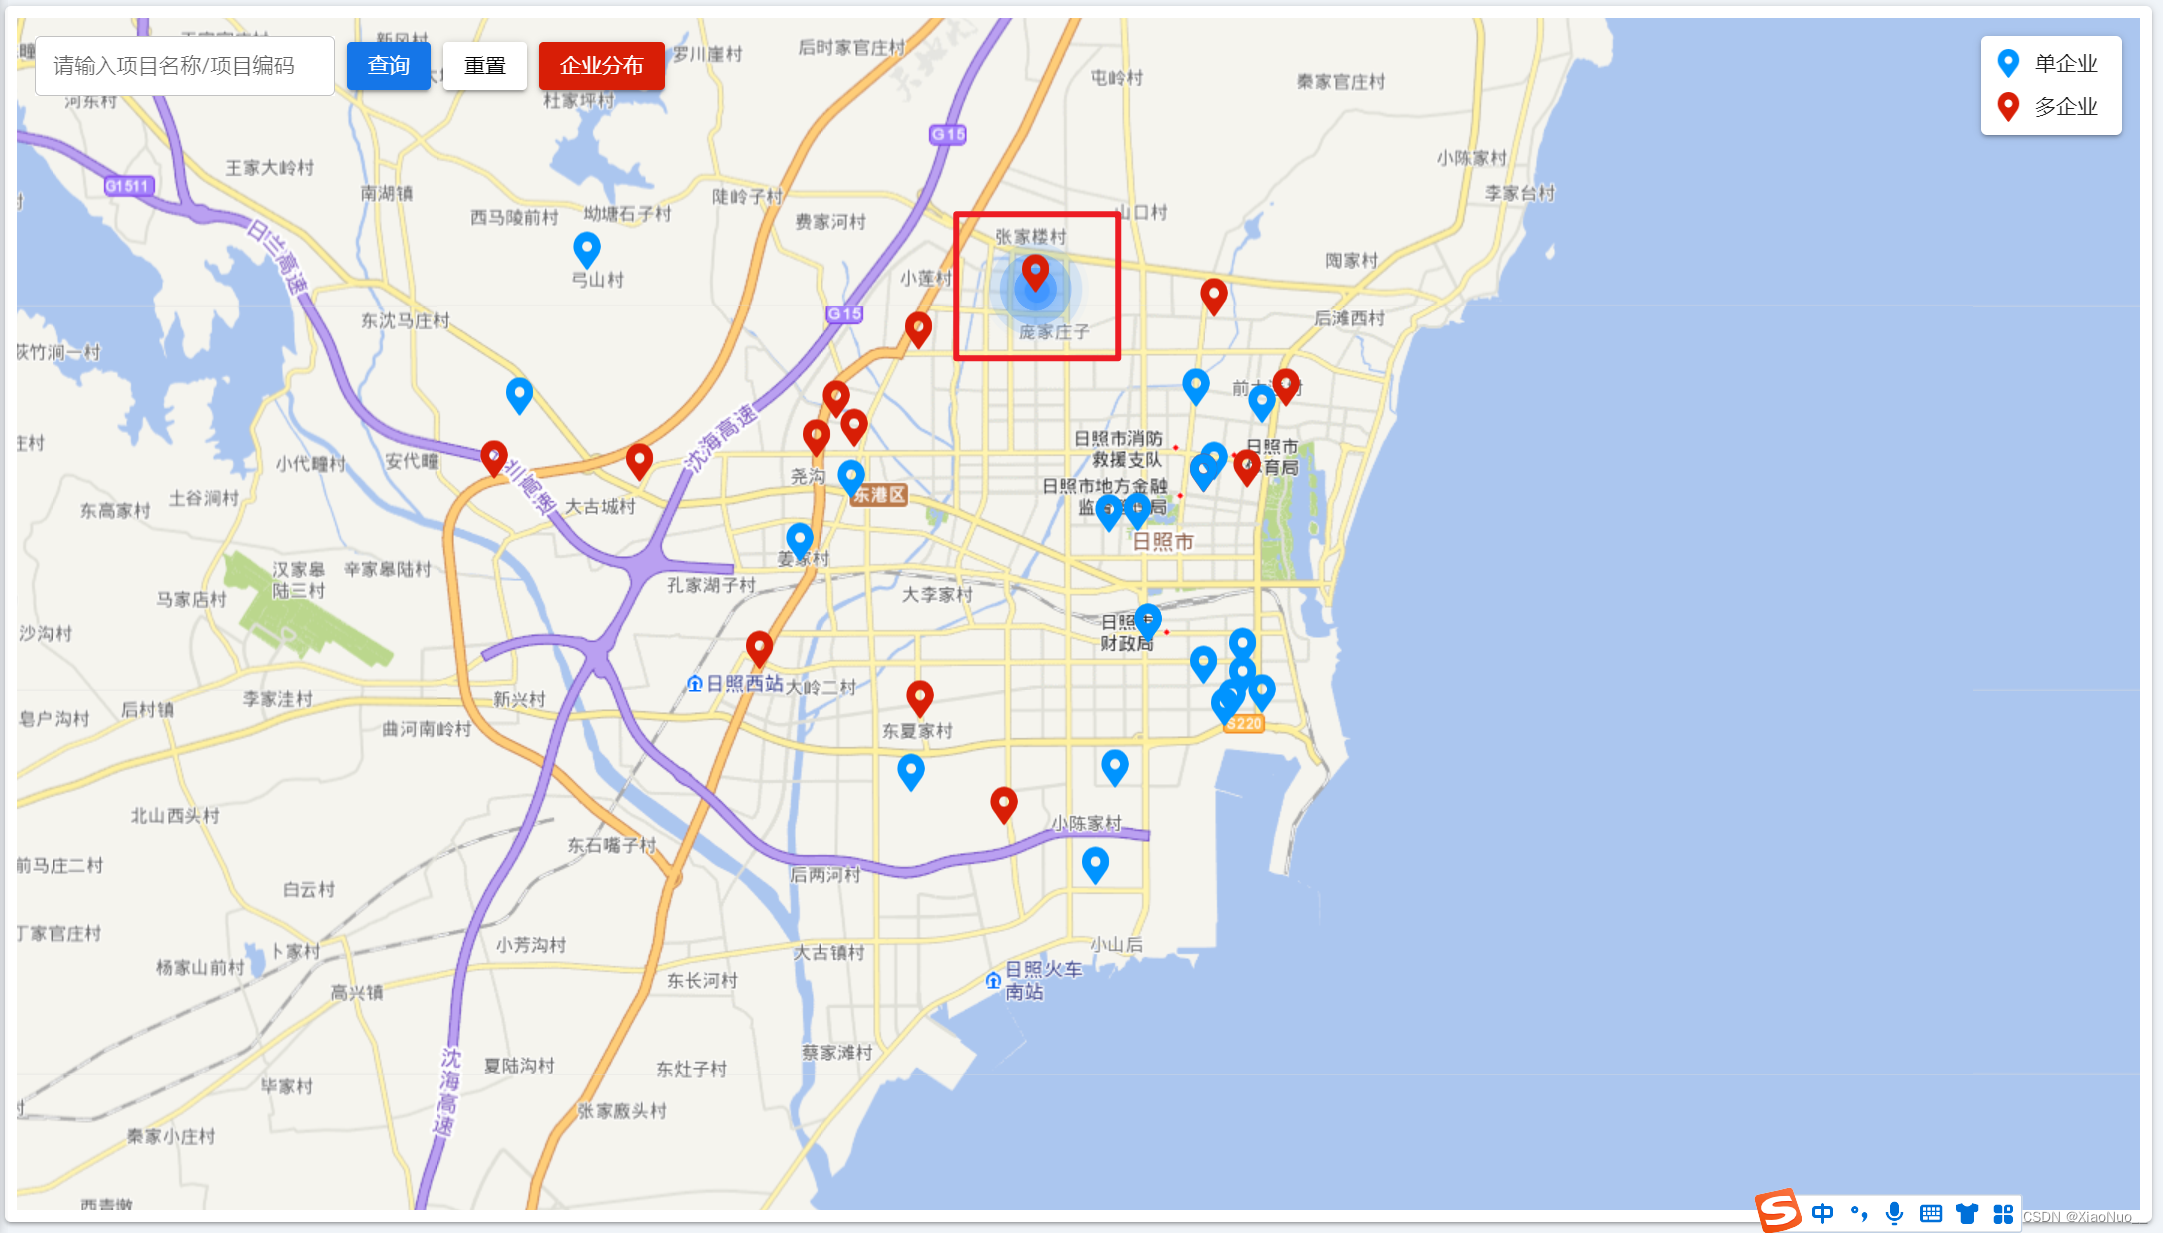
先上效果图:
这次实现的是一个点击效果,即当我在点击某一标注时,出现一个动态波纹效果,可以明确的了解到当前点击的是哪一标注。
不啰嗦直接上代码
首先是动态波纹的代码(html和css拷贝就可绘制出动态波纹效果):
html
<div class="circle-marker-content" >
        <div class="item item1" style='
              height:4vh;
              width:4vh;
        '></div>
        <div class="item item2" style='
              height:4vh;
              width:4vh;
        '></div>
        <div class="item item3" style='
              height:4vh;
              width:4vh;
        '></div>
        <div class="item item4" style='
              height:4vh;
              width:4vh;
        '></div>
        <div class="item item5" style='
              height:4vh;
              width:4vh;
        '></div>
</div>
css
.circle-marker-content {
    /* display: none; */
    position: absolute;
    top: 50%;
    left: 50%;
    height: 1.8vh;
    width: 1.8vh;
    transform: translate(-50%, -50%);
    border-radius: 100%;
    text-align: center;
    background: #4196ff;
    border: 1px solid #4196ff;
    box-shadow: 0px 0px 14px #4196ff;
    z-index: 1000;

    .item_count {
      position: absolute;
      top: 50%;
      left: 50%;
      transform: translate(-50%, -50%);
      color: #1C77C3;
      font-weight: bold;
      font-size: 13px;
      z-index: 10;
    }

    @keyframes scaless {
      0% {
        transform: scale(0);
        opacity: 1;
      }

      100% {
        transform: scale(2);
        opacity: 0;
      }
    }

    .item {
      width: 100%;
      height: 100%;
      position: absolute;
      border-radius: 100%;
      top: 50%;
      left: 50%;
      transform: translate(-50%, -50%);
    }

    .item:before {
      content: "";
      position: absolute;
      left: -1px;
      top: -1px;
      display: inline-block;
      width: 100%;
      height: 100%;
      border: 1px solid #4196ff;
      border-radius: 100%;
      opacity: 0;
      background-color: #4196ff;
      animation: scaless 5s infinite cubic-bezier(0, 0, 0.49, 1.02);
    }

    .item1:before {
      animation-delay: 0s;
    }

    .item2:before {
      animation-delay: 1s;
    }

    .item3:before {
      animation-delay: 2s;
    }

    .item4:before {
      animation-delay: 3s;
    }

    .item5::before {
      animation-delay: 4s;
    }
  }
然后 去初始化天地图渲染出地图 可参考 天地图API 中基本地图加载(记得申请key)
渲染完成地图后 ,天地图提供了 添加标注/覆盖物 的方法
/**
 *   添加标注  依据经纬度
 *   {Array}  data  渲染数据 每个对象中都包含经纬度
 */
pois(data) {
  console.error('添加标注-----------')
  const that = this;
  const zoomArr = [];
  data.map((i) => {
    // 判断经纬度是否存在
    if (i.latitude && i.longitude) {
      pointDimension([i.longitude, i.latitude], 'hc', i);
    }
  });
  function pointDimension(lnglatArr, type, item) {
    let iconUrl = '';
    if (type === 'hc') { // 自定义标注图片
      iconUrl = '/statics/image/map-icon1.png';
    }
    const icon = new T.Icon({
      iconUrl,
      iconSize: new T.Point(25, 27),
      iconAnchor: new T.Point(10, 25),
    });
    const lnglat = new T.LngLat(lnglatArr[0], lnglatArr[1]);
    // 创建标注对象
    const marker = new T.Marker(lnglat, { icon });
    marker.id = 'iconTag'; // 给图标加个名字  方便删除
    // 地图上添加标注点
    that.map.addOverLay(marker);

    // 注册标注点的点击事件
    marker.addEventListener('click', (e) => {

      // 添加点击效果
      var definedOverlay = T.Overlay.extend({
        initialize: function (lnglat) {
          that.lnglat = lnglat;
        },

        onAdd: function (map) {
          that.map = map;
          // 获取动态波纹DOM  CSS中加入display:none 一开始不展示 点击标注后展示
          var div = that._div = document.getElementsByClassName('circle-marker-content')[0];
          that._div.style.display = 'block'

          // 将动态波纹 渲染到地图中
          that.map.getPanes().overlayPane.appendChild(that._div);

          // 更新位置 将当前动态波纹位置通过经纬度 绝对定位到某个位置
          this.update(that.lnglat);
        },
        /**
         * 更新位置
         */
        update: function () {
          var pos = that.map.lngLatToLayerPoint(that.lnglat);
          that._div.style.top = ( pos.y) + "px";
          that._div.style.left = (pos.x + 4) + "px";
        }
      });

      // 添加标注/覆盖物
      var point = new T.LngLat(e.lnglat.lng, e.lnglat.lat);
      const pdefinedOverlay = new definedOverlay(point);
      that.map.addOverLay(pdefinedOverlay);
    }

    // 将标注添加到数组中
    zoomArr.push(lnglat);
    that.map.setViewport(zoomArr);
  }
}
OK 打完收工!
最后
以上就是重要小笼包最近收集整理的关于天地图添加动态波纹效果的全部内容,更多相关天地图添加动态波纹效果内容请搜索靠谱客的其他文章。
本图文内容来源于网友提供,作为学习参考使用,或来自网络收集整理,版权属于原作者所有。


发表评论 取消回复