连接sentinel控制台并实现限流
☞ 博客导航,带你有序的阅读和学习!
文章目录
- 连接sentinel控制台并实现限流
- ☞ [博客导航](https://blog.csdn.net/ooyhao/article/details/101559083),`带你有序的阅读和学习!`
- 连接sentinel控制台
- 依赖
- 配置文件
- Controller
- sentinel控制台效果
- 限流配置
连接sentinel控制台
我们这里依赖之前
依赖
<dependency>
    <groupId>com.alibaba.cloud</groupId>
    <artifactId>spring-cloud-starter-alibaba-sentinel</artifactId>
    <version>2.1.0.RELEASE</version>
</dependency>
配置文件
spring:
  cloud:
    sentinel:
      transport:
        dashboard: 192.168.56.101:8080
        port: 8719
  application:
    name: sentinel-simple
server:
  port: 8081
说明:
spring.cloud.sentinel.transport.dashboard来配置连接sentinel控制台的 ip:port;port: 默认是8719,这是端口是配置与sentinel dashboard来实时通信端口;server.port: 是当前项目的端口。
Controller
我们先简单编写一个测试的controller,来测试连接sentinel控制台的效果:
@RestController
public class TestController {
    @GetMapping(value = "/hello")
    public String hello() {
        return "Hello Sentinel";
    }
}
下面我们通过在控制台使用curl命令或是在浏览器访问几次 http://localhost:8081/hello 。

curl http://localhost:8081/hello
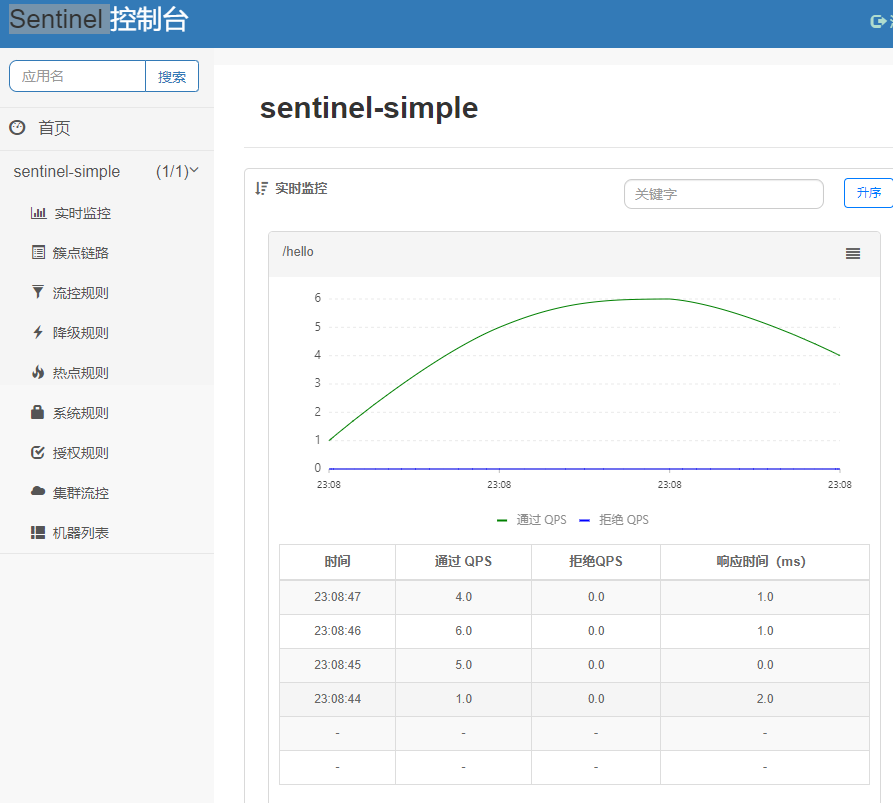
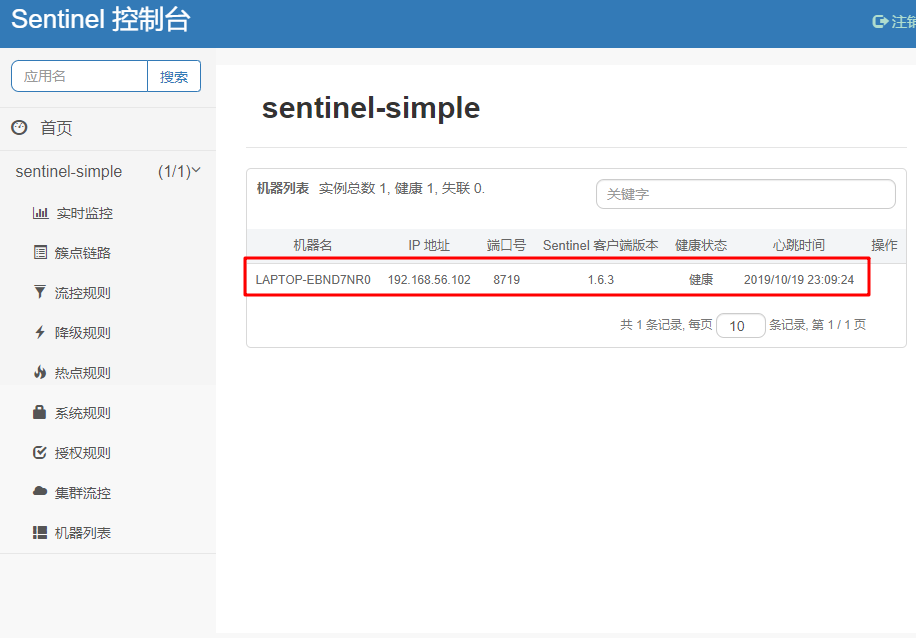
sentinel控制台效果
实时监控:
机器列表:
限流配置
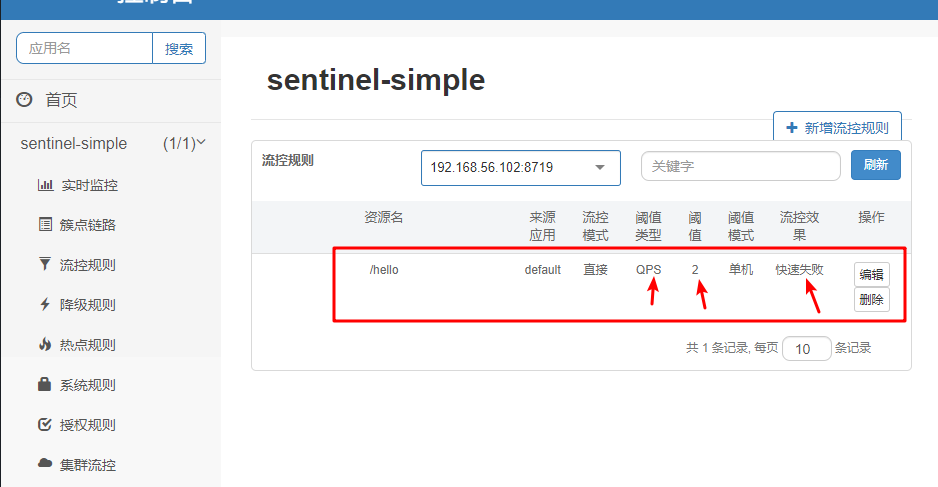
下面我们利用sentinel 的dashboard管理页面来配置流控规则:
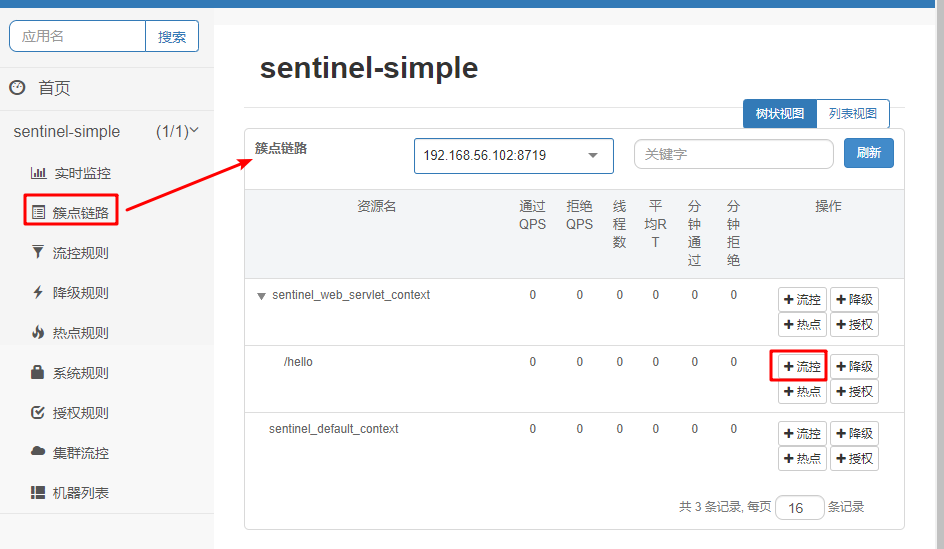
我们点击簇点链路菜单,选择我们当前的/hello 接口的流控 按钮,配置相应的流控规则:
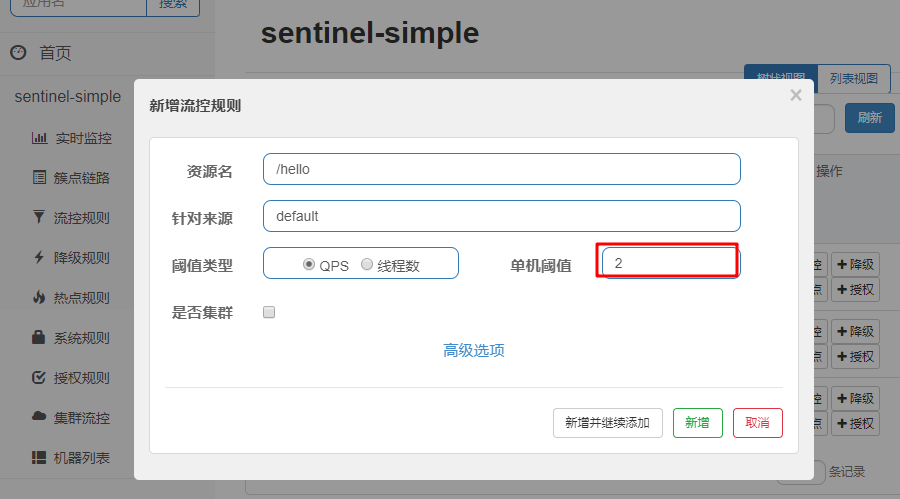
我们通过流控规则添加页面添加一条针对/hello 的流控规则.
- 阈值类型:
- 线程数:顾名思义就是当前接口的并发数。
- QPS:Queries Per Second,中文就是,每秒查询数。
当前我们将单机阈值的值设置为2.下面我们测试一下:

我们通过测试可以发现,当我们快速的访问接口时,在一秒之内的第三次访问会自动被sentinel限制,返回默认值Blocked by Sentinel (flow limiting) .我们可以再看一下流控规则 的页面:
最后
以上就是阔达大船最近收集整理的关于连接sentinel控制台并实现限流连接sentinel控制台并实现限流的全部内容,更多相关连接sentinel控制台并实现限流连接sentinel控制台并实现限流内容请搜索靠谱客的其他文章。
本图文内容来源于网友提供,作为学习参考使用,或来自网络收集整理,版权属于原作者所有。


![[case32]alibaba限流组件Sentinel实战](https://www.shuijiaxian.com/files_image/reation/bcimg4.png)
发表评论 取消回复