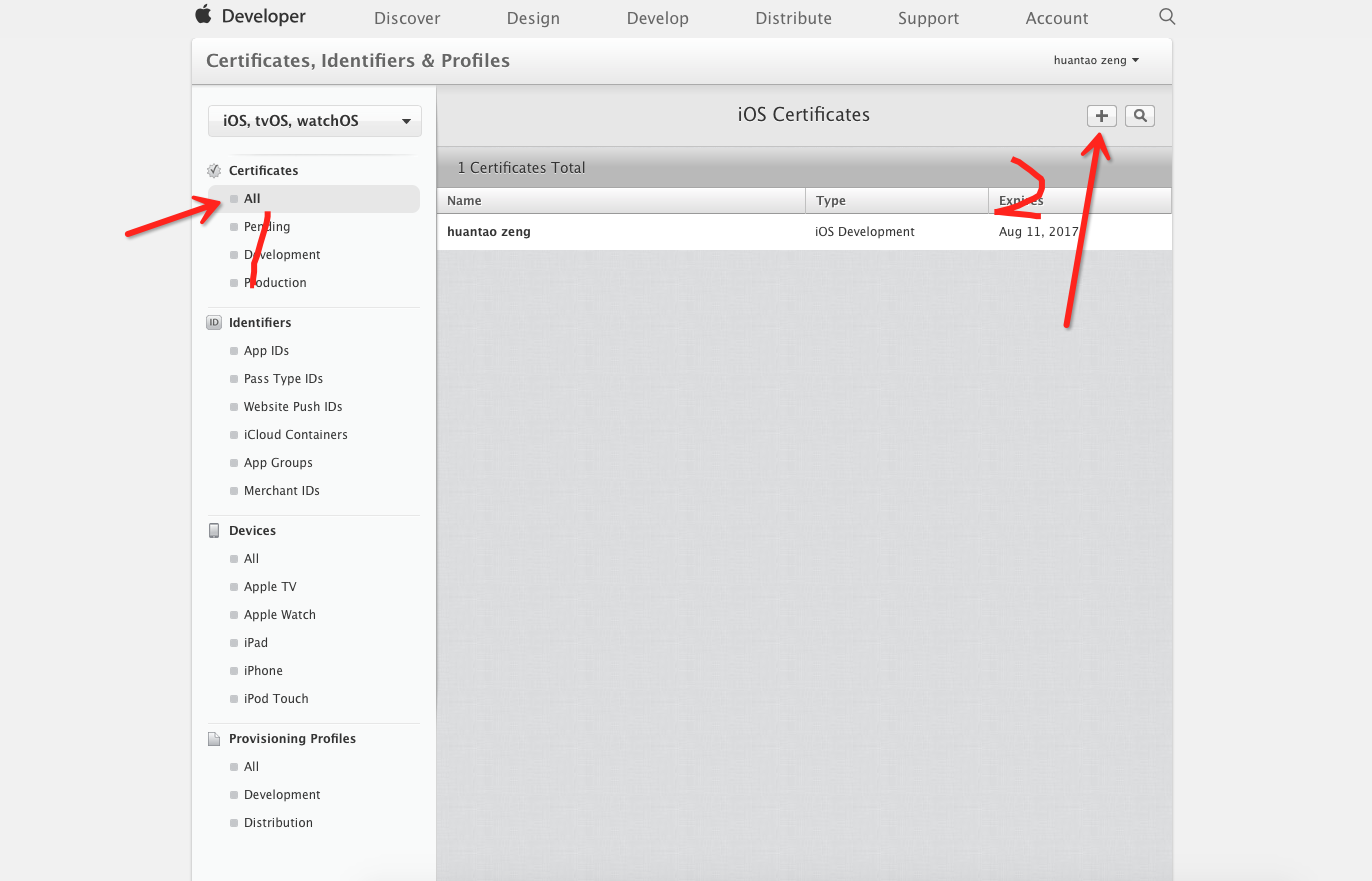
- 创建测试证书,如果还不会的,可以先看我的另一篇博文http://blog.csdn.net/liumude123/article/details/52190514
- 按下图操作
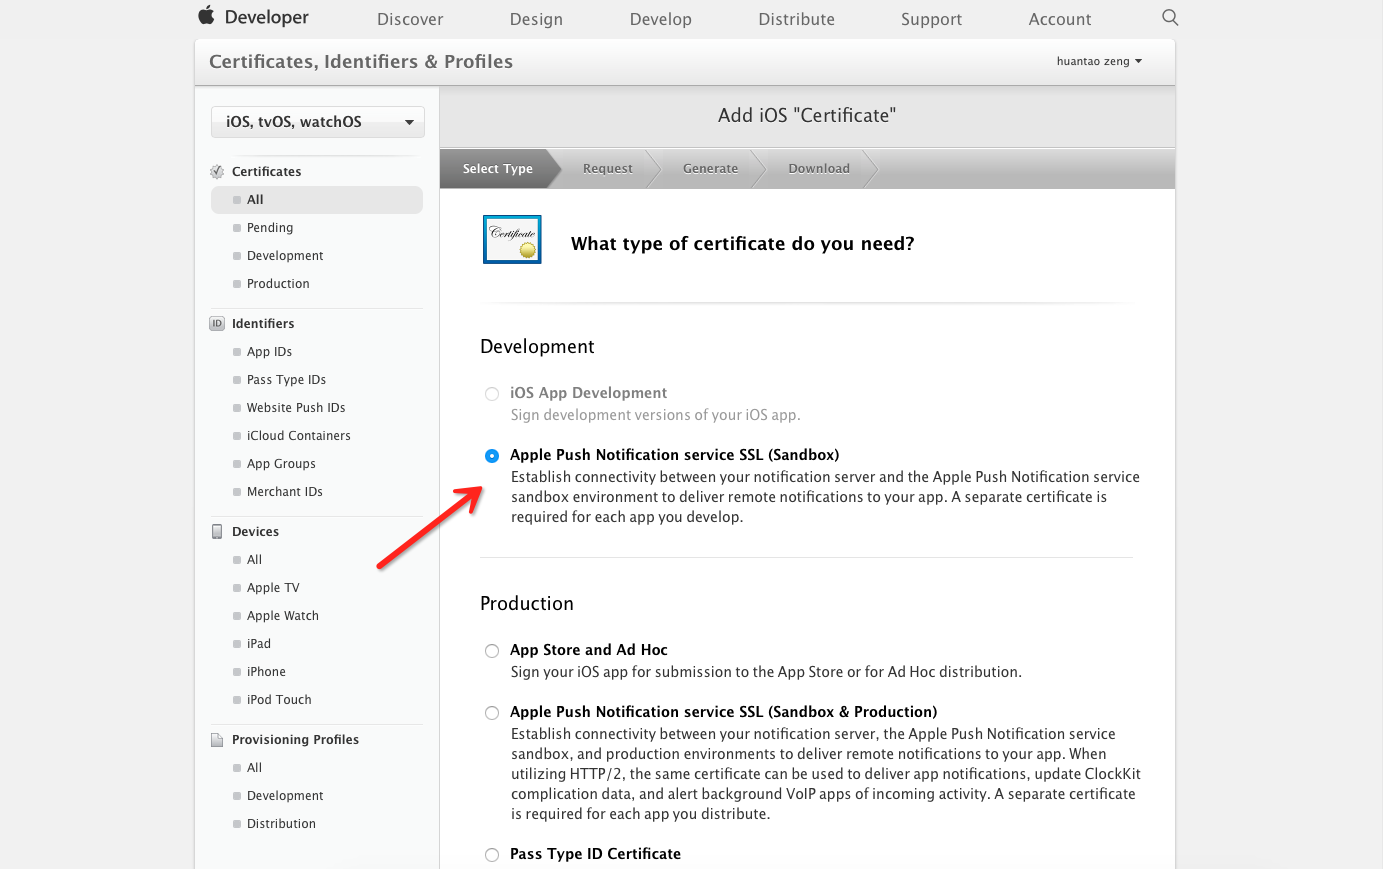
按下图操作,continue
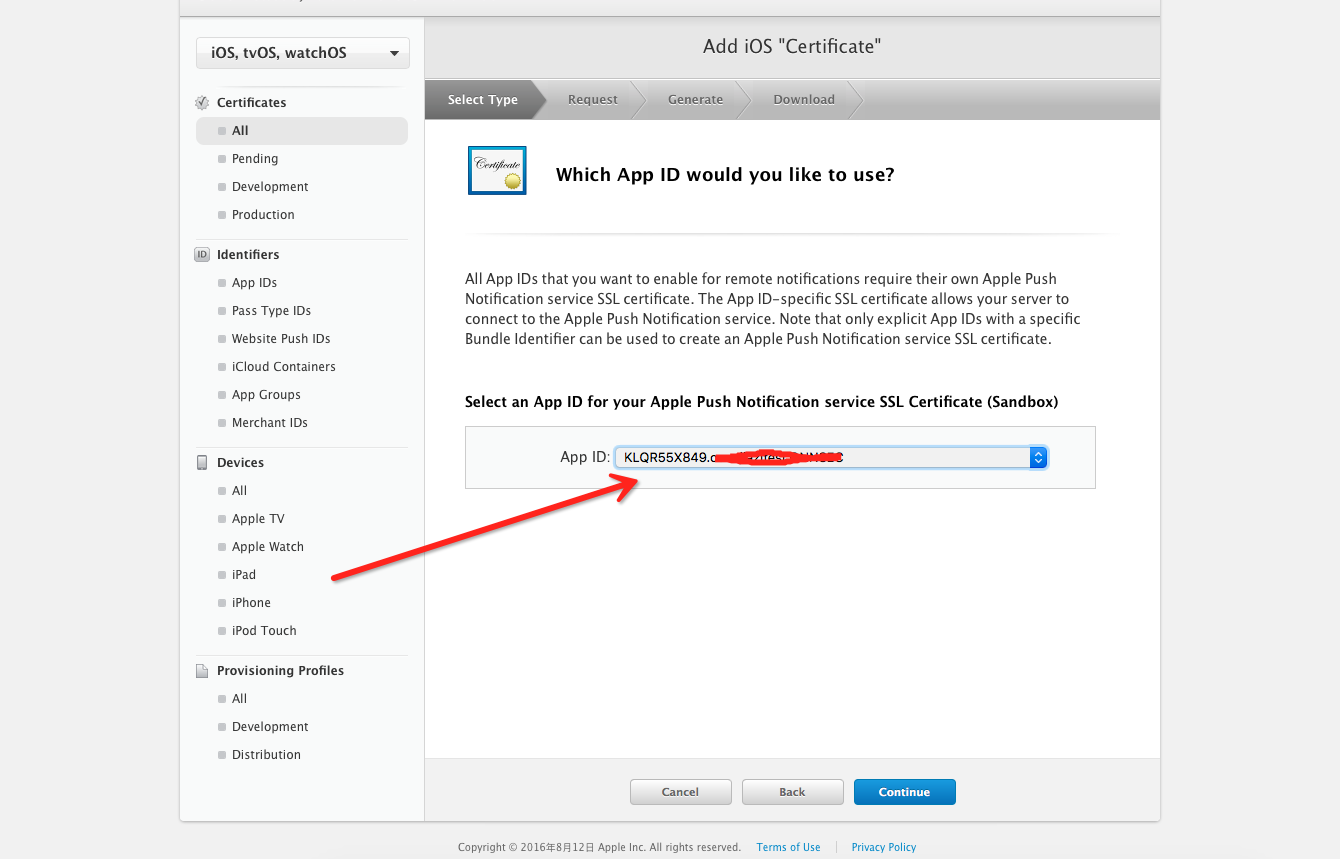
按下图操作,你可以选择你需要apns通知的app的bundleID(遮住的就是bundled),continue
continue
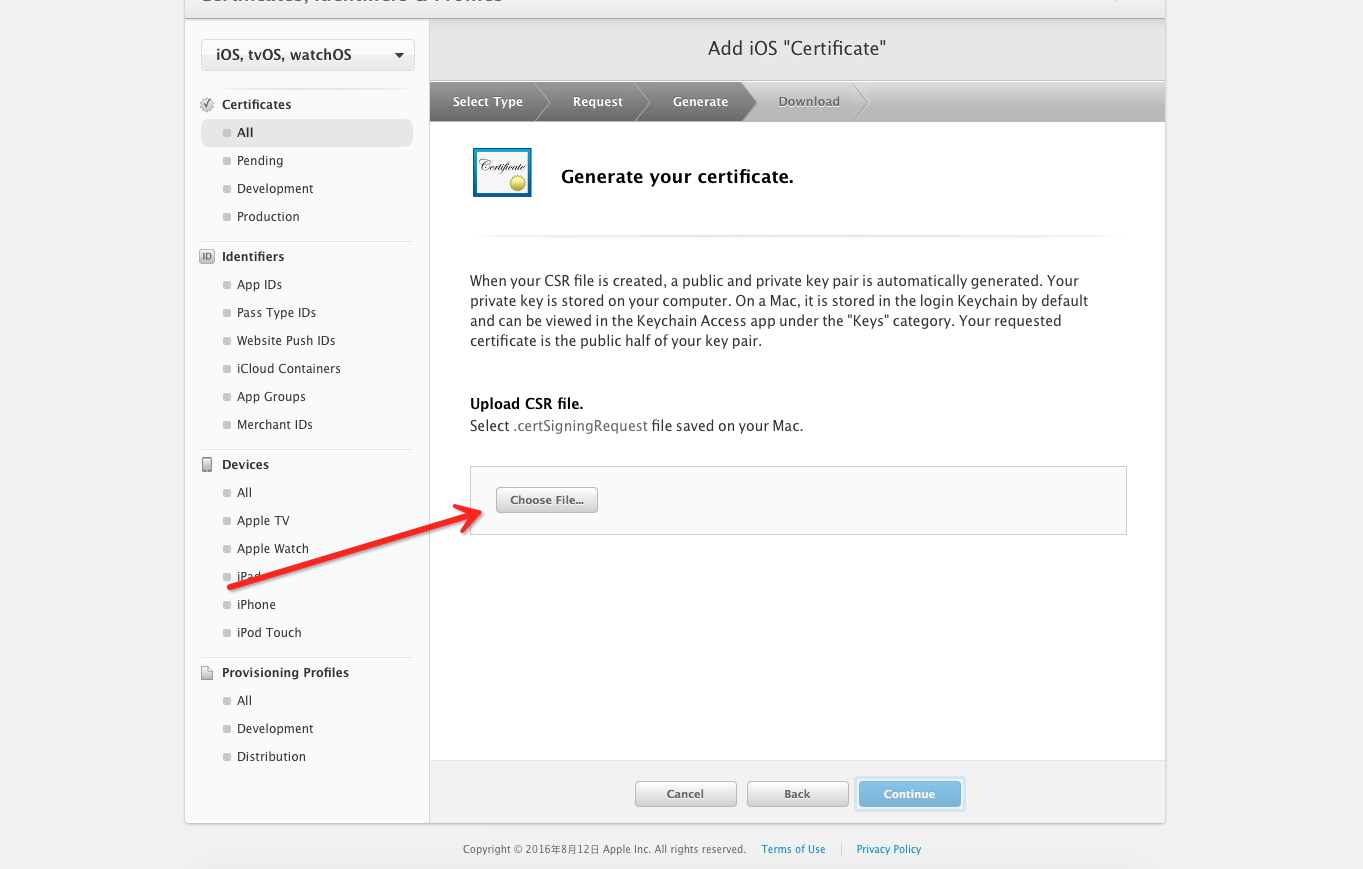
点击choose file,选择从证书机构请求的证书上传,continue
按下图操作
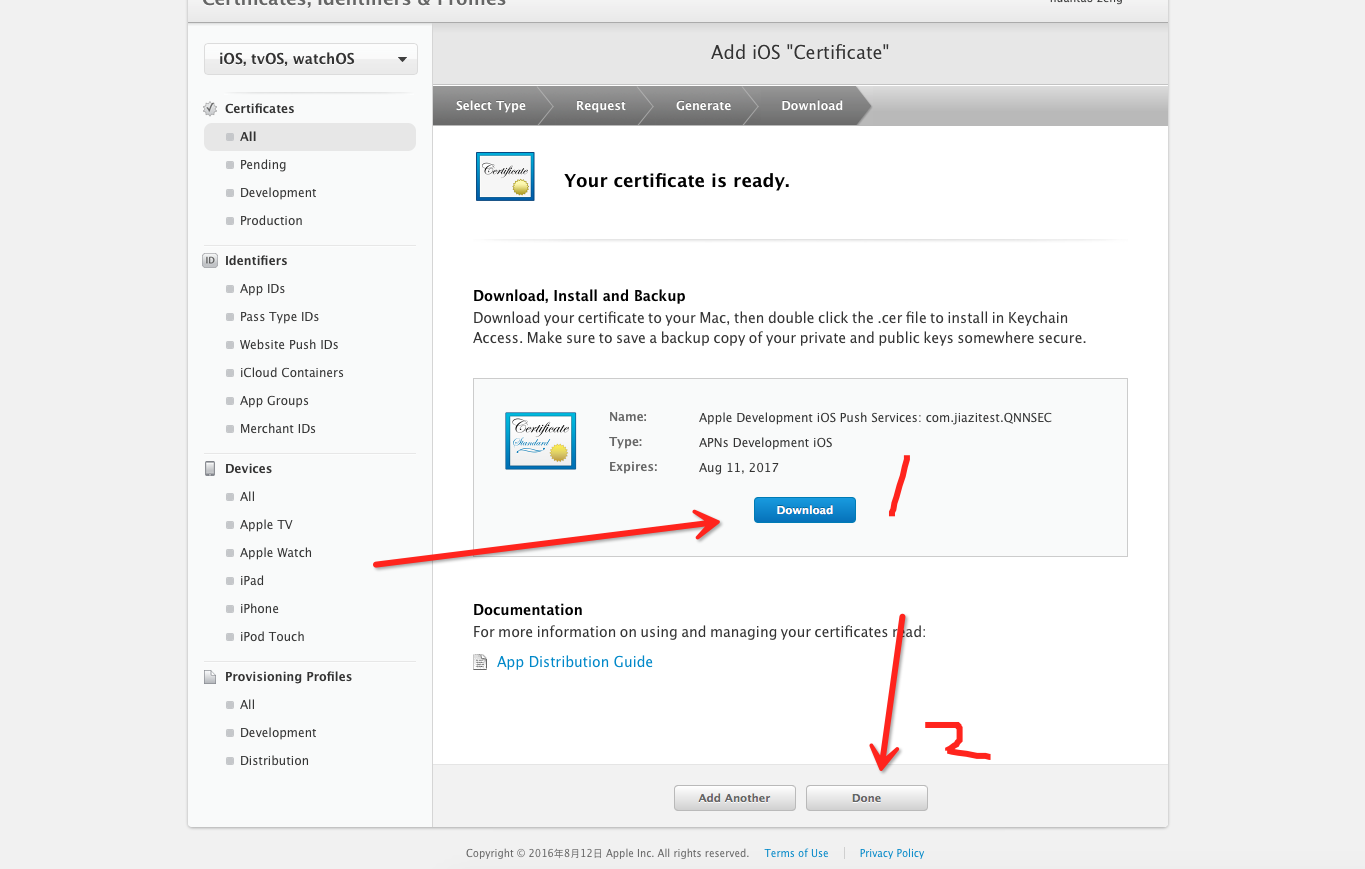
双击download的证书
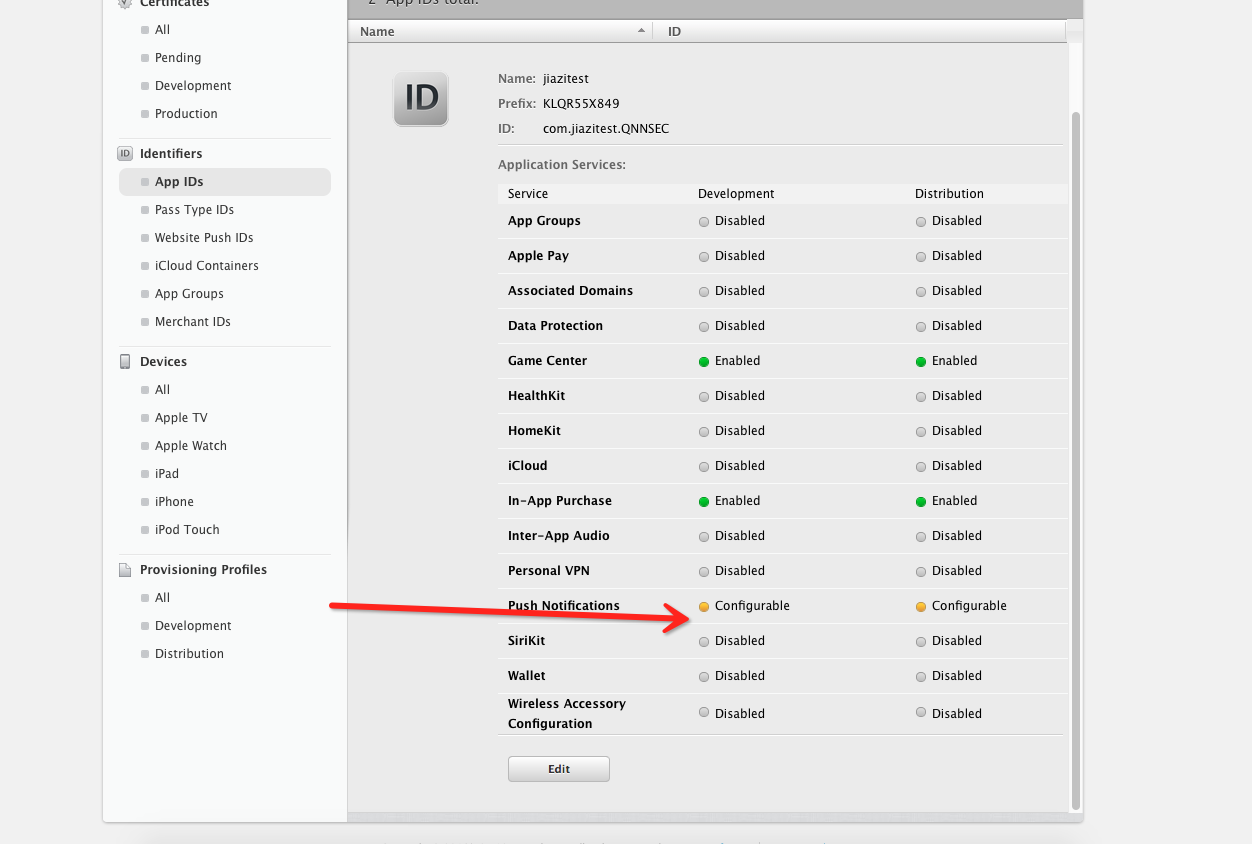
如下图,如果箭头处显示绿色,表明成功,否则点击edit(那是因为你在创建certificates时没有勾选push notification)
按下图操作
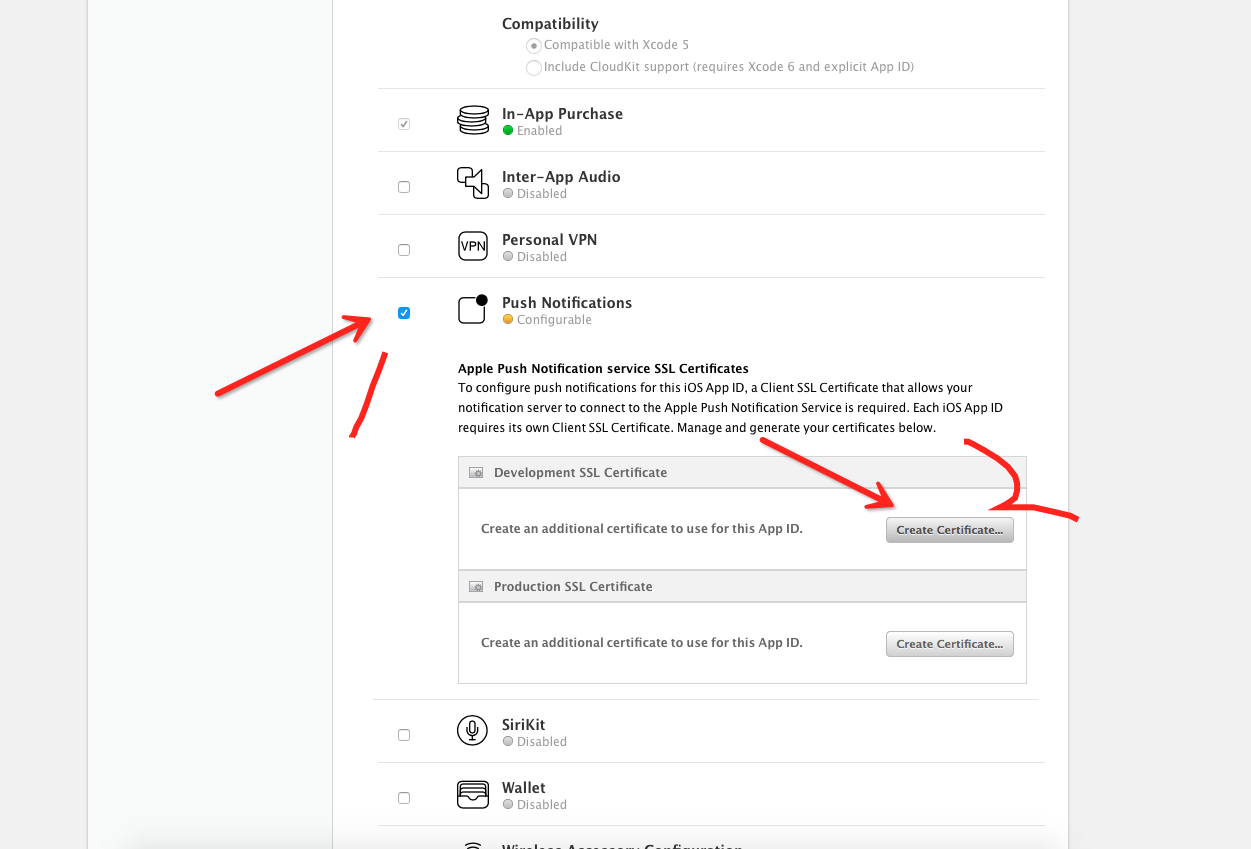
continue
- 这里和步骤6一样
- 和步骤7一样
- 回到步骤9的界面,发现已变绿色
- 按下图操作,如果2处变成了invalid,就要重新创建一个测试证书,先把这个删除,然后点击+进行创建
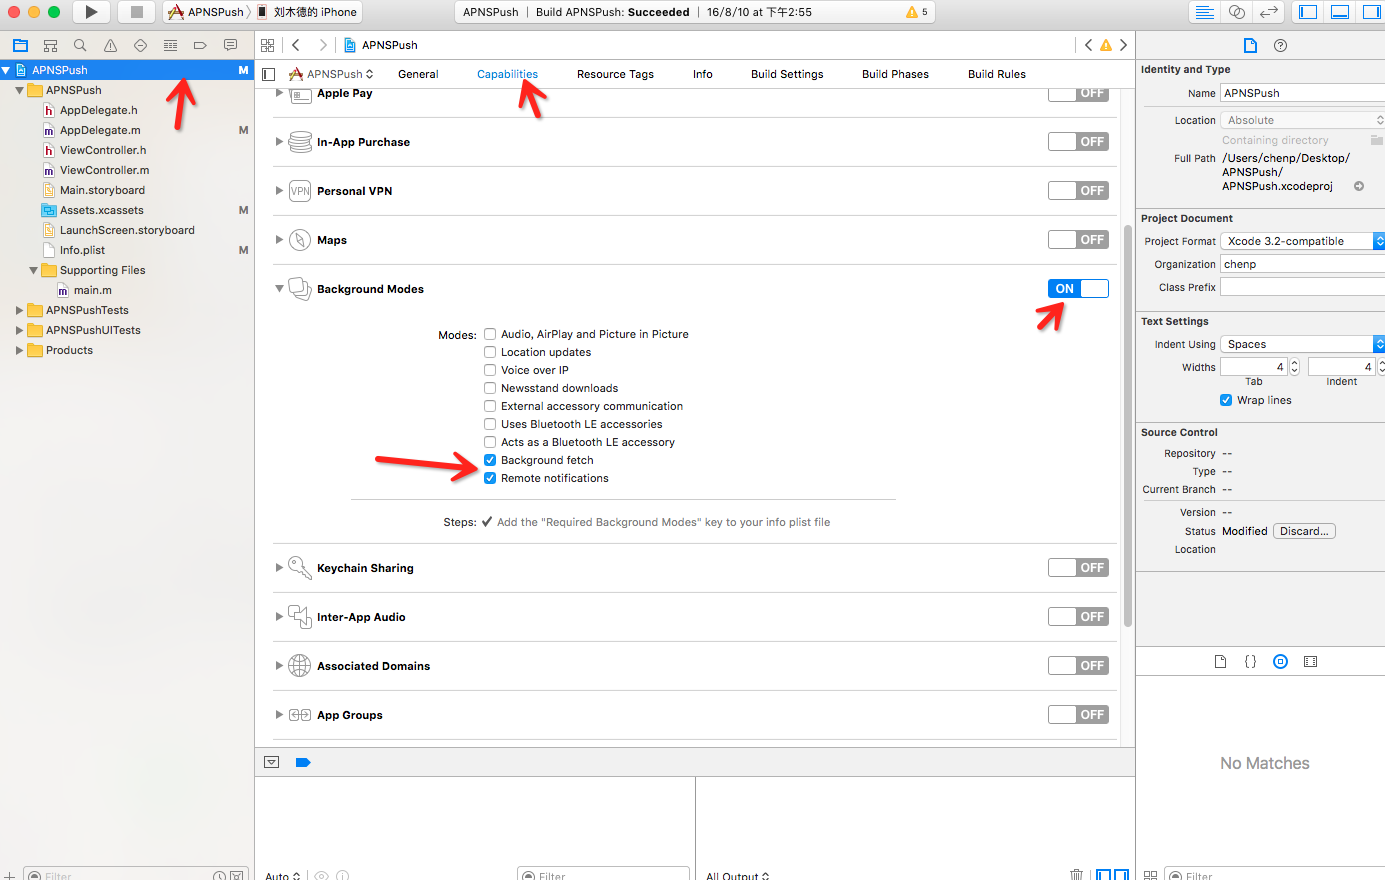
打开工程,按下图操作
在Appdelegate.m添加如下代码
- (BOOL)application:(UIApplication *)application didFinishLaunchingWithOptions:(NSDictionary *)launchOptions {
    //注册APNS
    [self registernotification];

    return YES;
}


-(void)registernotification
{
#ifdef __IPHONE_8_0
    if ([[[UIDevice currentDevice] systemVersion] floatValue] >= 8.0) {

        UIUserNotificationType types = (UIUserNotificationTypeAlert |
                                        UIUserNotificationTypeSound |
                                        UIUserNotificationTypeBadge);

        UIUserNotificationSettings *settings;
        settings = [UIUserNotificationSettings settingsForTypes:types categories:nil];
        [[UIApplication sharedApplication] registerForRemoteNotifications];
        [[UIApplication sharedApplication] registerUserNotificationSettings:settings];

    } else {
        UIRemoteNotificationType apn_type = (UIRemoteNotificationType)(UIRemoteNotificationTypeAlert |
                                                                       UIRemoteNotificationTypeSound |
                                                                       UIRemoteNotificationTypeBadge);
        [[UIApplication sharedApplication] registerForRemoteNotificationTypes:apn_type];
    }
#else
    UIRemoteNotificationType apn_type = (UIRemoteNotificationType)(UIRemoteNotificationTypeAlert |
                                                                   UIRemoteNotificationTypeSound |
                                                                   UIRemoteNotificationTypeBadge);
    [[UIApplication sharedApplication] registerForRemoteNotificationTypes:apn_type];
#endif
}

//APNS
- (void)application:(UIApplication *)app didRegisterForRemoteNotificationsWithDeviceToken:(NSData *)deviceToken {
    NSString *token = [NSString stringWithFormat:@"%@", deviceToken];
    NSLog(@"My token is:%@", token);
}


- (void)application:(UIApplication *)app didFailToRegisterForRemoteNotificationsWithError:(NSError *)error {
    NSString *error_str = [NSString stringWithFormat: @"%@", error];
    NSLog(@"Failed to get token, error:%@", error_str);
}

//收到通知
 1. (void)application:(UIApplication *)application didReceiveRemoteNotification:(NSDictionary *)userInfo
{
    NSLog(@"aa");
//    [UIApplication sharedApplication].applicationIconBadgeNumber=1;
}
成功后打印信息如下

双击创建的apns证书,打开钥匙串访问,找到那个证书(图中下划线是查找的关键,其中看不到的那些是你的bundleid)
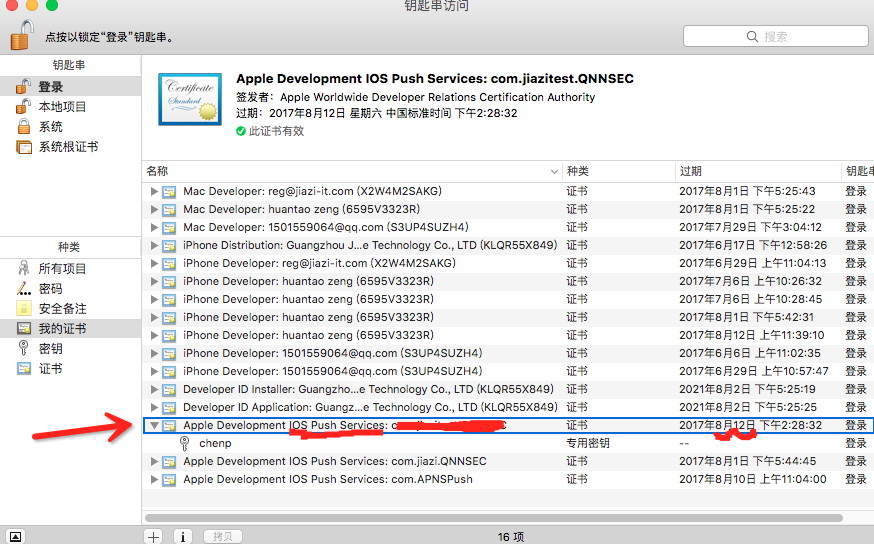
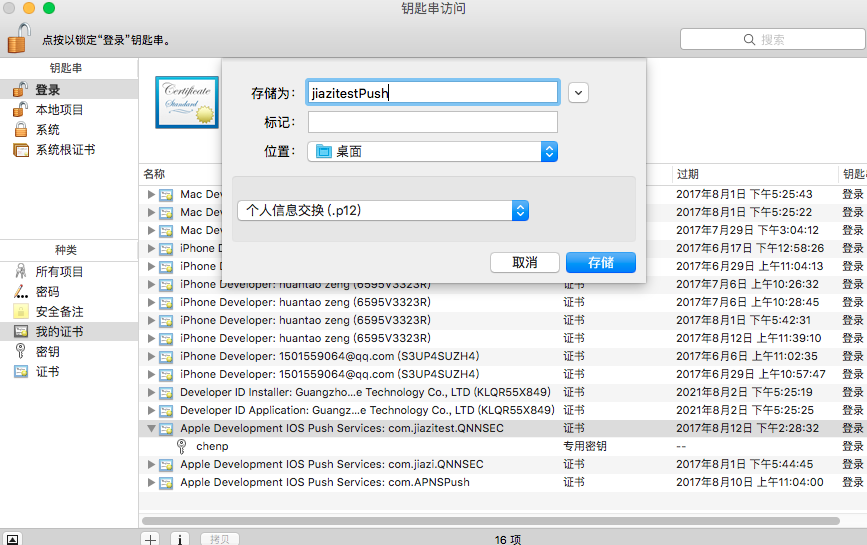
右键,导出,输入证书密码,输入本机账户密码(有两次的输入密码)
打开终端,
进入文件所在的路径(我的全部放在了桌面):
cd /Users/chenp/Desktop
把.cer文件转换成.pem文件:
openssl x509 -in aps_development.cer -inform der -out PushChatCert.pem
把.p12文件转换成.pem文件:
openssl pkcs12 -nocerts -out PushChatKey.pem -in jiazitestPush.p12
私钥和证书整合到一个.pem文件里:
cat PushChatCert.pem PushChatKey.pem > ck.pem
为了测试证书是否工作,执行下面的命令:
telnet gateway.sandbox.push.apple.com 2195
如果正确则会打印下面信息
Trying 17.172.232.226…
Connected to gateway.sandbox.push-apple.com.akadns.net.
Escape character is ‘^]’.
按ctrl+c终止,再输入openssl s_client -connect gateway.sandbox.push.apple.com:2195 -cert PushChatCert.pem -key PushChatKey.pem
右会输出一大串
- 将ck.pem和push.php放入同一目录上传到服务器,push.php的代码如下:
这些就交给后台处理吧,他们能看懂的
<?php

// 这里是我们上面得到的deviceToken,直接复制过来(记得去掉空格)
$deviceToken = '740f4707bebcf74f 9b7c25d4 8e3358945f6aa01da5ddb387462c7eaf 61bb78ad';

// Put your private key's passphrase here:
$passphrase = 'abc123456';//ck.pem的密码

// Put your alert message here:
$message = 'My first push test!';


$ctx = stream_context_create();
stream_context_set_option($ctx, 'ssl', 'local_cert', 'ck.pem');
stream_context_set_option($ctx, 'ssl', 'passphrase', $passphrase);

// Open a connection to the APNS server
//这个为正是的发布地址
 //$fp = stream_socket_client(“ssl://gateway.push.apple.com:2195“, $err, $errstr, 60, //STREAM_CLIENT_CONNECT, $ctx);
//这个是沙盒测试地址,发布到appstore后记得修改哦
$fp = stream_socket_client(
'ssl://gateway.sandbox.push.apple.com:2195', $err,
$errstr, 60, STREAM_CLIENT_CONNECT|STREAM_CLIENT_PERSISTENT, $ctx);

if (!$fp)
exit("Failed to connect: $err $errstr" . PHP_EOL);

echo 'Connected to APNS' . PHP_EOL;

// Create the payload body
$body['aps'] = array(
'alert' => $message,
'sound' => 'default'
);

// Encode the payload as JSON
$payload = json_encode($body);

// Build the binary notification
$msg = chr(0) . pack('n', 32) . pack('H*', $deviceToken) . pack('n', strlen($payload)) . $payload;

// Send it to the server
$result = fwrite($fp, $msg, strlen($msg));

if (!$result)
echo 'Message not delivered' . PHP_EOL;
else
echo 'Message successfully delivered' . PHP_EOL;

// Close the connection to the server
fclose($fp);
?>

接下来我们访问http://localhost/push/push.php
app就可以收到通知了。
最后
以上就是爱笑山水最近收集整理的关于iOS开发——APNS通知的使用的全部内容,更多相关iOS开发——APNS通知内容请搜索靠谱客的其他文章。


发表评论 取消回复